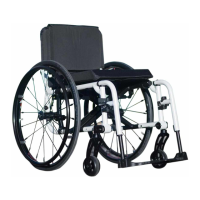
TiLite
®
OM000007 - Rev. B
75
4. Follow the procedures under “Composite Scissor
Lock - Adjusting the Composite Scissor Lock” on
page 74 to position and secure the new composite
scissor lock.
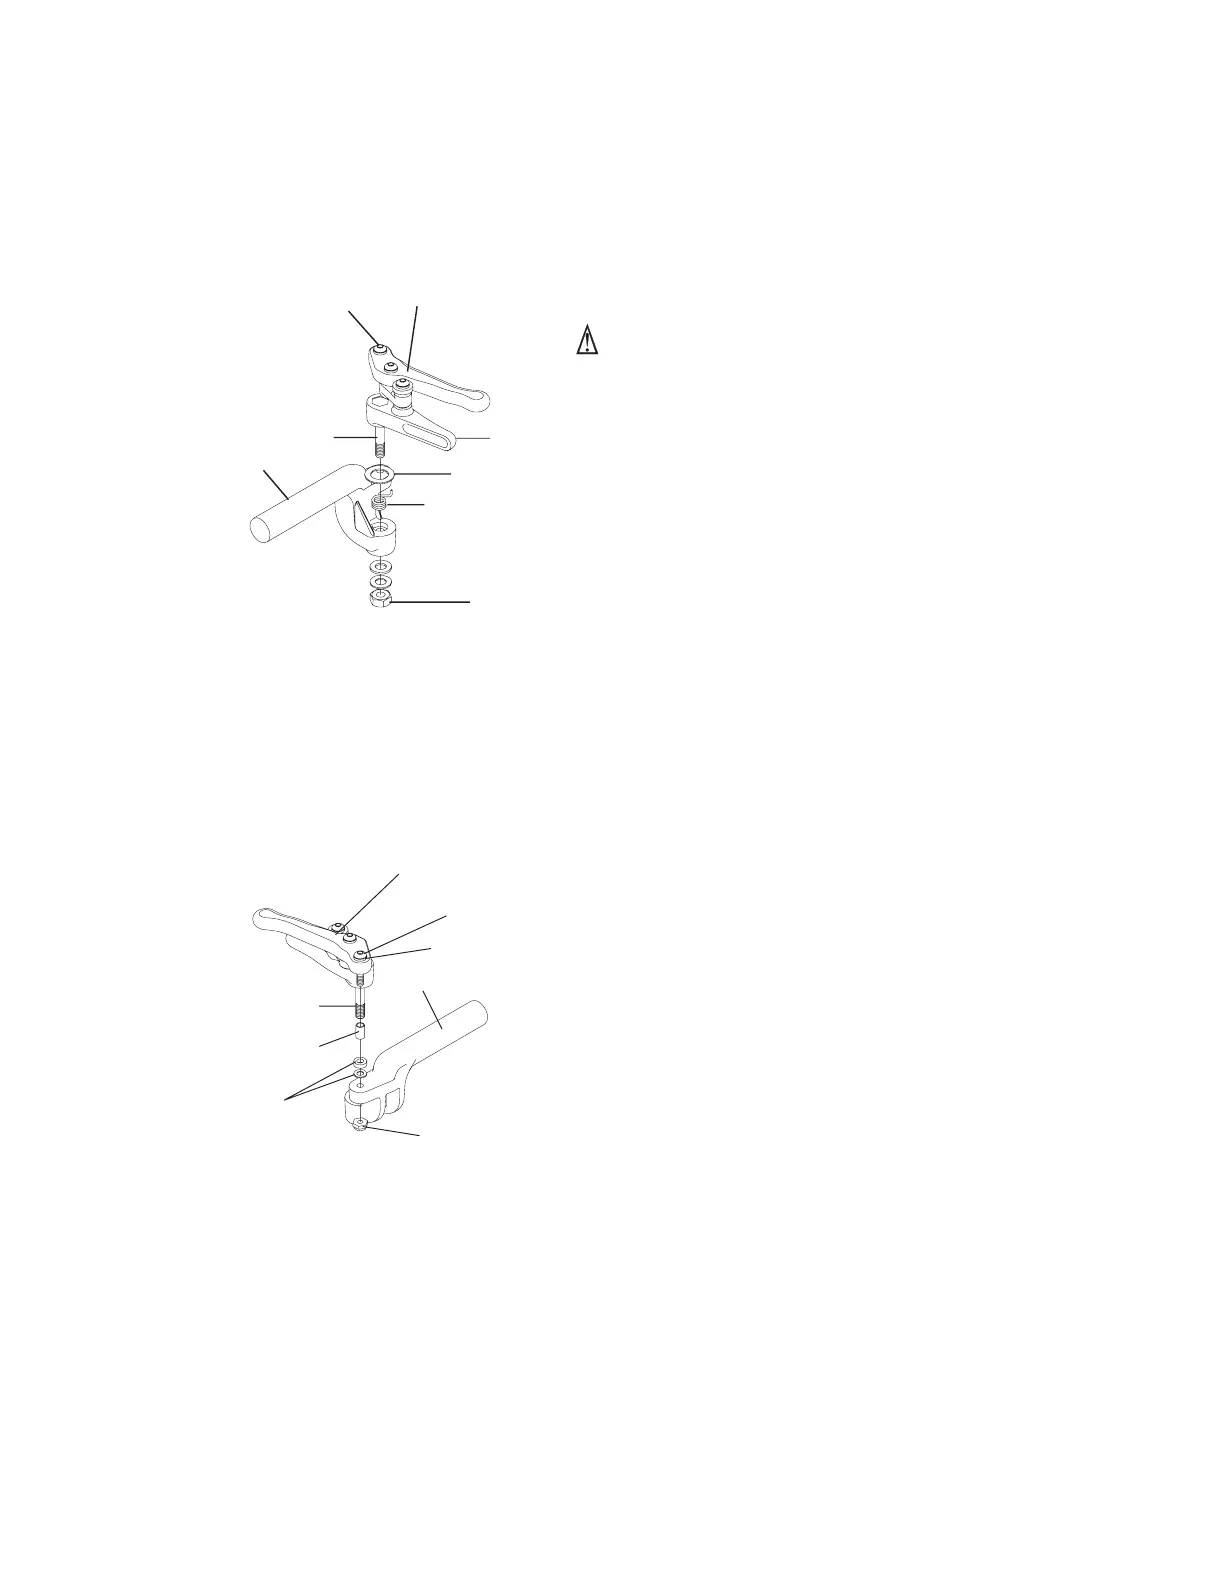
Removing the Scissor Lock Spring
WARNING
The spring will likely pop out when the two parts are
separated, so eye protection is required.
Tools Needed:
• 1/8" Allen Wrench
• 7/16" Open End Wrench
Some wheelchair users may not have sufficient arm
strength to comfortably operate the composite scissor
lock due to the tension in the spring mechanism. The
spring can be removed to facilitate easier operation of
the lock. Removal of the spring does not affect the
lock’s ability to properly secure the rear wheel when
fully engaged.
NOTE: Once removed, the spring cannot be readily
re-installed without a special installation tool. If you
require the re-installation tool, contact TiLite Customer
Service at 1-800-545-2266.
To remove the spring:
1. Remove the Allen Screw. See Figure 102. Carefully
note the order of the washers on either side of the lock
handle. See Figure 103.
2. Remove the nut. See Figure 102. Carefully note the
order of the washers between the nut and base.
3. Carefully separate the locking mechanism (handle and
blade) portion of the scissor lock from the base.
4. Remove and set aside the spring and metal washer
shown in Figure 102.
5. Replace the spring and washer shown in Figure 102
with the black plastic washer that shipped with your
wheelchair.
6. Reattach the locking mechanism (handle and blade)
portion of the scissor lock to the base by inserting the
hex bolt through the black plastic washer (instead of
the metal washer and spring), the base, and the two
washers and nut removed in Step 2.
7. Loosely secure the nut.
8. Reattach the handle to the base by inserting the Allen
Screw removed in Step 1 through the top washer, the
handle sleeve, the handle, the two middle washers, the
base and the bottom nut. See Figure 103.
9. Securely tighten the Allen Screw.
10. Tighten the nut that was loosely secured in Step 7. Do
not over-tighten or the scissor lock will become difficult
to operate.
11. Reinstall the scissor lock on the wheelchair and make
sure it is properly positioned to fully lock the rear wheel
and prevent it from turning when the lock is engaged.
See “Adjusting the Composite Scissor Lock” on page
74.
Figure 103
Figure 102
Removing the Scissor Lock Spring
Reassembling the Scissor Lock
Allen Screw
Base
Lock Handle
Hex Bolt
Metal
Washer
Spring
Nut
Allen Screw
Lock Handle
Hex Bolt
Base
Blade
Handle Sleeve
Top Washer
Washers
Nut
 Loading...