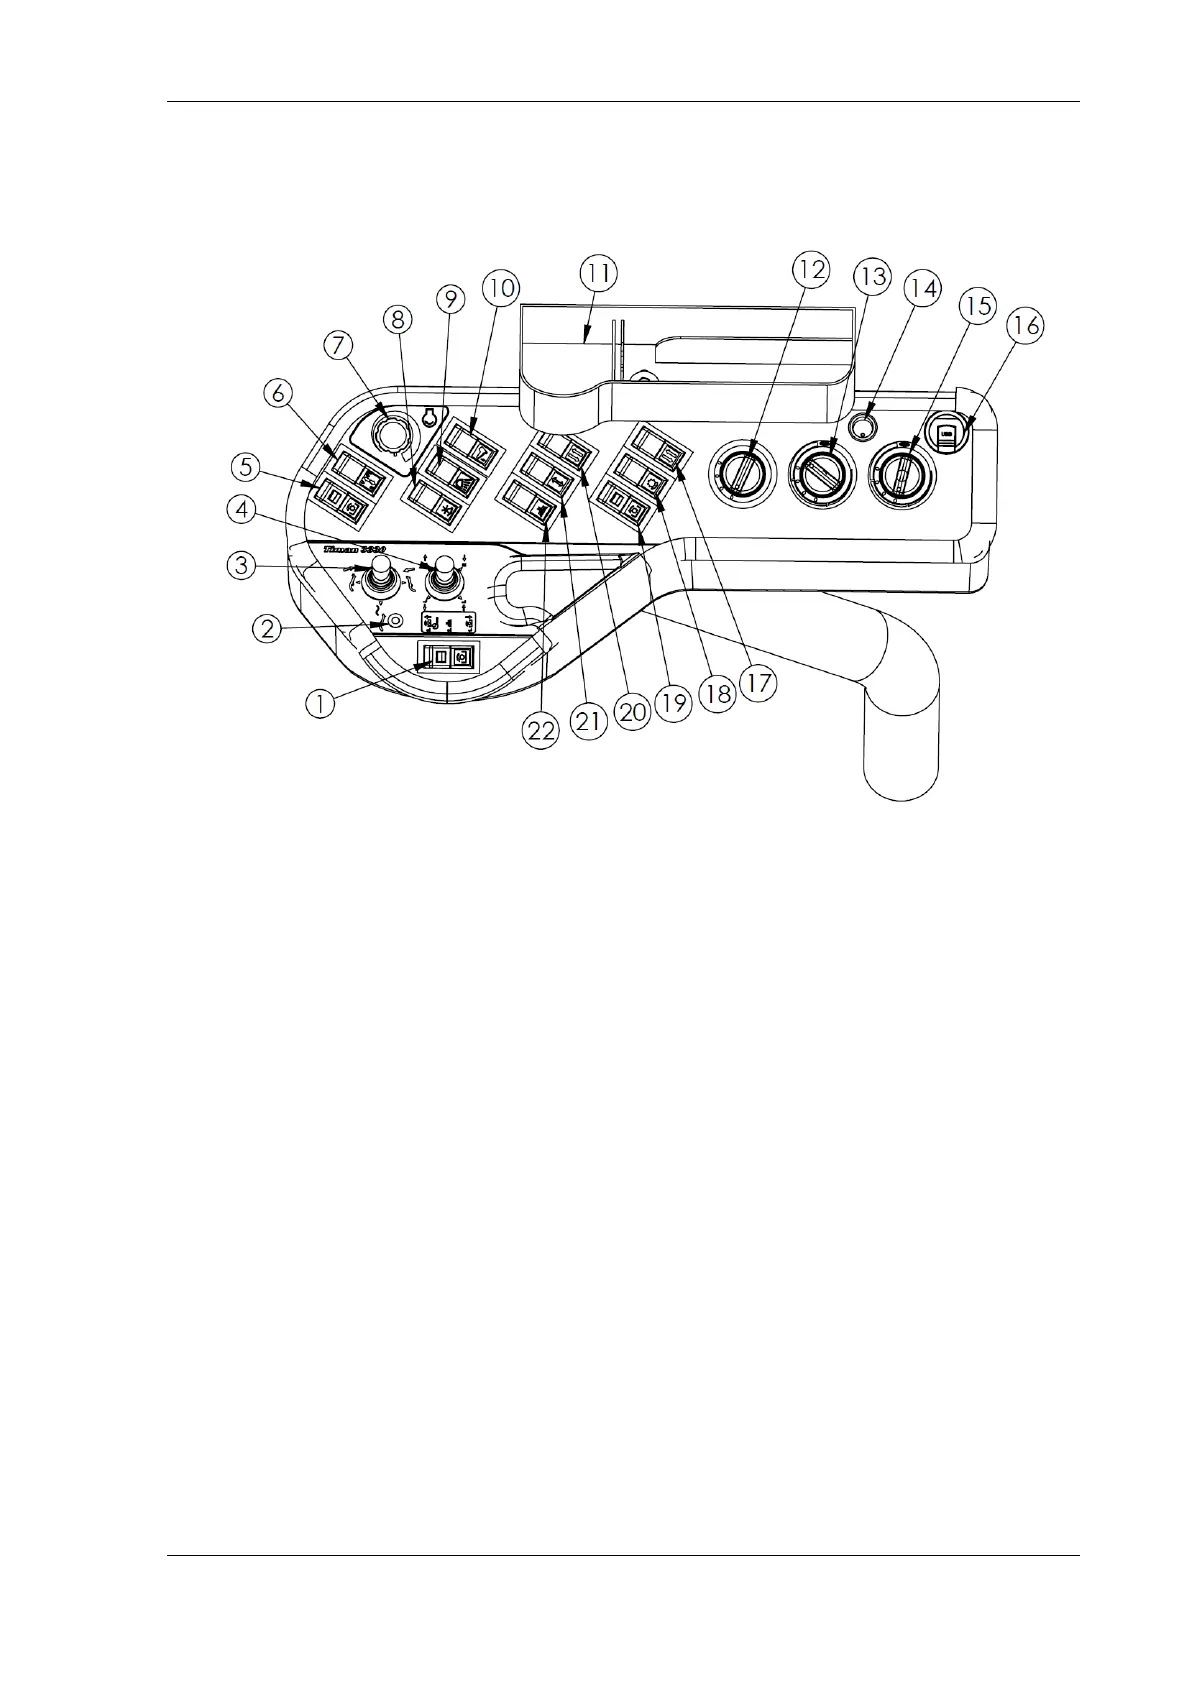
STEERING COLUMN, OPERATOR'S GRIP, CABINET AND AIR SWITCHES.
11
5.1 Side panel
1. Main starter for PTO.
Both the PTO (front [5] and rear [19]) + 12V switch [22] pass through this switch. This
makes it possible to start and stop the front and rear tools at the same time. Note that
there is a delay of approx. 3 seconds built into the front PTO.
2. Flow position light.
Lights up when flow position is activated. The flow position is used when the front-
mounted tool must follow the ground (flow).
3. Joystick that controls the lift arms.
If the joystick is pushed forward, the lift arms are lowered. When pushed forward, the
lift arms are raised. Pressing to the left activates the flowing position.
4. Joystick maneuver.
This joystick is used to control the maneuver valve. E.g. which way the broom turn
when mounted.
5. Switch for front hydraulic PTO jack.
The handle activates the 2 large quick-release clutches on the front of the hydraulic
panel. A delay of approx. 3 seconds is built in. Note: it is not possible to start the
machine if this switch is activated. While the PTO jack is activated, the engine stops
when the driver leaves the seat. The function is started with joint activation [1]
6. Switch to change direction of rotation on the front PTO.
7. Potentiometer for changing the engine’s rpm.
When the potentiometer is set to 0, the engine’s rpm are automatically adjusted as a
function of the motor’s load.
8. Switch for operating 3-pole electrical connectors on the front panel of the machine.