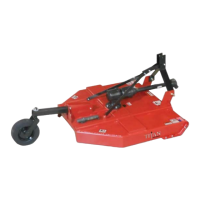
1200-1600 Series Rotary Cutters 30 Titan Implement, LLC
August 2016 (423) 334-0012
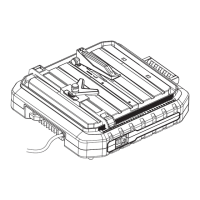
5.4 Checking the Driveline Length
Before operating the rotary cutter, make sure the
driveline will not bottom out or become disengaged.
Bottoming out occurs when the inner shaft penetrates
the outer housing until the assembly can shorten no
more. Bottoming out can cause serious damage to the
tractor PTO by pushing the PTO into the tractor and
through the support bearings or downward onto the
PTO shaft, breaking it off . A broken driveline can cause
personal injury.
1. Attach the rotary cutter to the tractor 3-point hitch.
Do not attach the driveline. Keep the driveline out
of the way of moving parts.
2. Raise and lower the rotary cutter to determine the
maximum and minimum distance between the
tractor PTO shaft and the gearbox input shaft. If
the distance is too large, the driveline will be too
short for proper engagement. If the distance is too
small, the driveline may bottom out in operation and
damage the rotary cutter or tractor.
There must be at least six inches of engagement at
the rotary cutter’s lowest possible point of operation,
and the driveline must not bottom out when raised to
the maximum height possible. If the driveline is too
short, please call your Titan Implement dealer for a
longer driveline. If the driveline is too long, follow the
instructions for shortening the driveline.
5.5 Shortening the Driveline
1. Move rotary cutter up and down to get the shortest
possible distance between tractor PTO shaft
and gearbox input shaft. Shut down tractor PTO
shaft and gearbox input shaft. Shut down tractor
leaving rotary cutter in position of shortest distance.
Securely block rotary cutter in position.
2. Separate driveline into two halves and connect them
to the tractor PTO and gearbox.
3. Place driveline halves parallel to one another to
determine how much to shorten the driveline.
4. Each section should end approximately 3” short of
reaching the universal joint shield on the opposite
section. If too long, measure 3” back from the
universal joint shield and mark on the opposite
section.
5. Repeat Step 4 for the other half of the drive.
6. Raise and lower rotary cutter to determine position
with greatest distance between PTO shaft and
gearbox input shaft. Shut down tractor leaving rotary
cutter in position of greatest distance. Securely
block rotary cutter in position.
7. Hold driveline sections parallel to each other and
check for minimum 6” overlap. If driveline has been
marked for cutting, overlap will be the distance
between two marks. If driveline has less than
minimum overlap, do not use. Contact your Titan
Implement dealer.
Note: If driveline is the correct length, omit the
following Steps 8 - 9 and proceed to Step 10.
8. Clamp a driveline section in a well padded vice to
prevent damage to the shield. Cut off the shield
where marked. Using the cut off section of the
shield as a guide, cut the shaft the same amount.
Repeat for the other driveline section.
9. File and clean the cut ends of both drive halves.
Remove all chips and fi lings.
10. Apply multi-purpose grease around the inner
driveline section. Slide drive halves over each
other several times to distribute the grease. Install
driveline on tractor and rotary cutter. Make certain
driveline shielding is in place and in good condition.
Note: Do not use the rotary cutter if proper driveline
engagement cannot be obtained through these
methods. Contact your Titan Implement dealer.
11. Set the tractor lift control stop to a position that will
prevent the driveline from contacting the front edge
of the rotary cutter deck when the rotary cutter is
raised fully.