5
5-41
4st 60 2019
1
2
3
4
5
6
LIT
GREA
SE
LIT
2. Loosen drive pulley nut 2, use socket wrench (50 mm).
3. Remove drive pulley nut 2, belt guide 3, drive pulley 4, key
5 and oil seal 6.
24) Removing of Drive Pulley
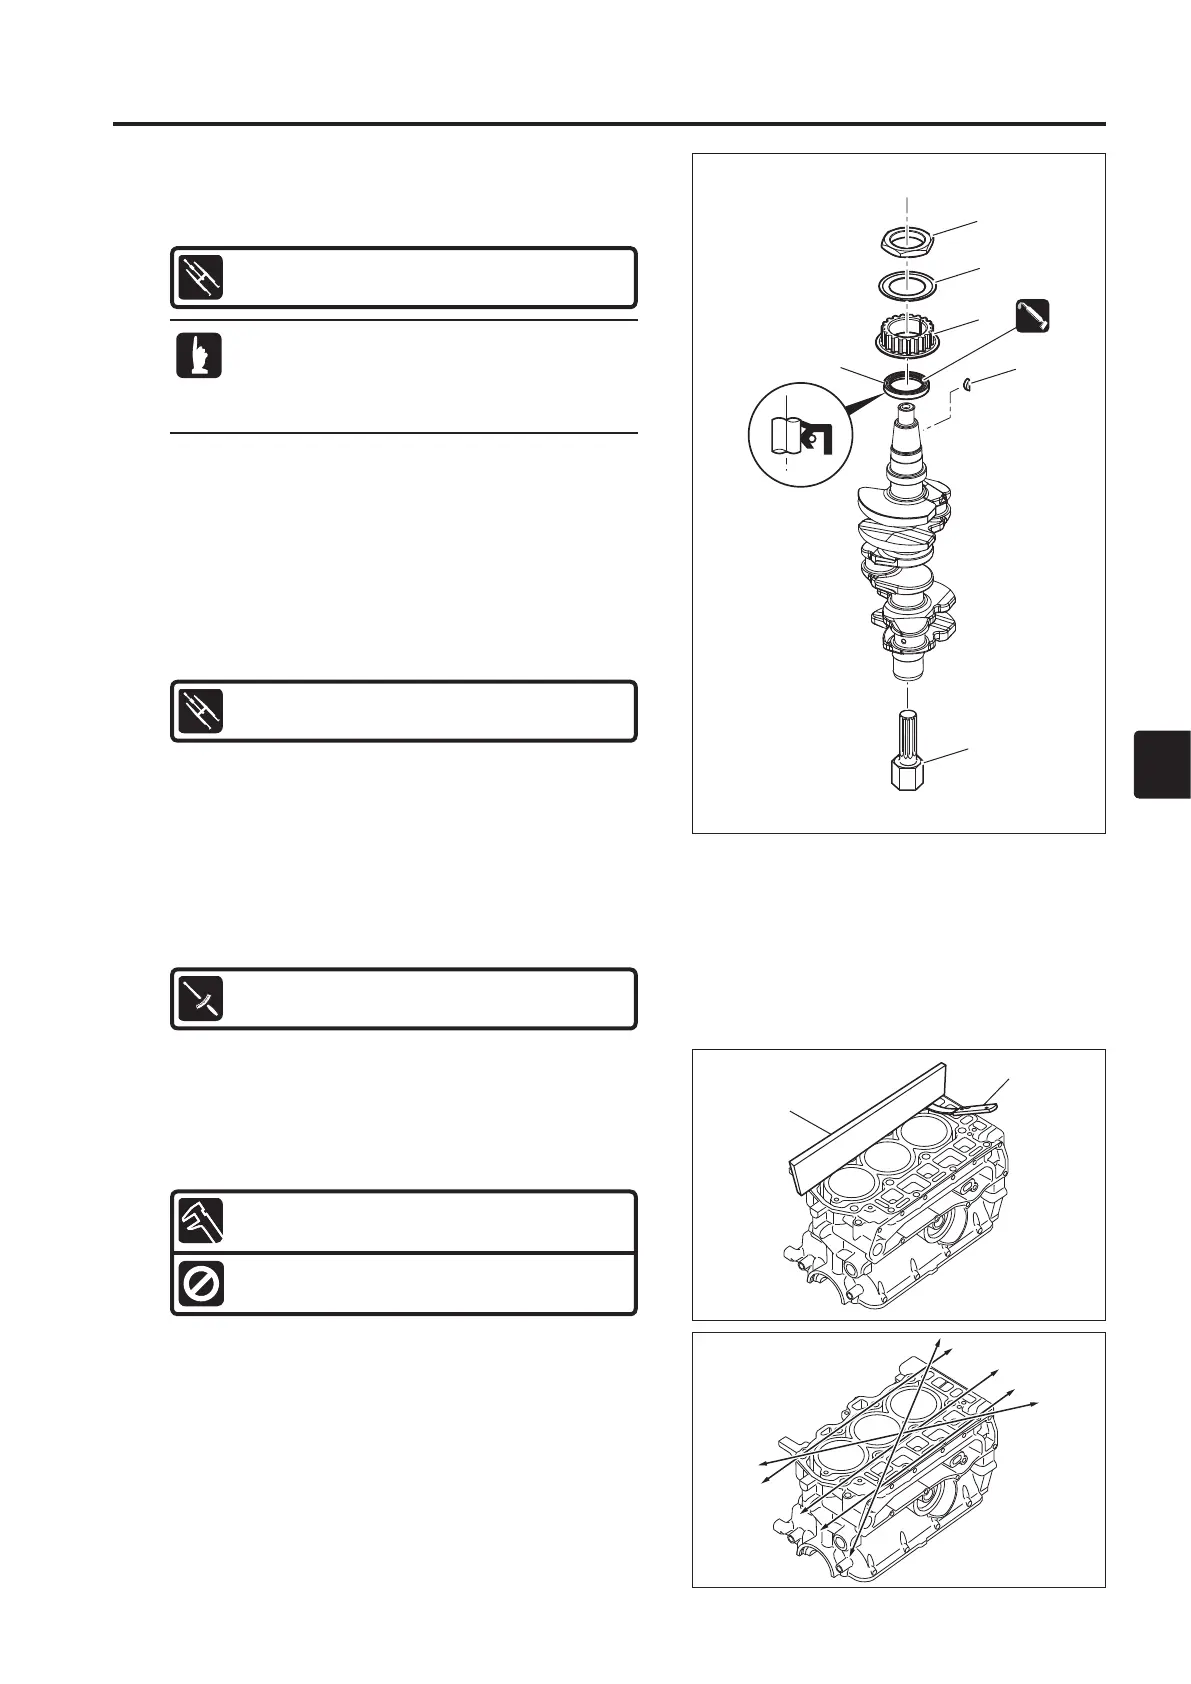
1. Secure crankshaft holder 1 with vice, and then insert
crankshaft.
Crankshaft Holder 1 :
P/N. 3KY-72815-0
25) Installing of Drive Pulley
1. Secure crankshaft holder 1 with vise, and then insert
crankshaft.
2. Apply Lithium grease to oil seal lip and install oil seal 6.
3. Install key 5, drive pulley 4, belt guide 3 and drive pulley
nut 2.
4. Tighten drive pulley nut 2 to specified torque, use socket
wrench (50 mm).
Crankshaft Holder 1 :
P/N. 3KY-72815-0
Drive Pulley Nut 2 :
120 N·m (88 lb·ft )[ 12 kg·m ]
It may help to heat the nut with a small torch
to be able to remove easier. Also, many front
wheel drive auto sockets work well for removal/
installation drive belt pulley nuts.
26) Inspection of Cylinder
1. Use straight edge 1 and thickness gauge 2 to check
distortion of cylinder in the directions shown. Replace if the
distortion is over specified value.
1
2
Cylinder Distortion Amount :
0.05 mm (0.0020 in) or less
Functional Limit :
0.10 mm (0.004 in)

 Loading...