Do you have a question about the Topens KD702 and is the answer not in the manual?
Specifies gate opener use for Class I vehicular gates and awareness of potential hazards.
Covers gate installation, clearance for entrapment reduction, and pedestrian access.
Discusses safety sensors, control accessibility, and warning placards.
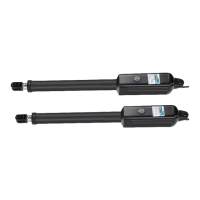
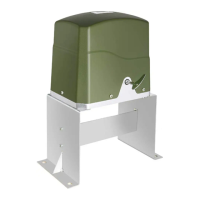
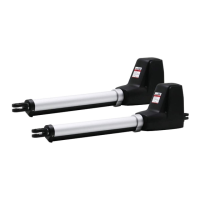
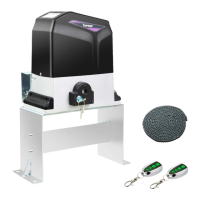
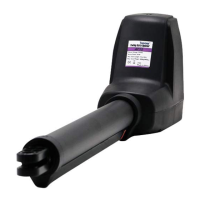
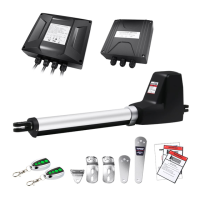
Lists the main gate opener actuators and PSO parts.
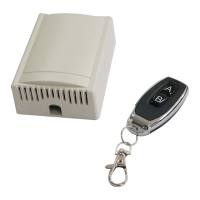
Details the control box and remote control components.
Shows post brackets, gate brackets, and warning signs.
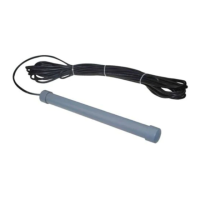
Lists accessories supplied with the gate opener.
Lists optional accessories available for purchase.
Lists the tools necessary for installation.
Details model, input voltage, power, current, speed, travel, and temperature.
Provides a table showing gate opener capacity based on weight and length.
Lists operational features like soft start, emergency release, and auto-close.
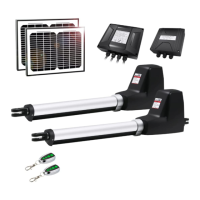
Illustrates the placement of openers, control box, solar components, and accessories.
Provides an important note on protecting the second gate opener cable with conduit.
Explains the two installation types and the need for PSO parts.
Details mounting post brackets to wooden or concrete posts and stability considerations.
Provides a table for determining post bracket position for opening angle.
Details attaching brackets using bolts, washers, and nuts.
Explains using the release key to manually move the actuator rod.
Describes using C-clamps to temporarily secure brackets during alignment.
Ensures 2.5cm clearance and no binding between opener and brackets.
Securing the post pivot bracket with an M8x30 bolt after clearance is set.
Marking and drilling holes for post and gate brackets.
Securing post brackets with M10 bolts and gate brackets with M10x75 bolts.
Connecting the opener to brackets using clevis pins and hairpin clips.
Recommends secure surface, 100cm above ground for safety and longevity.
Routing cables through strain relief and into the control box.
Details connecting Live and Neutral lines to the control board terminals.
Specifies wire connections for Motor 1 and Motor 2 in Pull-to-Open mode.
Details motor wire connections for Push-to-Open mode.
Covers connections for warning light, battery, photocell, push button, and keypad.
Instructions for programming, erasing, and managing remote controls.
Explains how to use the remote buttons to operate the gate opener.
Guides on programming and changing passwords for the wireless keypad.
Configures the system for single or dual gate operation.
Designates one gate opener as master and the other as slave.
Sets the time delay between master and slave gate opening.
Sets the time delay between master and slave gate closing.
Configures sensitivity to obstructions and stall force for gate openers.
Sets the maximum time the motor runs per cycle.
Enables or disables the photocell safety system.
Configures the time delay before the gate automatically closes.
Adjusts soft start and fast running periods for smooth operation.
Resets all settings to factory defaults.
Explains the meaning of indicators on the digital display.
Guides on setting limit switches for gate open and closed positions.
Describes operating the gate using the remote control for opening and closing.
Explains how the gate stops, reverses, or continues based on commands and obstructions.
Instructions for cleaning the shaft and applying silicone spray.
Advises checking hinges, hardware, and the surrounding area.
Addresses power, transformer, fuse, and cable checks.
Solves issues related to gate weight, installation, and immediate stops.
Solves problems with PBS function, photo eyes, and limit switches.
Addresses problems with shorted wires or faulty limit switches.
Resolves gates opening, closing, or stopping unexpectedly.
Guides setting up gate modes and master/slave configuration.
Covers setting open/close intervals and obstruction force levels.
Details setting motor run time and photocell functionality.
Configures auto-close timers and soft start periods.
Adjusts the fast running period for soft stop functionality.
Resets settings to factory defaults and enters standby mode.
Recommends regular silicone spray for actuator shafts.
Provides information on the disposal of electrical and electronic equipment.
Lists contact methods including email and phone for inquiries.
This document is a user's manual for the TOPENS KD702 Dual Swing Gate Opener, providing comprehensive instructions for its installation, operation, and maintenance. The manual emphasizes safety precautions and offers detailed guidance to ensure proper setup and long-term functionality of the gate opener.
The primary function of the TOPENS KD702 is to automate the opening and closing of dual swing gates. It is designed for vehicular swing gates classified as Class I, meaning gates associated with dwellings, garages, or parking areas. The system allows for both "Pull-to-Open" and "Push-to-Open" installations, with specific instructions and components required for each type. The opener is equipped with features that enhance convenience and safety, making it suitable for residential and light commercial applications.
Key usage features of the KD702 gate opener include:
The installation process involves several steps, starting with preparation, which includes determining the appropriate installation type (Pull-to-Open or Push-to-Open) and ensuring the gate does not open into public areas. Detailed instructions are provided for mounting the gate opener actuators to the gate and posts, including the use of Post Brackets and Gate Brackets. The manual includes tables and illustrations to help determine the proper mounting positions based on gate dimensions and desired opening angles. It also highlights the importance of ensuring a minimum clearance between the gate and the opener to prevent binding.
Mounting the control box is another crucial step, with recommendations to install it in a secure, well-ventilated, and protected location, at least 100 cm (40 inches) above the ground to avoid environmental damage. The manual provides clear guidance on connecting the power supply and the motor wires to the control board, specifying different wiring configurations for "Pull-to-Open" and "Push-to-Open" installations. It also details the connection of various optional accessories like warning lights, photocell beam systems, push buttons, external receivers, and wired keypads.
Programming the remote controls is a straightforward process, allowing users to program up to 8 remotes directly to the opener, or up to 250 remotes with an optional external receiver. The manual also explains how to erase all remote codes for security purposes. Instructions for programming wireless keypads are also provided, including how to set and change the password.
The control board settings offer extensive customization options:
Maintenance features are outlined to ensure the longevity and safe operation of the gate opener:
Troubleshooting guidance is also included to address common issues such as the opener not running, powering up but not moving, or stopping immediately after starting. These sections provide practical steps to diagnose and resolve problems, including checking power connections, motor cables, gate hinges, and safety devices. The manual emphasizes the importance of ensuring correct wiring for "PULL TO OPEN" or "PUSH TO OPEN" installations if the gate opens, closes, or stops on its own. It also addresses issues related to the gate ignoring limit switches, advising checks on wiring and replacement of faulty switches.
| Protection Level | IP44 |
|---|---|
| Motor Type | DC 24V |
| Control Method | Remote control, push button, keypad |
| Operating Temperature | -4°F to +122°F (-20°C to +50°C) |
| Operating Voltage | 24V DC |
| Remote Control Range | 30 m |
| Opening Speed | 12 seconds |
| Safety Features | Obstacle detection |
| Power Supply | AC 110V or AC 220V |
| Max Gate Weight | 660 lbs (300 kg) |
| Max Gate Length | 12 ft (3.66 m) |