4.Assembleandadjustasdescribedinthecutting
unitOperator'sManual.
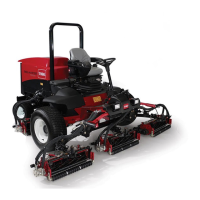
5.Makesurethatthecounterweight(Figure9)is
installedtotheproperendofthecuttingunitas
describedinthecuttingunitOperator'sManual.
g003320
Figure9
1.Counterweight
6.Ensurethattheturf-compensationspringis
mountedtothesamesideasthereeldrivemotor
oneverycuttingunit.T ochangethepositionof
thespring,dothefollowingsteps:
A.Removethe2carriageboltsandnuts
securingtherodbrackettothecutting-unit
tabs(Figure10).
g003949
Figure10
1.Turf-compensationspring3.Springtube
2.Rodbracket
B.Removetheangenutsecuringthe
spring-tubebolttothecarrier-frametab
(Figure10)
C.Removetheassembly.
D.Mountthespring-tubebolttotheopposite
tabonthecarrierframeandsecurewiththe
angenut.
Note:Positiontheboltheadtotheouter
sideofthetabasshowninFigure11.
g003967
Figure11
1.Oppositecarrierframetab
2.Rodbracket
E.Mounttherodbrackettothecuttingunit
tabswiththecarriageboltsandnuts(Figure
11).Onthecuttingunit,mountthelefthose
guidetothefrontofthecuttingunittabs
wheninstallingtherodbracket(Figure13).
Important:OnCuttingUnit4(left
front)andCuttingUnit5(rightfront),
usetherod-bracketmountingnutsto
installthehoseguidestothefrontof
thecutting-unittabs.Thehoseguides
shouldleantowardthecentercutting
unit(Figure12throughFigure14).
g031275
Figure12
1.Cuttingunit15.Cuttingunit5
2.Cuttingunit2
6.Reelmotor
3.Cuttingunit3
7.Weight
4.Cuttingunit4
14