the po w er tak e off (PTO), set the parking
brak e , and tur n the ignition k ey to of f . R emo v e
the k ey .
2. Close the fuel shut-off v alv e at the fuel tank
( Figure 37 ).
3. Squeeze the ends of the hose clamp tog ether
and slide it up the fuel line a w a y from fuel filter
( Figure 37 ).
4. Pull the fuel line off the fuel filter ( Figure 37 ).
Open the fuel shut-off v alv e and allo w the
g asoline to drain into a g as can or drain pan.
Note: No w is the best time to install a new
fuel filter because the fuel tank is empty . R efer
to R e placing the Fuel Filter .
5. Install the fuel line onto the fuel filter . Slide
the hose clamp close to the v alv e to secure the
fuel line .
Figure 37
1. Fuel shut-off valve 2. Clamp
Servicing the Fuel Filter
R e place the fuel filter after ev er y 200 operating
hours or yearly , whic hev er occurs first.
Replacing the Fuel Filter
Nev er install a dir ty filter if it is remo v ed from the
fuel line .
Note: Note ho w the fuel filter is installed.
Note: Wipe up any spilled fuel.
1. Diseng ag e the PTO and set the parking brak e .
2. Stop the engine , remo v e the k ey , and w ait for
all mo ving par ts to stop before lea ving the
operating position.
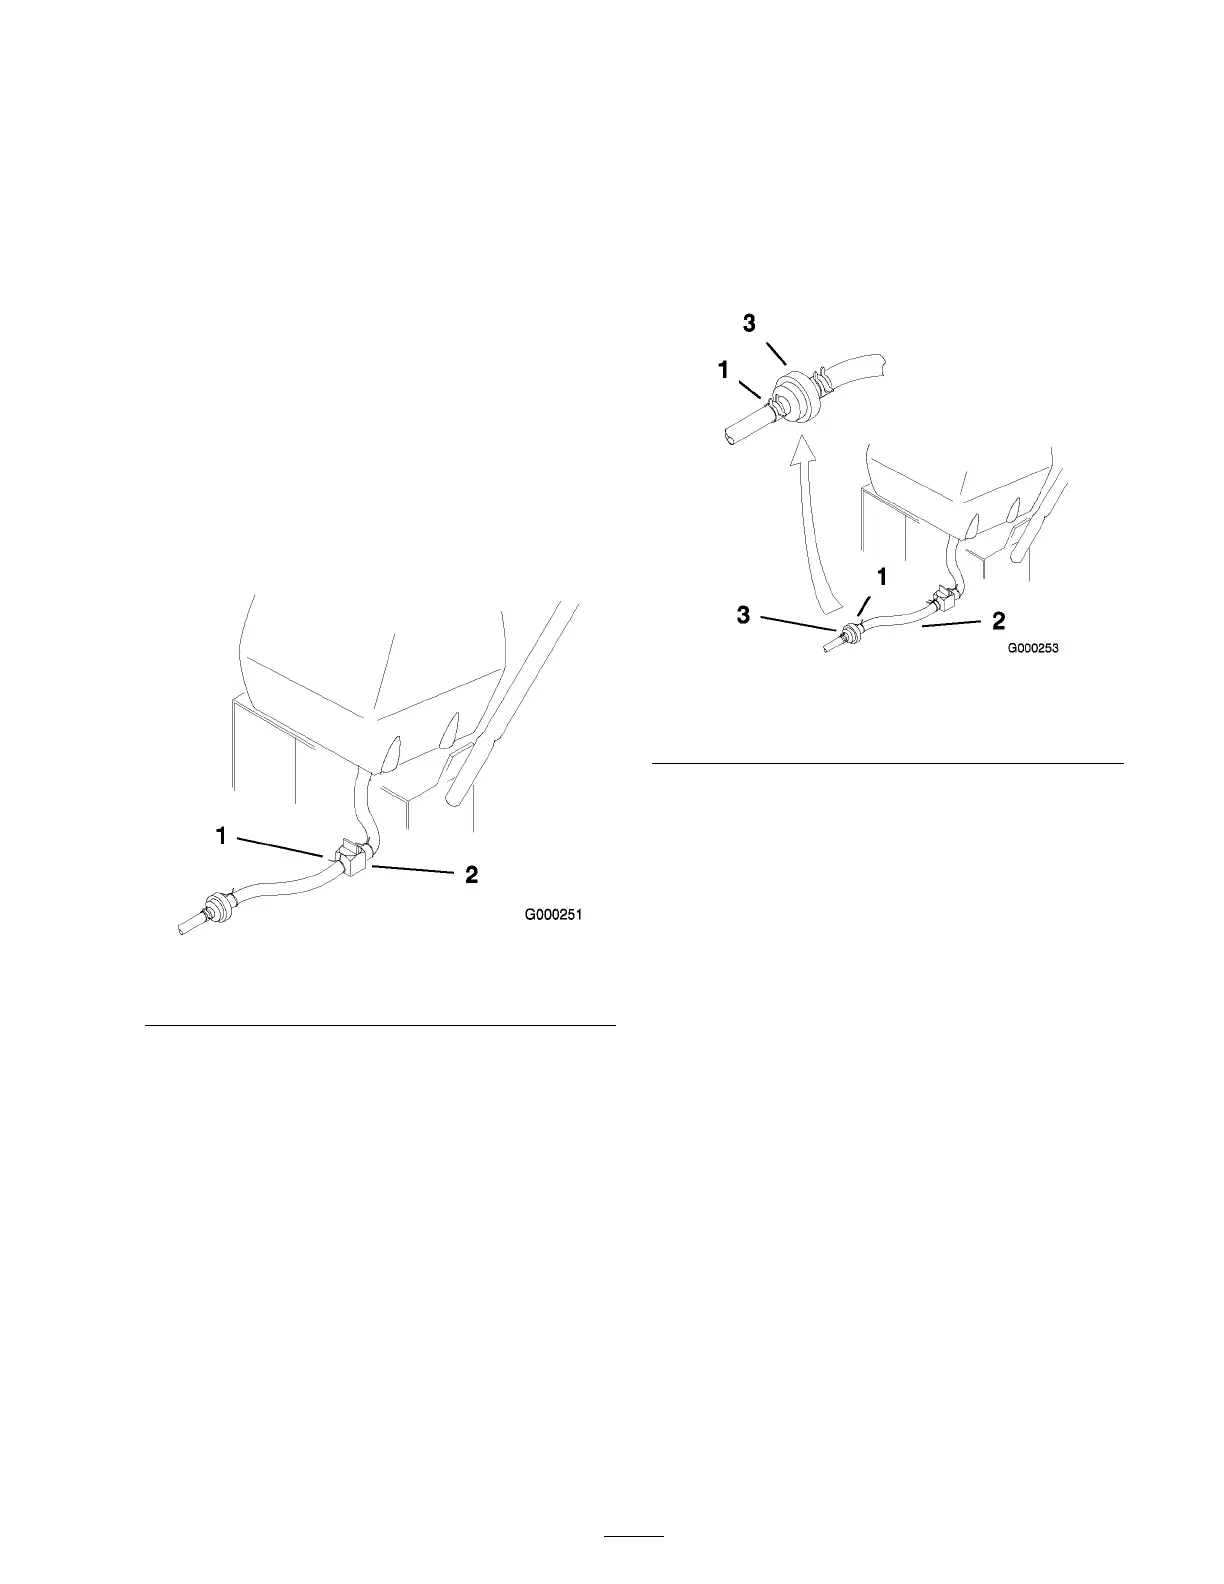
3. Close fuel shut-off v alv e at fuel tank
( Figure 37 ).
Note: R emo v e the fuel line from the fuel
v alv e that is closest to the engine .
4. Squeeze the ends of the hose clamps tog ether
and slide them a w a y from the filter ( Figure 38 ).
Figure 38
1. Hose clamp 3. Filter
2. Fuel line
5. R emo v e the filter from the fuel lines .
6. Install a new filter and mo v e the hose clamps
close to the filter .
7. Open fuel shut-off v alv e at fuel tank
( Figure 37 ).
8. Chec k for fuel leaks and re pair if needed.
Electrical System
Maintenance
Servicing the Spark Plug
Chec k the spark plug(s) after ev er y 200 operating
hours . Mak e sure the air g ap betw een the center
and side electrodes is cor rect before installing the
spark plug . Use a spark plug wrenc h for remo ving
and installing the spark plug(s) and a g apping
tool/feeler g aug e to c hec k and adjust the air g ap .
Install a new spark plug(s) if necessar y .
T ype: Champion® R C12Y C or Champion®
Premium Gold 2071 (or equi v alent)
Air Gap: 0.040 in. (1.02 mm)
33