2. Stop the engine , remo v e the k ey , and w ait for
all mo ving par ts to stop before lea ving the
operating position.
3. R emo v e the knobs/r ubber w ashers holding
the car rier frame co v er and remo v e the car rier
frame co v er .
4. R emo v e the knobs/r ubber w ashers holding
the belt co v ers to the top of the cutting unit
and remo v e the belt co v ers .
5. R emo v e the heat shield from the engine dec k
and car rier frame .
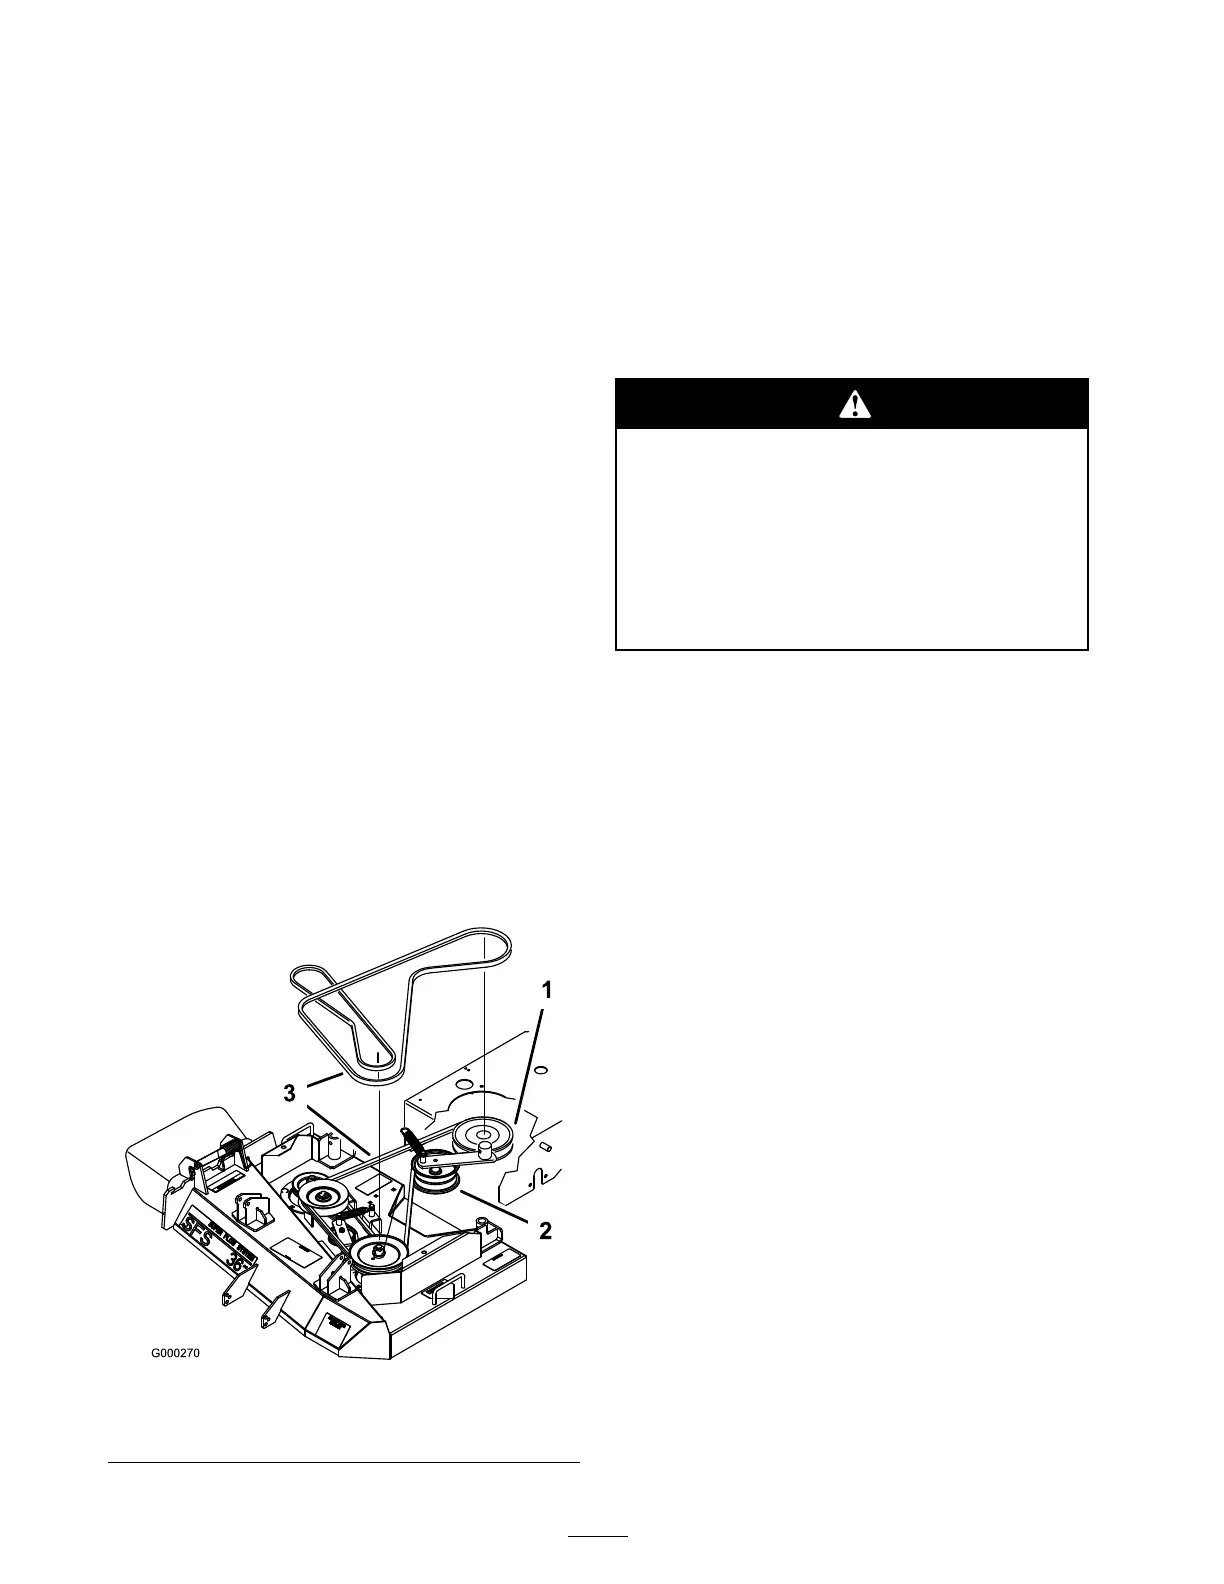
6. R emo v e the idler spring from idler ar m.
R emo v e the dri v e belt from the PTO clutc h
pulley , idler pulleys and the left spindle pulley
( Figure 51 ).
7. Install the new dri v e belt onto the PTO
eng ag ement pulley and the top g roo v e of the
center spindle pulley ( Figure 51 ).
8. Install belt onto idler pulleys and then install
idler spring ( Figure 51 ).
9. Install the heat shield to the engine dec k and
car rier frame .
10. R einstall the belt co v ers onto the cutting unit,
then reinstall and tighten the knobs/r ubber
w ashers .
11. R einstall the car rier frame co v er onto the
cutting unit, then reinstall and tighten the
knobs/r ubber w ashers .
Figure 51
1. PTO clutch pulley 3. Drive Belt
2. Drive belt idler 4. Double Spindle Pulley
Mower Deck
Maintenance
Servicing the Cutting Blades
T o ensure a superior quality of cut, k ee p the
blades shar p . F or con v enient shar pening and
re placement, y ou ma y w ant to k ee p extra blades
on hand.
A w or n or dama ged blade can br eak, and a
piece of the blade could be thr o wn into the
operator’ s or bystander’ s ar ea, r esulting in
serious per sonal injur y or death.
• Inspect the blade periodicall y f or w ear
or dama ge.
• R eplace a w or n or dama ged blade.
Before Inspecting or Servicing the
Blades
P ark the mac hine on a lev el surface , diseng ag e
the blade control bail and set the parking brak e .
T ur n the ignition k ey to off . R emo v e the k ey and
disconnect the spark plug wire(s) from the spark
plug(s).
Inspecting the Blades
Inspect the blades ev er y 8 hours .
1. Inspect the cutting edg es ( Figure 52 ). If the
edg es are not shar p or ha v e nic ks , remo v e and
shar pen the blades . R efer to Shar pening the
Blades .
40