Figure 55
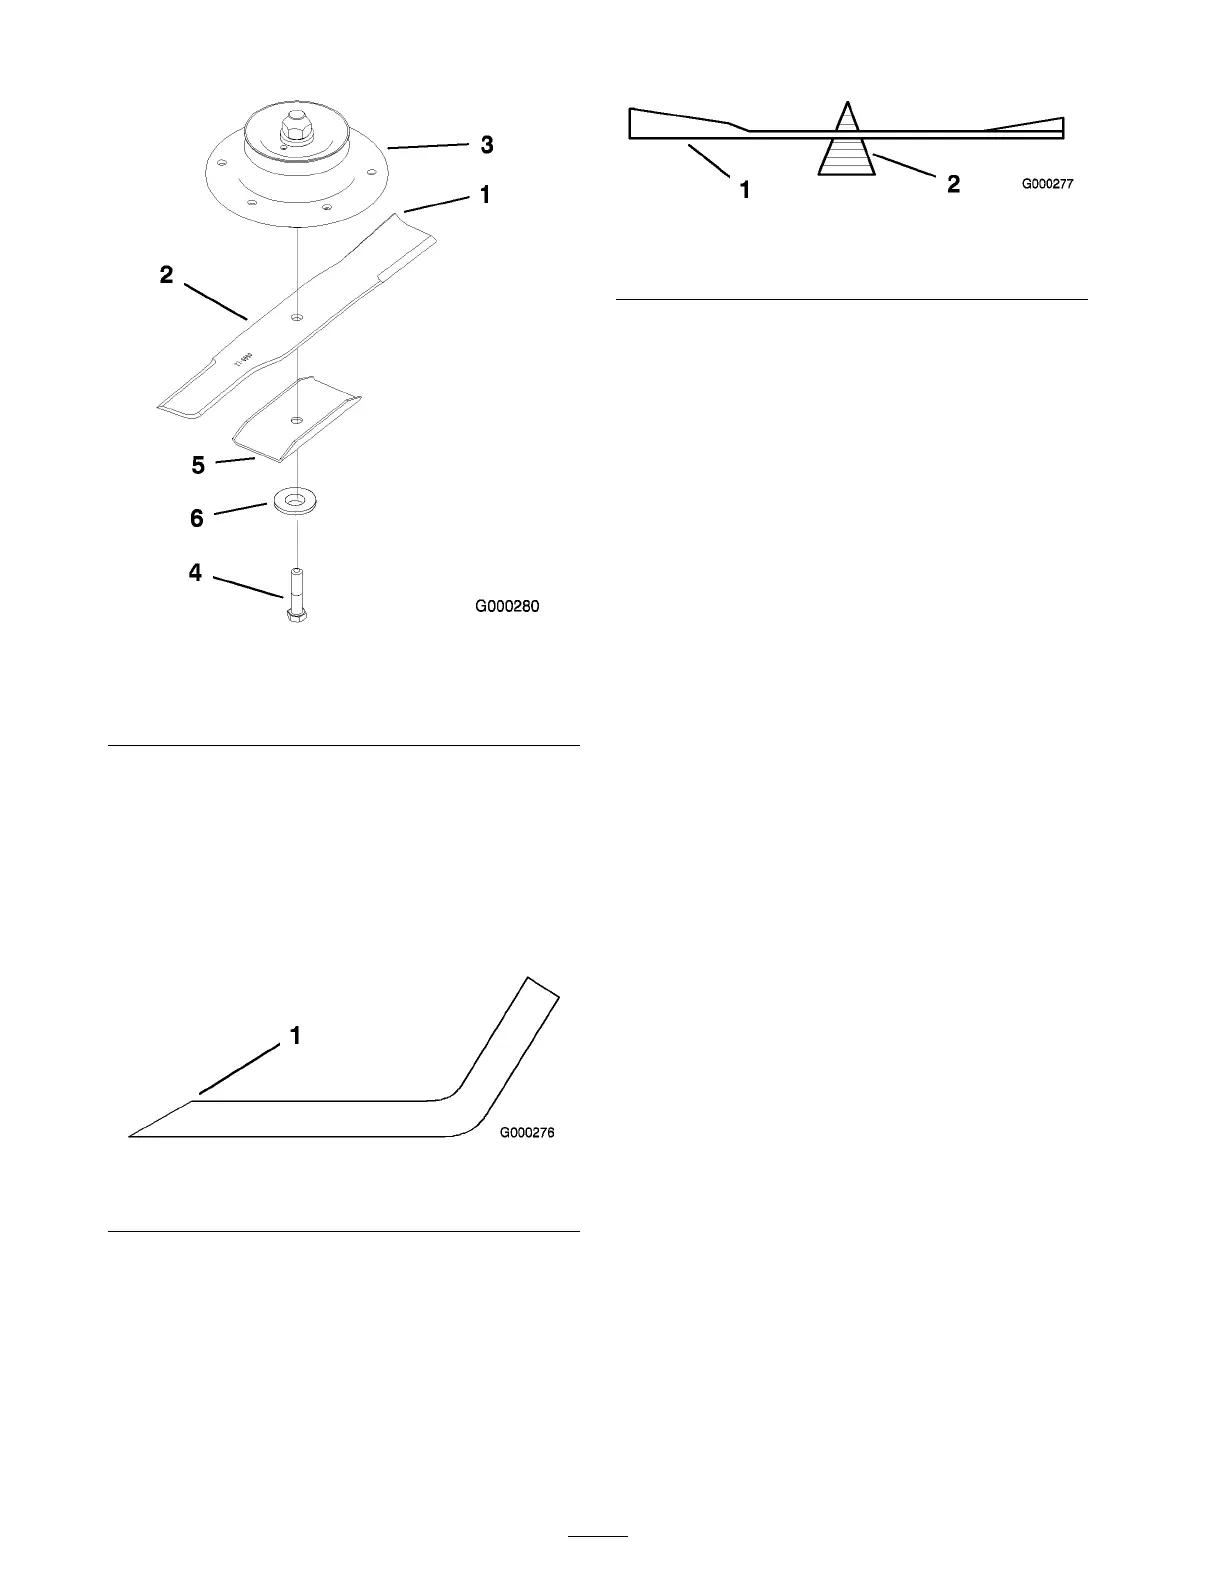
1. Sail Area of Blade 4. Blade Bolt
2. Blade 5. Blade stiffener
3. Blade spindle 6. Flat washer
Sharpening the Blades
1. Use a file to shar pen the cutting edg e at both
ends of the blade ( Figure 56 ). Maintain the
original angle . T he blade retains its balance if
the same amount of material is remo v ed from
both cutting edg es .
Figure 56
1. Sharpen at original angle
2. Chec k the balance of the blade b y putting it on
a blade balancer ( Figure 57 ). If the blade sta ys
in a horizontal position, the blade is balanced
and can be used. If the blade is not balanced,
file some metal off the end of the sail area only
( Figure 55 ). R e peat this procedure until the
blade is balanced.
Figure 57
1. Blade 2. Balancer
Installing the Blades
1. Install the blade onto the spindle shaft
( Figure 55 ).
Important: T he sail par t of the blade
must be pointing up w ard, to w ard the
inside of the mo w er to ensur e pr oper
cutting ( Figur e 55 ).
2. Install the blade stiffener , flat w asher and blade
bolt ( Figure 55 ).
3. T or que the blade bolt to 85-110 ft-lb (115-140
N•m).
Correcting the Mower
Quality of Cut
If one dec k blade cuts lo w er than the other , cor rect
as follo ws .
Note: Tire air pressure is critical in these
procedures . Mak e sure all tires ha v e cor rect
pressure .
1. Diseng ag e the PTO and set the parking brak e .
2. Stop the engine , remo v e the k ey , and w ait for
all mo ving par ts to stop before lea ving the
operating position. Disconnect the spark plug
wire(s) from the spark plug(s).
3. Adjust the tire pressure in all tires to
specifications on pag e .
4. Chec k that the blades and spindle shafts are
not bent. R efer to Chec king for Bent Blades .
5. Set the height-of-cut to the 4 inc h (101.6 mm)
position. R efer to Adjusting the Height-Of-Cut
in Operation , pag e 20 .
6. P erfor m the ste ps in the follo wing sections
F rame Set Up , Chec king F ront-to-R ear Pitc h,
and Chec king Side-to-Side Lev eling .
42