5. Grease the inside and outside of the new
bushings . Use a hammer and flat plate to
carefully dri v e the bushings into the mounting
tube .
6. Inspect the caster wheel fork for w ear and
re place if necessar y ( Figure 43 ).
7. Slide the caster wheel fork through the
bushings in the mounting tube . R e place the
spacer(s) onto the fork and secure with the
retaining ring ( Figure 43 ).
Important: T he inside diameter of
the bushings may collapse slightl y when
installed. If the caster wheel f or k does not
slide into the new bushings, r eam both
bushings to an inside diameter of 1.126
inch (29 mm).
8. Grease the fitting on the car rier frame
mounting tube using No . 2 g eneral pur pose
lithium base or molybden um base g rease .
Servicing the Caster Wheel
and Bearings
T he caster wheels rotate on a roller bearing
suppor ted b y a spanner bushing . If the bearing is
k e pt w ell lubricated, w ear will be minimal. F ailure
to k ee p the bearing w ell lubricated will cause rapid
w ear . A w obbly caster wheel usually indicates a
w or n bearing .
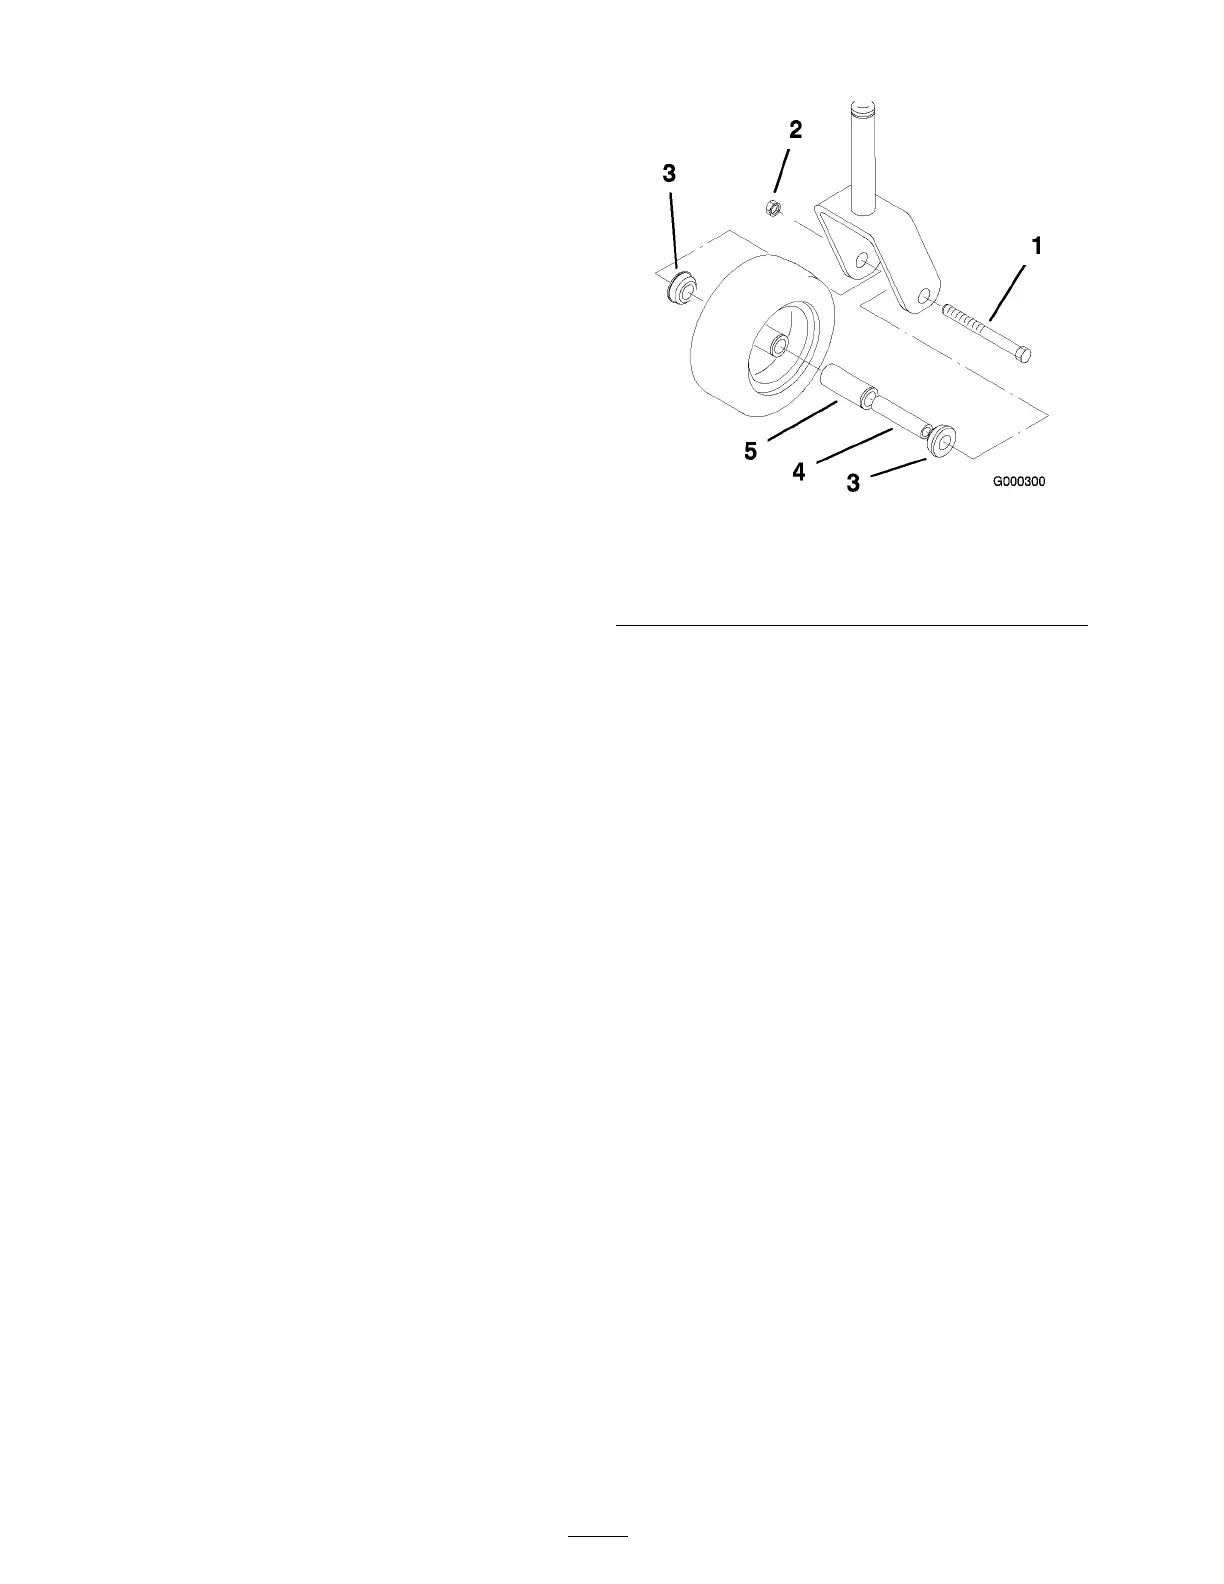
1. R emo v e the loc kn ut and wheel bolt holding
the caster wheel to the caster fork ( Figure 45 ).
Figure 45
1. Locknut 4. Spanner Bushing
2. Wheel Bolt 5. Roller Bearing
3. Bushing
2. R emo v e one bushing, then pull the spanner
bushing and roller bearing out of the wheel
hub ( Figure 45 ).
3. R emo v e the other bushing from the wheel hub
and clean any g rease and dir t from the wheel
hub ( Figure 45 ).
4. Inspect the roller bearing, bushings , spanner
bushing and inside of the wheel hub for
w ear . R e place any defecti v e or w or n par ts
( Figure 45 ).
5. T o assemble , place one bushing into the wheel
hub . Grease the roller bearing and spanner
bushing and slide them into the wheel hub .
Place the second bushing into the wheel hub
( Figure 45 ).
6. Install the caster wheel into the caster fork
and secure with the wheel bolt and loc kn ut.
Tighten the loc kn ut until the spanner bushing
bottoms ag ainst the inside of the caster forks
( Figure 45 ).
7. Grease the fitting on the caster wheel.
Adjusting the Electric Clutch
T he clutc h is adjustable to ensure proper
eng ag ement and proper braking . Chec k
adjustment after ev er y 100 hours of operation.
1. T o adjust the clutc h, tighten or loosen the loc k
n uts on the flang e studs ( Figure 46 ).
36