6.Loosentherearnuts.
Note:Thenutsdonotneedtoberemoved.
7.Slidetheseatandseatplateforwardtoallowthefront
nutstogothroughthekeyhole(Figure67).
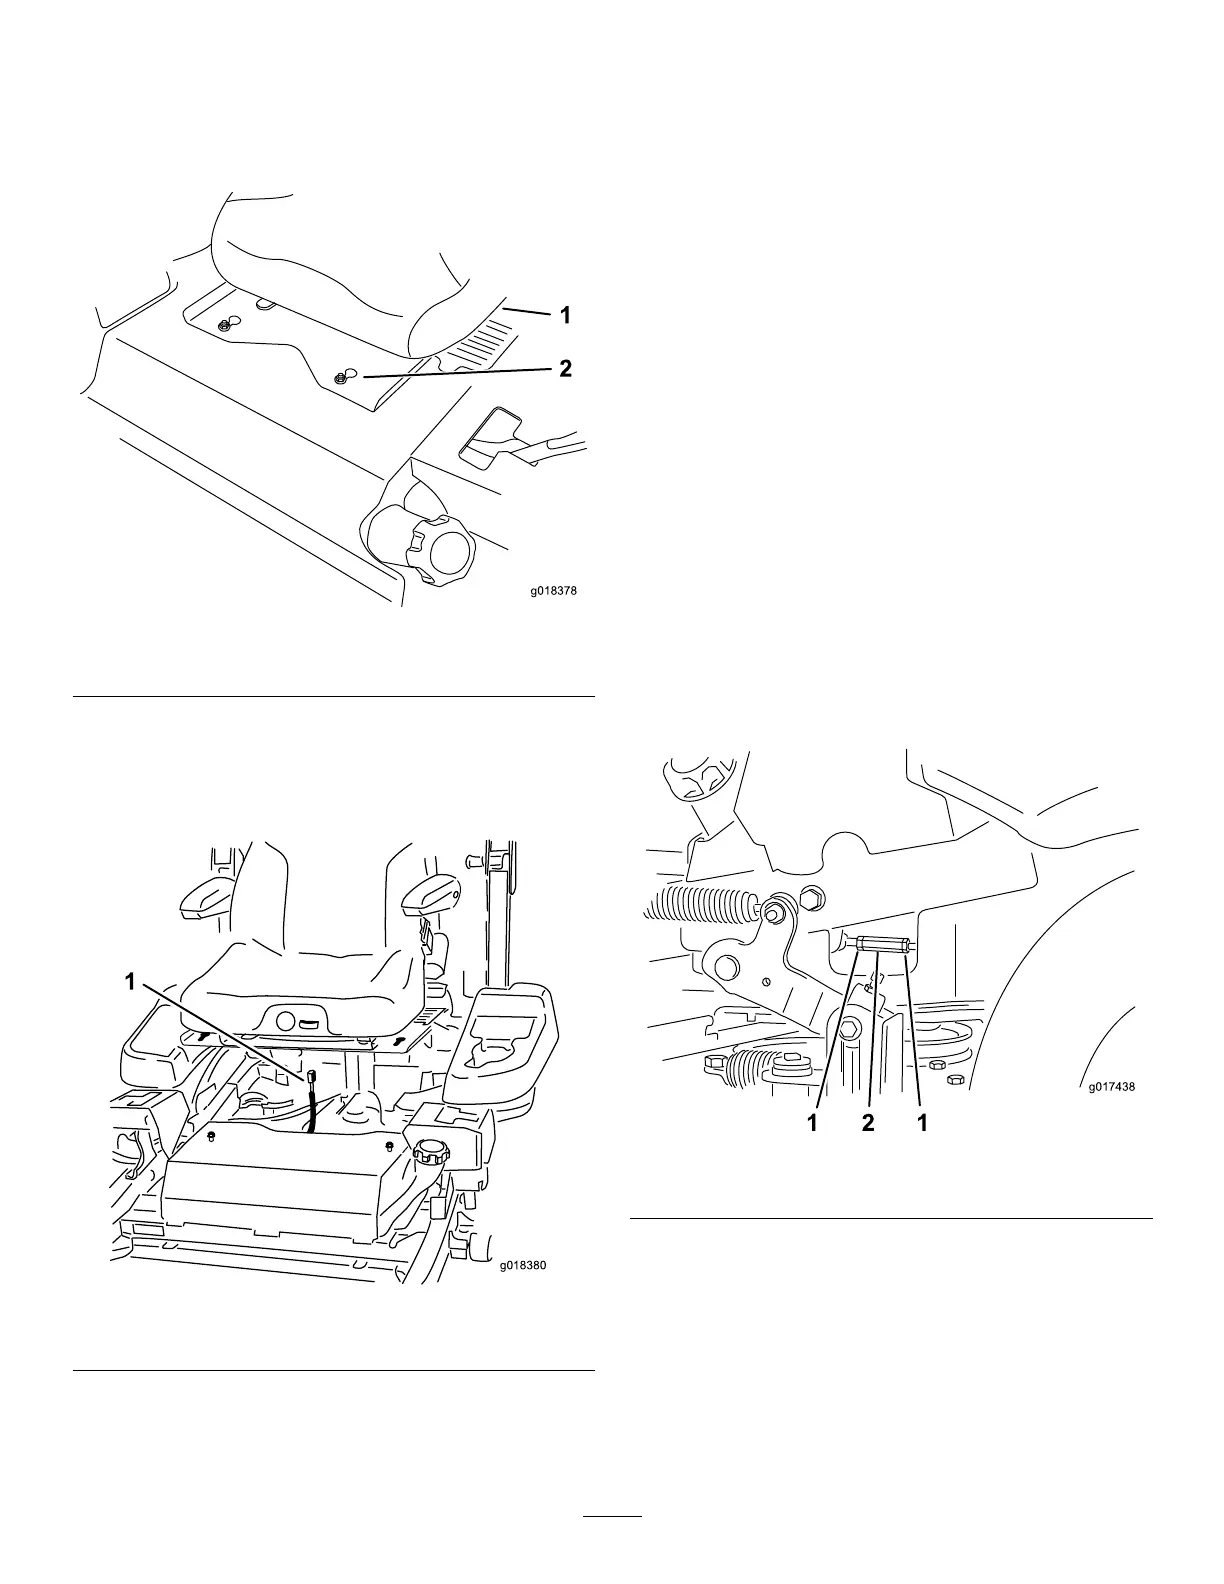
Figure67
1.Seat
2.Frontnutswithkeyhole
8.Loosentheboltsholdingtheseattothemachine,and
slidetheseatforwardintheslotstoremovetheseat.
9.Unplugtheharnessconnectorfromtheseatswitch
locatedundertheseat(Figure68).
Figure68
1.Harnessconnector
10.Temporarilyinstallajumperwireacrosstheterminals
intheconnectorofthemainwiringharness.
11.Starttheengine,runtheengineatfullthrottle,and
releasethebrake.
Important:Engagetheparkingbrakeandmove
themotion-controlleversoutbeforestartingthe
engine.Youdonotneedtobeintheseatbecause
ofthejumperwirebeingused.
12.Runthemachineatleast5minuteswiththedrivelevers
atfullforwardspeedtobringthehydraulicoilupto
operatingtemperature.
Note:Themotion-controlleverneedstobeinneutral
whilemakinganynecessaryadjustments.
13.Bringthemotion-controlleversintotheNEUTRAL
position.
14.Adjustthepump-controlrodsbylooseningthe2jam
nutsandrotatingtheadjustmentnutintheappropriate
directionuntilthewheelsslightlycreepinreverse
(Figure69).
15.Movethemotion-controlleverstotheREVERSE
position,andwhileapplyingslightpressuretothelever,
allowthereverse-indicatorspringstobringthelevers
backtoneutral.
Note:Thewheelsmuststopturningorslightlycreep
inreverse.
16.Tightenthe2jamnutsagainsttheadjustmentnut
(Figure69).
Figure69
1.Jamnut2.Adjustmentnut
17.Shutoffthemachine.
18.Removethejumperwirefromthewireharness,and
plugtheconnectorintotheseatswitch.
19.Installtheseat.
20.Removethejackstands.
21.Raisethedeckandinstalltheheight-of-cutpin.
22.Ensurethatthemachinedoesnotcreepinneutralwith
theparkingbrakesdisengaged.
49