3
Installing the Attachment
Mount
Parts needed for this procedure:
1
Stabilizer bracket (For 2015 and newer Models)
2
Carriage bolt (5/16 x 3/4 inch)
4
Locknut (5/16 inch)
2
Self-tapping screw (5/16 x 3/4 inch)
2
Bolt (5/16 x 1 inch)
1
Pivot frame
2 Hairpin cotter
2 Rod
2 W asher
1 Draw-bar decal
For 2015 through 2019 Models
Only
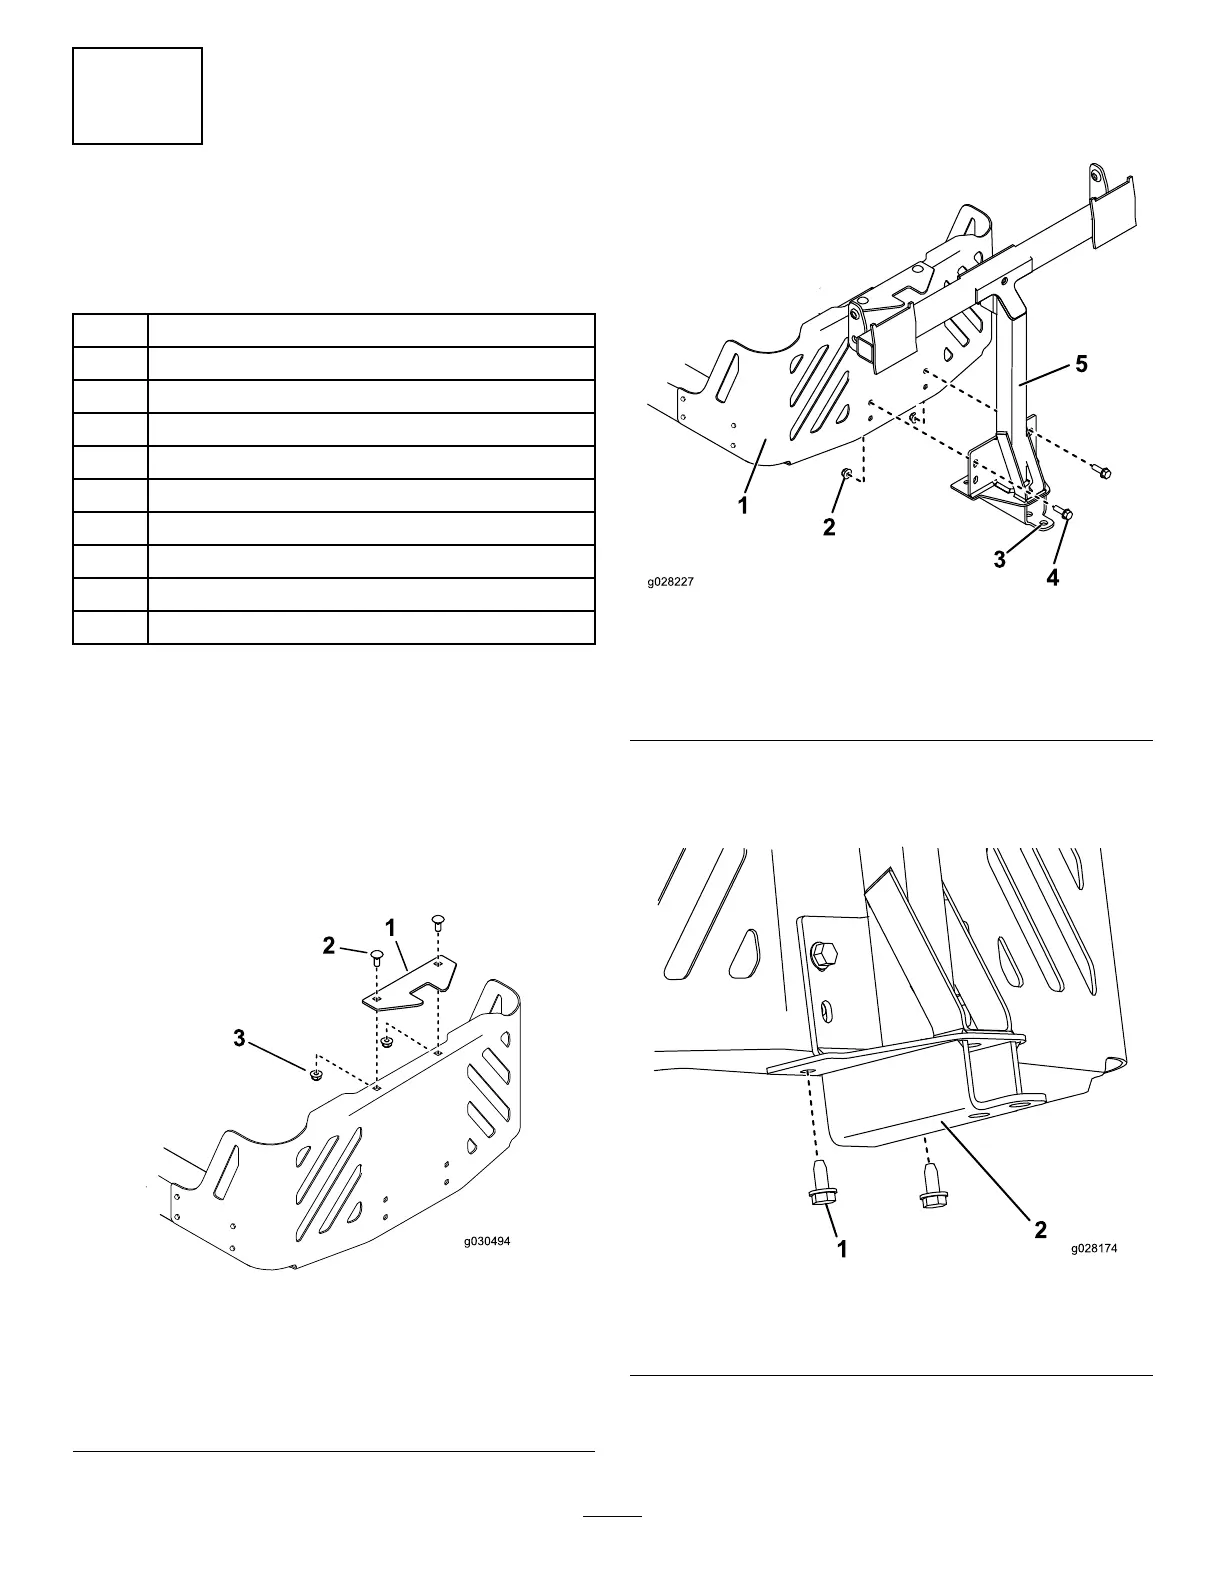
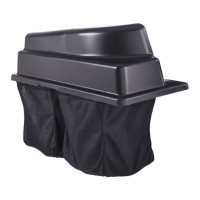
Note: The stabilizer bracket is used only on 2015
and newer models ( Figure 10 ).
1. Install the stabilizer bracket to the engine guard
using 2 carriage bolts (5/16 x 3/4 inch) and 2
locknuts (5/16 inch) ( Figure 10 ).
g030494
Figure 10
2015 model shown
1. Stabilizer bracket 3. Locknut (5/16 inch)
2. Carriage bolt (5/16 x 3/4
inch)
2. Install the pivot frame to the machine frame as
shown in Figure 1 1 . Secure the pivot frame to
the machine frame using 2 bolts (5/16 x 1 inch)
and 2 locknuts (5/16 inch).
g028227
Figure 1 1
1. Machine frame 4. Bolt (5/16 x 1 inch)
2. Locknut (5/16 inch) 5. Pivot frame
3. Hole
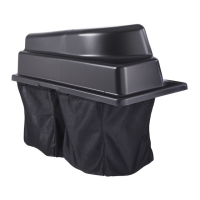
3. Secure the pivot frame to the bottom of the
machine frame using 2 self-tapping screws (5/16
x 3/4 inch) as shown in Figure 12 .
g028174
Figure 12
1. Self-tapping screw (5/16 x
3/4 inch)
2. Pivot frame
4. Attach the draw bar decal 1.3 cm (1/2 inch) to
the left of the attachment mount ( Figure 13 ).
10