charged.Thisstatelastsonlyafewminutesuntil
thebatteryisfullycharged.
Note:Whenthebatterynolongerholdsacharge,
recyclethelead-acidbatteryaccordingtolocalcodes.
ReplacingtheFuse
Electric-startmodelonly
Ifthebatterydoesnotchargeortheenginedoesnotturn
withtheelectricstarter,thefusemaybeblown;replaceitwith
a40-ampplug-intypefuse.
Important:Youcannotstartthemachinewiththe
electricstarterorchargethebatteryunlessaworking
fuseisinstalled.
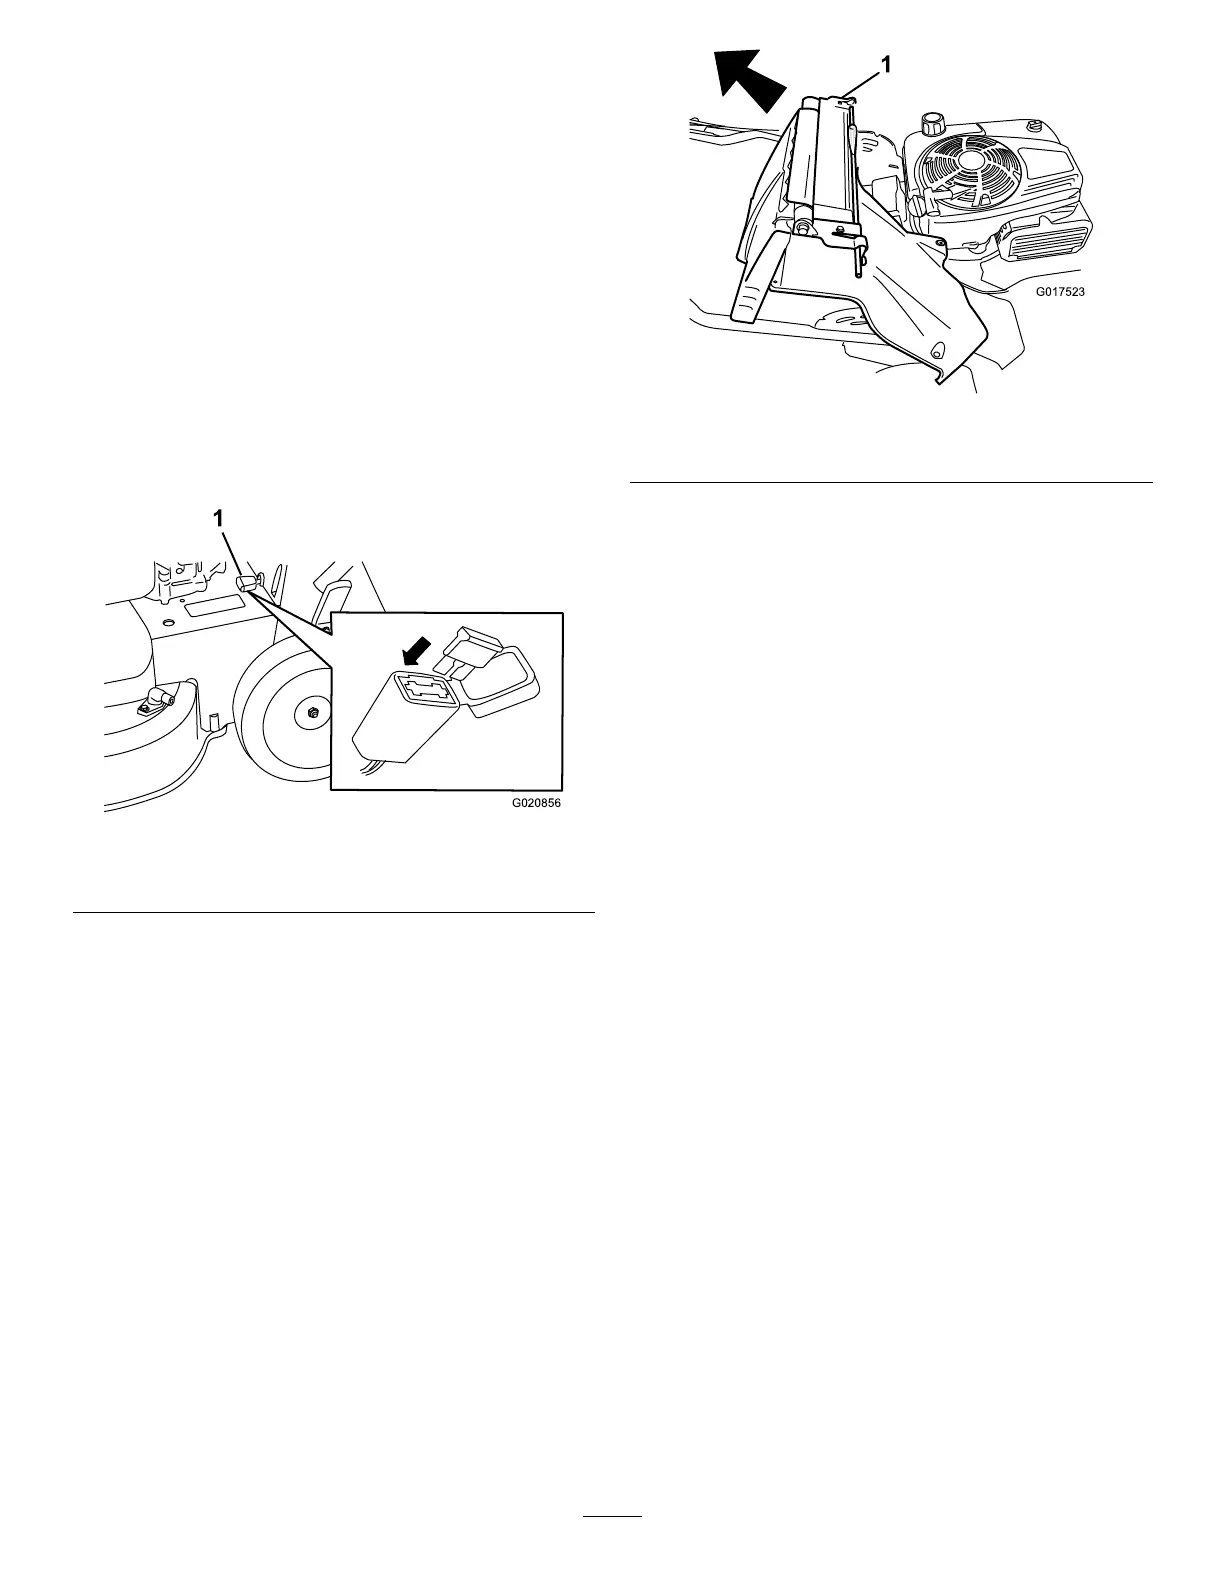
1.Openthesealedfuseholderandreplacethefuse
(Figure34).
Figure34
1.Fuseholder
2.Closethecovertothefuseholder,andensurethatit
issealedtightly.
ReplacingtheBattery
Electric-startmodelonly
RemovingtheOldBattery
1.ContactanAuthorizedToroPartsDealertoobtaina
replacementbattery.
2.Removethebeltcover;refertostep1ofServicingthe
Blade-driveSystem(page20).
3.Removetherear-dischargeplug.
4.Movethehandletotheverticalposition.
5.Removethe4smallboltsthatholdtherear-deector
andhandle-lockleverassemblyinplace.
6.Foldthehandleallthewayforward.
7.Removetherear-deectorandhandle-locklever
assembly(Figure36).
Figure35
1.Rear-deectorandhandle-lockleverassembly
8.Removethecoverfromthebattery.
9.Disconnecttheleadsfromthebattery.
10.Removeandbatteryandrecycleit.
Note:Recyclethebatteryaccordingtoyourstateand
localregulations.
InstallingtheNewBattery
1.Cleanthebattery-holdingareaonthemachinehousing.
2.Setthenewbatteryinplaceonthemachinehousing.
3.Connecttheleadstothenewbattery.
Note:Ensurethatyouconnecttheblack(negative)
wiretothenegative(-)terminalandthered(positive)
wiretothepositive(+)terminal.
4.Installthecoverontothebattery.
Note:Ensurethatthecovertsproperlyoverthe
wiringharness.
5.Installtherear-deectorandhandle-lockleverassembly
ontothemachine.
6.Raisethehandletotheverticalposition.
7.Securetheshroudwiththe4small
boltsthatyouremovedinstep5of
RemovingtheOldBattery(page18).
8.Installtherear-dischargeplug.
9.Returnthehandletotheoperatingposition.
18