15
2
3
1
4
6
5
7
m–7007
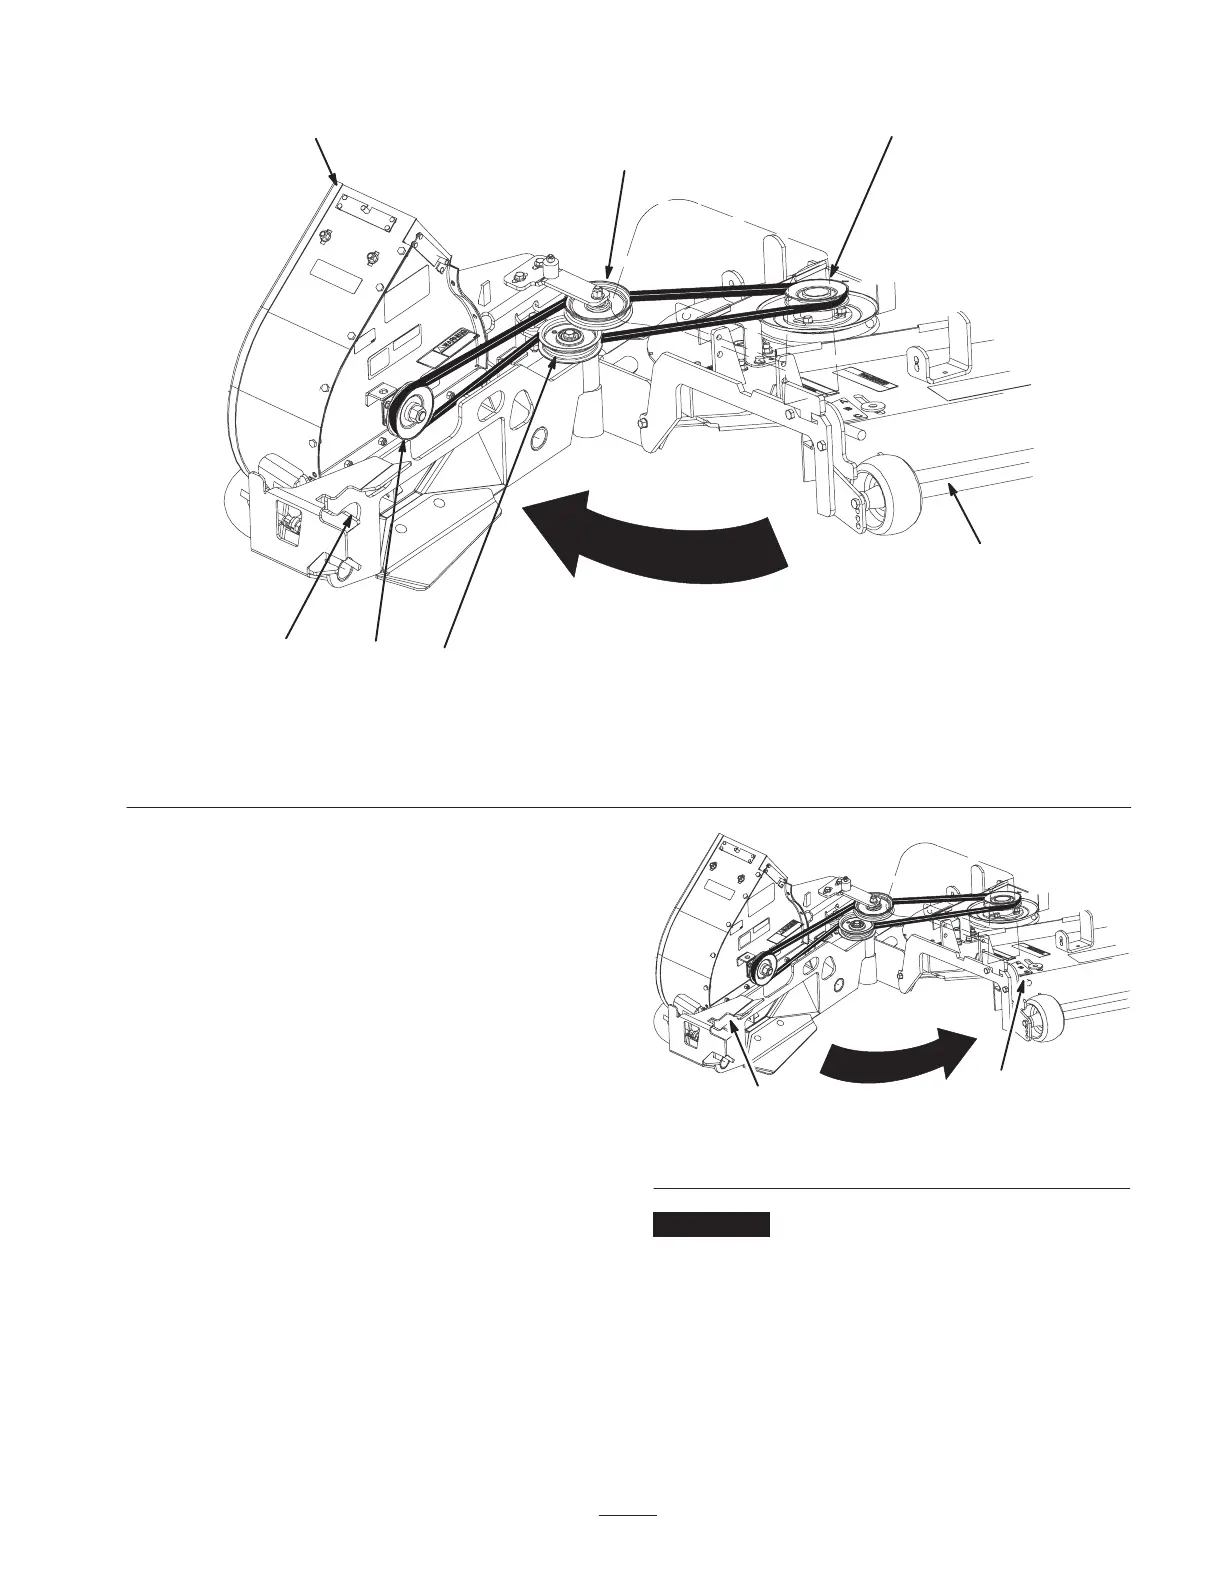
Figure 20
1. Blower pulley
2. Mower
3. Blower assembly
4. Top pulley of mower pulley
assembly
5. Spring loaded idler pulley
(belt back side touching
pulley)
6. Fixed idler pulley
7. Front latch (red)
4. Push down on the front latch (colored red) and open
the blower assembly (Fig. 20).
5. Install the bagger belt on the top mower pulley
(Fig. 20).
6. Route the bagger belt around the top pulley of the
mower pulley assembly (Fig. 20).
7. Feed the belt between the idler pulleys (Fig. 20).
8. Route the bagger belt around the spring–loaded idler
pulley (Fig. 20). The backside of belt will be touching
the pulley.
9. Route the bagger belt around the fixed idler pulley
(Fig. 20).
10. Route the bagger belt around the blower pulley
(Fig. 20).
11. Close the blower assembly and ensure the blower front
latch engages onto the front peg (Fig. 21).
m–7008
2
1
Figure 21
1. Blower front latch (red) 2. Front peg
Important Make sure to check the belt tension and
spring length after the initial 8 hours of use.
12. Adjust the bagger belt tension. Refer to Checking and
Adjusting the Bagger Belt Tension on page 23.
 Loading...