9
3
Step
Parts needed for this step:
• 1 Anti-scalp roller bracket
• 1 Tapping screw
Installing the New Bracket and
Anti-Scalp Roller
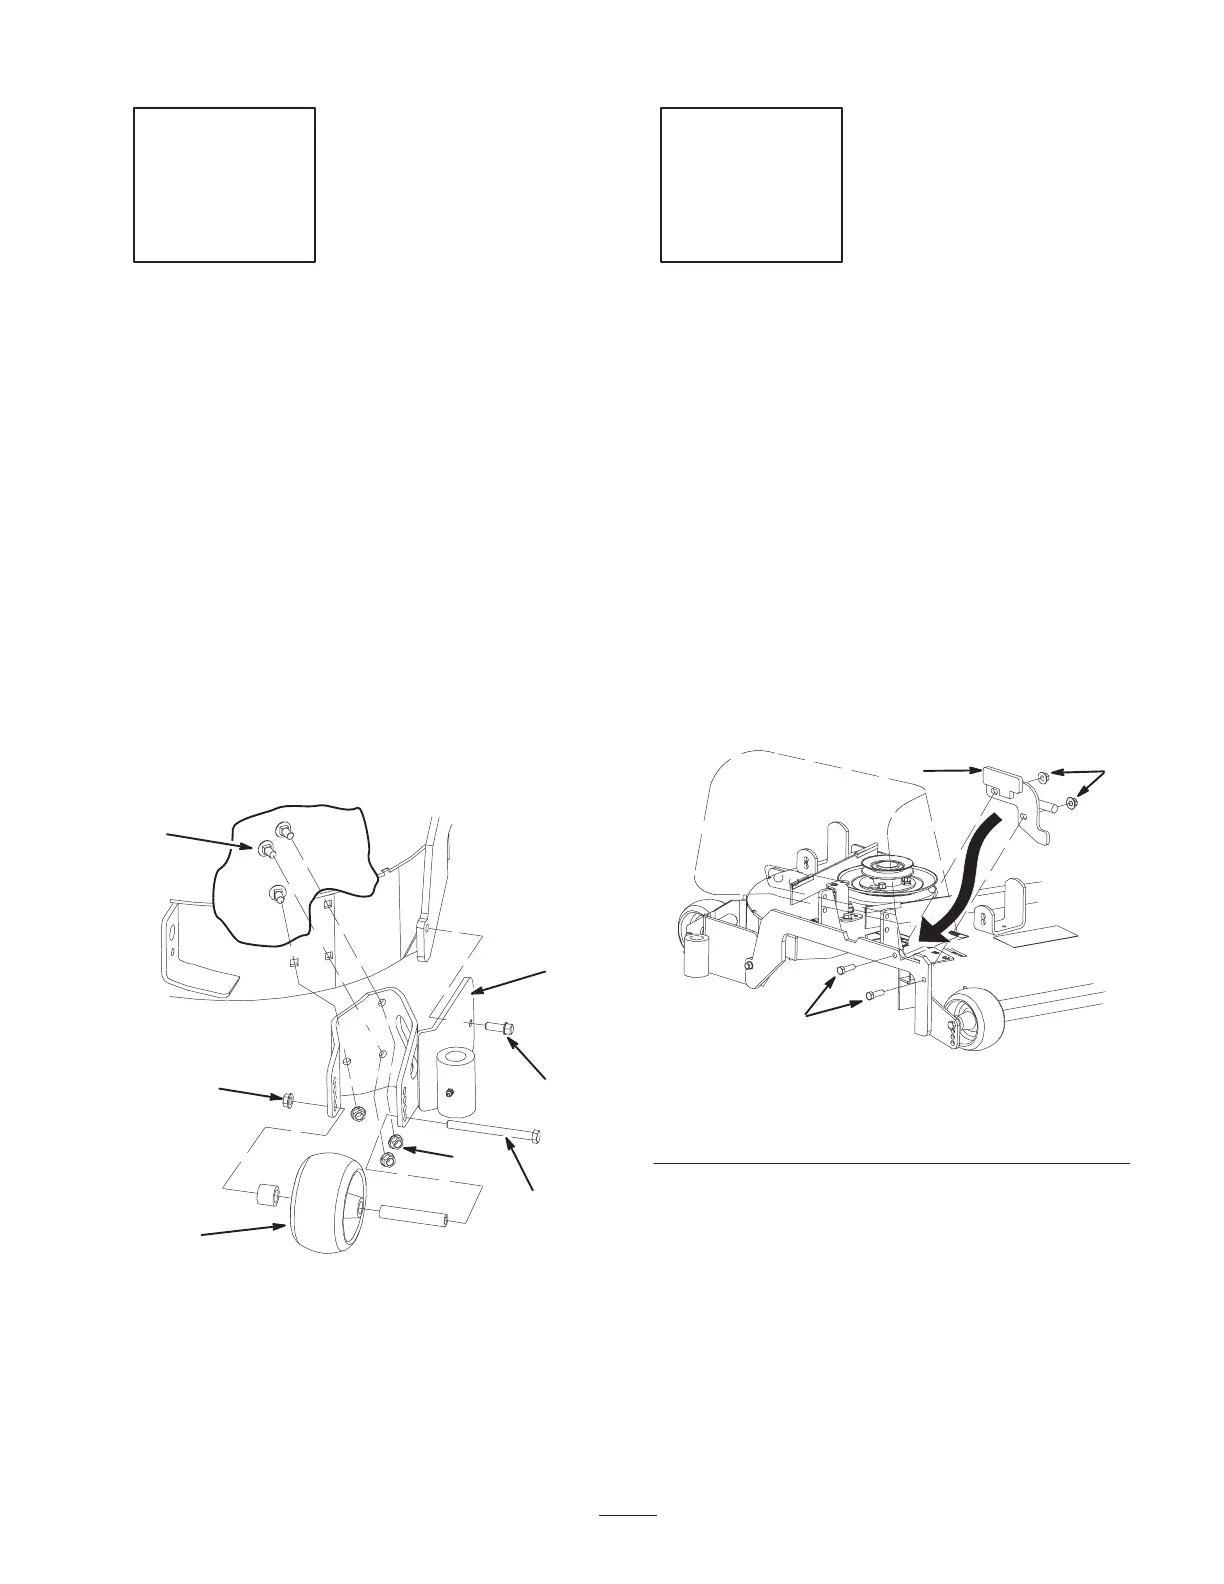
1. Install the new anti–scalp roller bracket using the three
carriage bolts (3/8 x 3/4 inch) and flange nuts
(3/8 inch) removed previously (Fig. 7).
2. Install a tapping screw (3/8 x 1 inch) into the deck and
roller bracket (Fig. 7).
Note: The screw requires effort to turn. By installing the
screw, threads will be cut into the new bracket.
3. Install the anti-scalp roller with the axle bolt
(3/8 x 4-1/2 inches), flange nut (3/8 inch) (Fig. 7).
m–6980
7
4
3
1
2
5
3
Figure 7
1. Anti-scalp bracket, new
2. Carriage bolt,
3/8 x 3/4 inch
3. Flange nut, 3/8 inch
4. Screw, tapping,
3/8 x 1inch
5. Bolt, 3/8 x 4-1/2 inch
6. Anti-scalp roller
4
Step
Parts needed for this step:
• 1 Mounting plate
• 2 Bolts, 3/8 x 1-1/4 inch
• 2 Flange nuts, 3/8 inch
Installing the Mounting Plate
1. Move the grass deflector into the upright position.
Note: When the mower is switched to bagging leave the
grass deflector on the machine. The grass deflector will
rest against the blower belt cover.
2. Install the mounting plate to the inside of the deck
mounting bracket with 2 bolts (3/8 x 1-1/4 inch) and
2 flange nuts (3/8 inch) as shown in figure 8.
m–7005
3
2
1
Figure 8
1. Mounting plate
2. Bolt, 3/8 x 1–1/4 inch
3. Flange nut, 3/8 inch
 Loading...