6 INTERNET FAX
118 Sending Internet Faxes
6
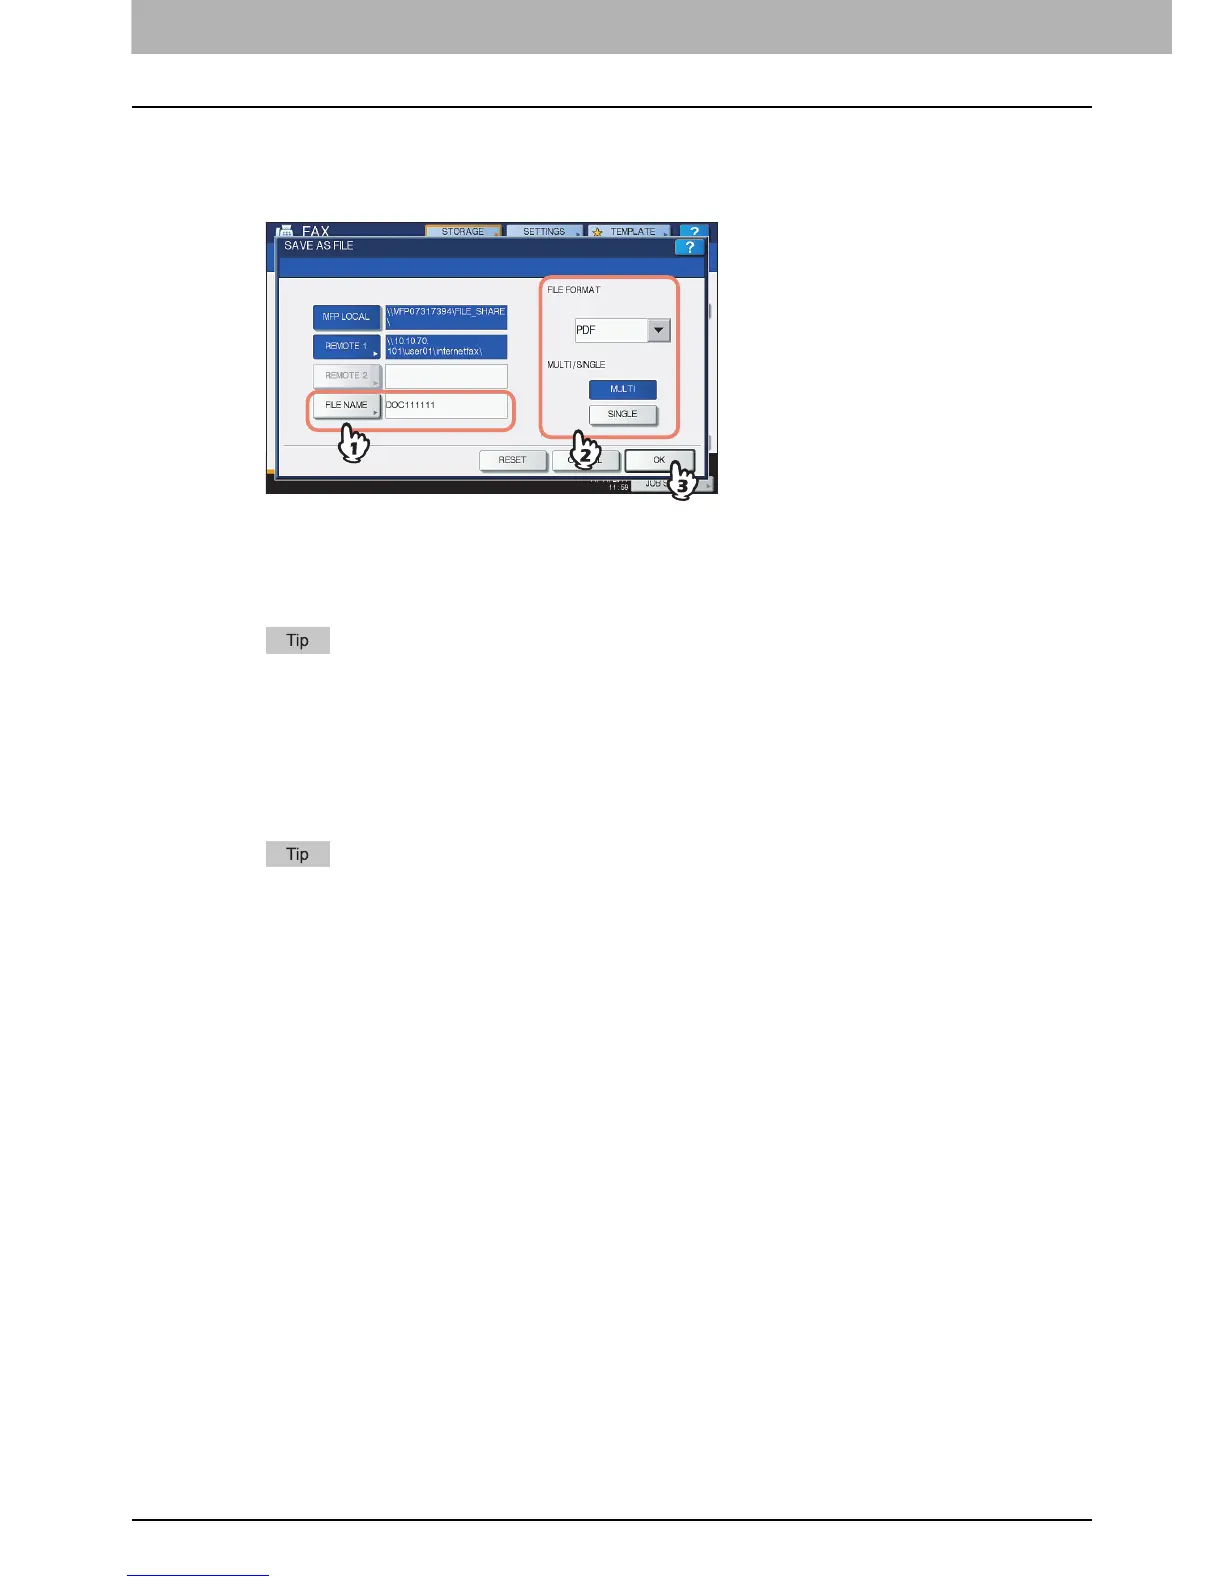
Define the settings for the new file(s) as required.
1) Press [FILE NAME] and change the file name.
2) Select an option for the FILE FORMAT and/or MULTI/SINGLE PAGE settings.
3) Finally, press [OK].
[FILE NAME]
Pressing the button displays an on-screen keyboard. Change the file name using the keyboard and
digital keys, and then press [OK] to set the entry. The file name can consist of a maximum of 128
characters.
The trailing characters in a file name (maximum 74) may be deleted depending on the type of letters
used.
FILE FORMAT
[PDF] — Press this button to store your scan as a PDF file.
[TIFF] — Press this button to store your scan as a TIFF file.
[XPS] — Press this button to store your scan as an XPS file.
XPS files are supported only by the following models and operating systems:
Models:
- e-STUDIO6570C Series
- e-STUDIO6550C Series
- e-STUDIO4540C Series
- e-STUDIO507 Series
- e-STUDIO456 Series
- e-STUDIO857 Series
- e-STUDIO856 Series
- e-STUDIO2550C Series (only when the hard disk is installed)
- e-STUDIO5055C Series
- e-STUDIO307LP
- e-STUDIO306LP
Operating systems:
- Windows Vista
- Windows 7
- Windows 8
- Windows Server 2008 SP1 or later versions
- Windows Server 2012
- Windows Server 2003 SP1 or later versions with .NET Framework 3.0 installed
MULTI/SINGLE PAGE
[MULTI] — Press this button to store your scan as a multiple page file. When you scan several pages,
the equipment stores all the pages as a single file.
[SINGLE] — Press this button to store your scan as a single file for each page. When you scan several
pages, the equipment stores each page as a separate file.
 Loading...


