P9 ASD Installation and Operation Manual 29
EOI Remote Mounting
The EOI may be mounted remotely using the optional ASD-MTG-KIT-P9. Or if operating in a NEMA 4
environment, the ASD-EOI-N4-G9 is best suited for this application. Each kit contains all of the
hardware required to mount the EOI of the ASD remotely.
System operation and EOI operation while using the remotely-mounted EOI are the same as with the
ASD-mounted configuration.
See the section titled EOI Remote Mounting on pg. 32 for more information on mounting the EOI
remotely.
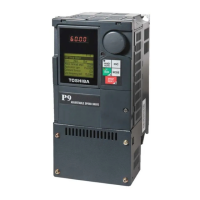
EOI Features
Figure 21. The P9 ASD Electronic Operator Interface Features.
LED Screen
— Displays the running frequency, active Fault, or active Alarm information.
Rotary Encoder
— Used to access the P9 ASD menu selections, change the value of a displayed
parameter, and performs the Enter key function. Turn the Rotary Encoder either clockwise or
counterclockwise to perform the Up or Down functions of the displayed menu selection. Press the Rotary
Encoder to perform the Enter (select) function. Press while turning for times-ten increment/decrement.
LCD Screen
— Displays configuration information, performance data (e.g., output frequency, bus
voltage, torque, etc.), diagnostic information, and LED screen information in expanded normal text.
Hand/Auto Key
— Toggles the system to and from the Hand and Auto modes. The Hand/Auto key is
disabled while the Fault screen is active. The Hand/Auto key LED is on when the system is in the Hand
mode. The Hand mode allows the Command and Frequency control functions to be carried out via the
EOI.
The Auto mode enables the Command and Frequency control functions to be carried out via the
Terminal Board, RS485, Communication Board, Pulse Input, or the settings of F003/F004. The (F003/
F004) selection may be made via
Program
Fundamental
Standard Mode Selection
Command
Mode and Frequency Mode 1, respectively.
Note: See the section titled Command Mode and Frequency Mode Control on pg. 38 for more
information on system control.
The availability of Hand mode control (Command and Frequency control) may be disabled via Program
Utilities
Prohibition
Hand/Auto Key Command Override and Hand/Auto Key Frequency
Override. The availability of the Hand mode of operation may be reinstated by changing this setting or
performing a Reset (see F007).
HAND
/AUTO
Remove the Phillips screw
first to remove the LED/
LCD display unit to
activate the Battery Backup
system.
LED/LCD Display Unit
Rotary Encoder
LED Screen
LCD Screen
Hand/Auto Key (LED)
Escape Key
Run Key (LED)
Mode Key
Stop/Reset Key
 Loading...