TABLE OF CONTENTS
24
5.15 INPUT POWERING OPTIONS
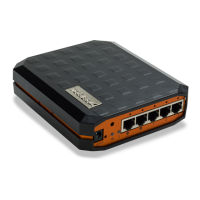
LOCK 100
Use the AC adapter included in the sales package. Alternatively,
in case the operating voltage of 8-30V DC (absolute value) is
available from an external power source, a DC input plug included
in the sales package can be used. Connect the stripped wires by
tightening the screws with a flat blade screwdriver. Follow the
polarity marking in the plug
LOCK 200
Use the AC adapter included in the sales package. Alternatively, in
case the operating voltage of 8-27V DC +/-10% is available from
an external power source, a DC input plug included in the sales
package can be used. Connect the stripped wires by tightening the
screws with a flat blade screwdriver. Follow the polarity marking
in the plug.
To secure the input power cable from being accidentally pulled
away from the power input jack, the use of the cable saddle is
recommended. The cable saddle is included in the sales package
and it is locked in place by inserting it into the 4mm diameter hole
in the front panel. Loop the power cable around the frame and
snap the jaw closed.
LOCK 500
A power source with voltage of 12-48V DC +/-20% is required
to operate the Lock. The power input port is equipped with a
removable plug-in connector included in the sales package.
Remove the connector if needed and connect the stripped power
wires by tightening the wire connector screws with a flat blade
screwdriver.
A device frame connection is available at the power input
port. It is recommended to wire this connection to the installation
cabinet protective earth potential with as short cable as possible.
This will enhance the immunity of the equipment against conducted
and radiated RF disturbance, as well as against electrical
transients that may be propagated by the ethernet cables. Use
+ and - terminals to power the device. Follow the polarity and
grounding symbols in the front panel.
Make sure the connector is completely plugged in and secure the
connector into the Lock frame by tightening the locking screws
with a flat blade screwdriver. The wires with a cross-section of up
to 1.5mm
2
(AWG 16) can be used with the connector. The stripping
length of the conductor is 6 mm.
The Lock is equipped with a 2 Amp internal fuse. In case of a device
malfunction, the fuse is blown to protect the power circuitry. The
fuse cannot be replaced by the user. In case of a blown internal
fuse, do not open the device. Instead, contact your local Tosibox
distributor for service.
 Loading...