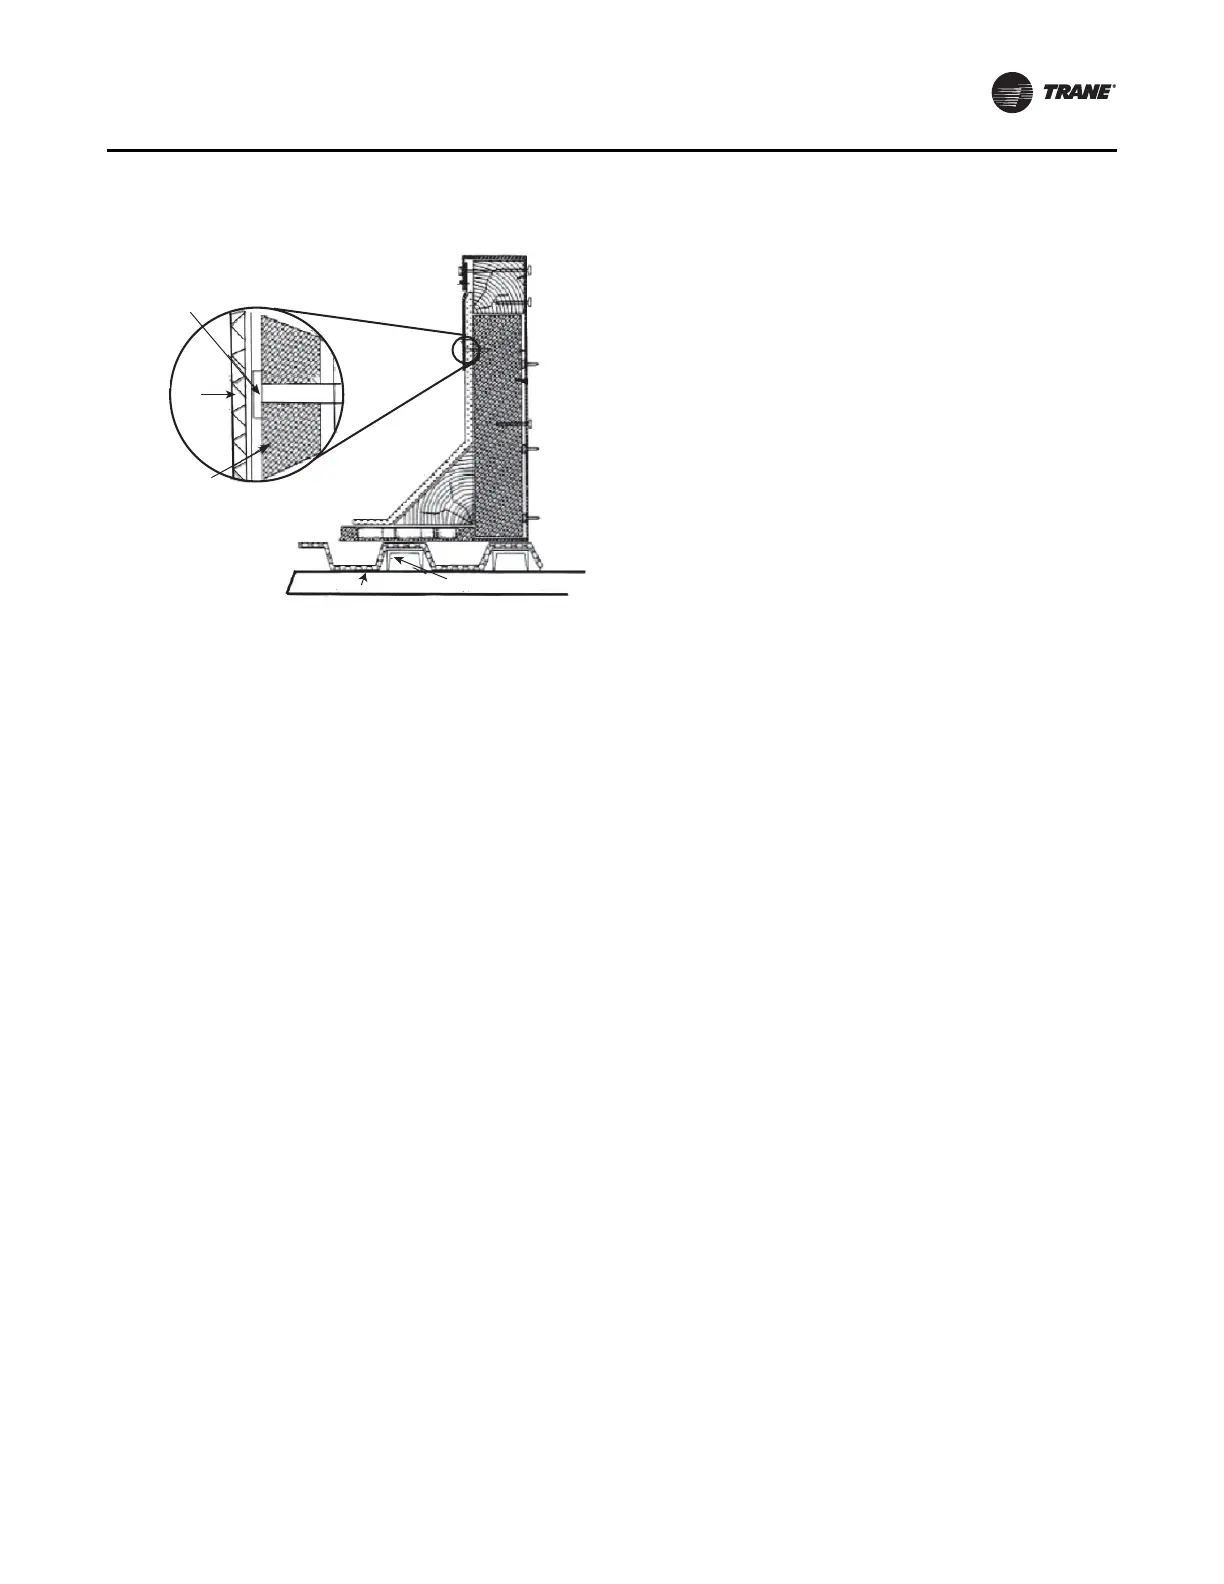
Figure 2. Cross section of typical curb installation on
new construction
Screw securing roof
felt to rigid insulation
or 2 x 10
Flashing
(field-supplied)
Roofing felt
(field-supplied)
4 x 4 cant
(field-supplied)
Roof deck Support channels
Pre-Installation
CLCH-SVX013B-EN 11
1. Verify that the roof structure can adequately support
the combined weight of the unit and curb assembly.
2. Ensure that the selected instal
latio
n location provides
sufficient service and operational clearances.
3. Remove any twist within the curb due to r
oof supports
and square the curb.
4. Level the curb.
5. Secure the curb to the roof support members.
6. Install 2-inch thick boards or rigid insulation around the
curb.
7. Install cant strips
around th
e curb.
8. Bring field supplied roofing felt up to the top of the curb
nailing
strips. Nail felt into place.
9. Install field supplied flashing under the lip of the curb
flanges and over the felt.
10
. Apply sealant to the four corners.
11. Caulk all joints between
the curb and the roof.
Attach the gasket material to the curb’s top flanges
(entire perimeter) and to the supply and return air duct
opening panel flanges.