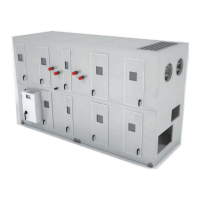
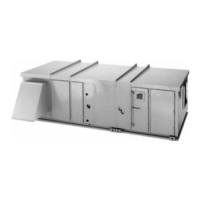
Routine Maintenance
76 CLCH-SVX013B-EN
Inspecting and Cleaning Fans
Fan sections of air handlers should be inspected every six
months at a minimum or more frequently if operating
experience dictates. If evidence of microbial growth
(mold) is found, identify and remedy the cause
immediately. Refer to “Troubleshooting,” p. 79 for
possible causes and solutions. To clean the fan section:
1.
Disconnect all electrical power to the
unit.
2. Wearing the appropriate pe
rsonal protective
equipment, remove any contamination.
3. Vacuum the section with a vacuum device
that uses
high-efficiency particulate arrestance (HEPA) filters
with a minimum efficiency of 99.97 percent at
0.3 micron particle size.
4. Thoroughly clean any contam
inated are
a(s) with a
mild bleach and water solution or an EPA-approved
sanitizer specifically designed for HVAC use.
5. Immediately rinse the affecte
d surf
aces thoroughly
with fresh water and a fresh sponge to prevent
potential corrosion of metal surfaces.
6. Allow the unit to dry completely before putting it back
in
to service.
7.
Be careful any contaminated material does not contact
other areas of the un
it or building. Properly dispose of
all contaminated materials and cleaning solution.
Motor Bearing Lubrication
Obtain an operation and maintenance manual from the
motor manufacturer for the specific motor installed. The
motor manufacturer’s recommendations take precedence
for all matters related to the start-up and routine
maintenance of the motor.
Motor grease fittings have been removed from factory-
i
nstalled motors in compliance with UL regulations. Motor
bearings require periodic maintenance throughout their
life. Many different styles of motors come as standard
selections, so please obtain the motor IOM and use the
manufacturer-recommended grease.
Fan Motor Inspection
Inspect fan motors periodically for excessive vibration or
temperature. Operating conditions will vary the frequency
of inspection and lubrication. Motor lubrication
instructions are on the motor tag or nameplate. If for some
reason these instructions are not available, contact the
motor manufacturer. Some motor manufacturers may not
provide oil tubes on motors with permanently sealed
bearings.
Filters
WARNING
Rotating Components!
The following procedure involves working with rotating
components. Disconnect all electric power, including
remote disconnects before servicing. Follow proper
lockout/ tagout procedures to ensure the power can
not be inadvertently energized. Secure rotor to ensure
rotor cannot freewheel. Failure to secure rotor or
disconnect power before servicing could result in
rotating components cutting and slashing technician
which could result in death or serious injury.
Throwaway Filters
To replace throwaway filters, install new filters with the
directional arrows pointing in the direction of airflow.
Note: Bag and cartridge filters must have an ai
rtight seal
to prevent air bypass. If using filters not supplied by
Trane, apply foam gasketing to the vertical edges of
the filter.
Permanent Filters
To clean permanent filters:
1. Disconnect all electrical power to the unit.
2. Wash the filter under a stream of water to remove dirt
an
d lint.
3. Rem
ove oil from the filter with a wash of m
ild alkali
solution.
4. Rinse the filter in clean,
hot water and allow to dry.
5. Coat both si
des of the filter by immersing or spraying
it with Air Maze Filter Kote W or an equivale
nt.
6. Allow to drain and dry for about 12 hours.
7. Reinstall the filter.
Note: It may be pre
ferable to keep extra, clean filters to
replace the dirty filters to minimize unit downtime
for filter maintenance.
Cartridge or Bag Filters
To replace cartridge or bag filters:
1. Disconnect all electrical power to the unit.
2. Remove the dirty filters from their installed position.
3. Keeping the new bag filters folded, slide each filter into
the fi
lter rack, pushing them tightly against the unit.
Note: Th
e pleats should be in the vertical position.
4. If using the
optional pre
-filters, replace them on the
appropriate filter rack.
5. Close and secure the access door.