Optional Equipment (for qualified installers only) 49
© Travis Industries 4140808 100-01298
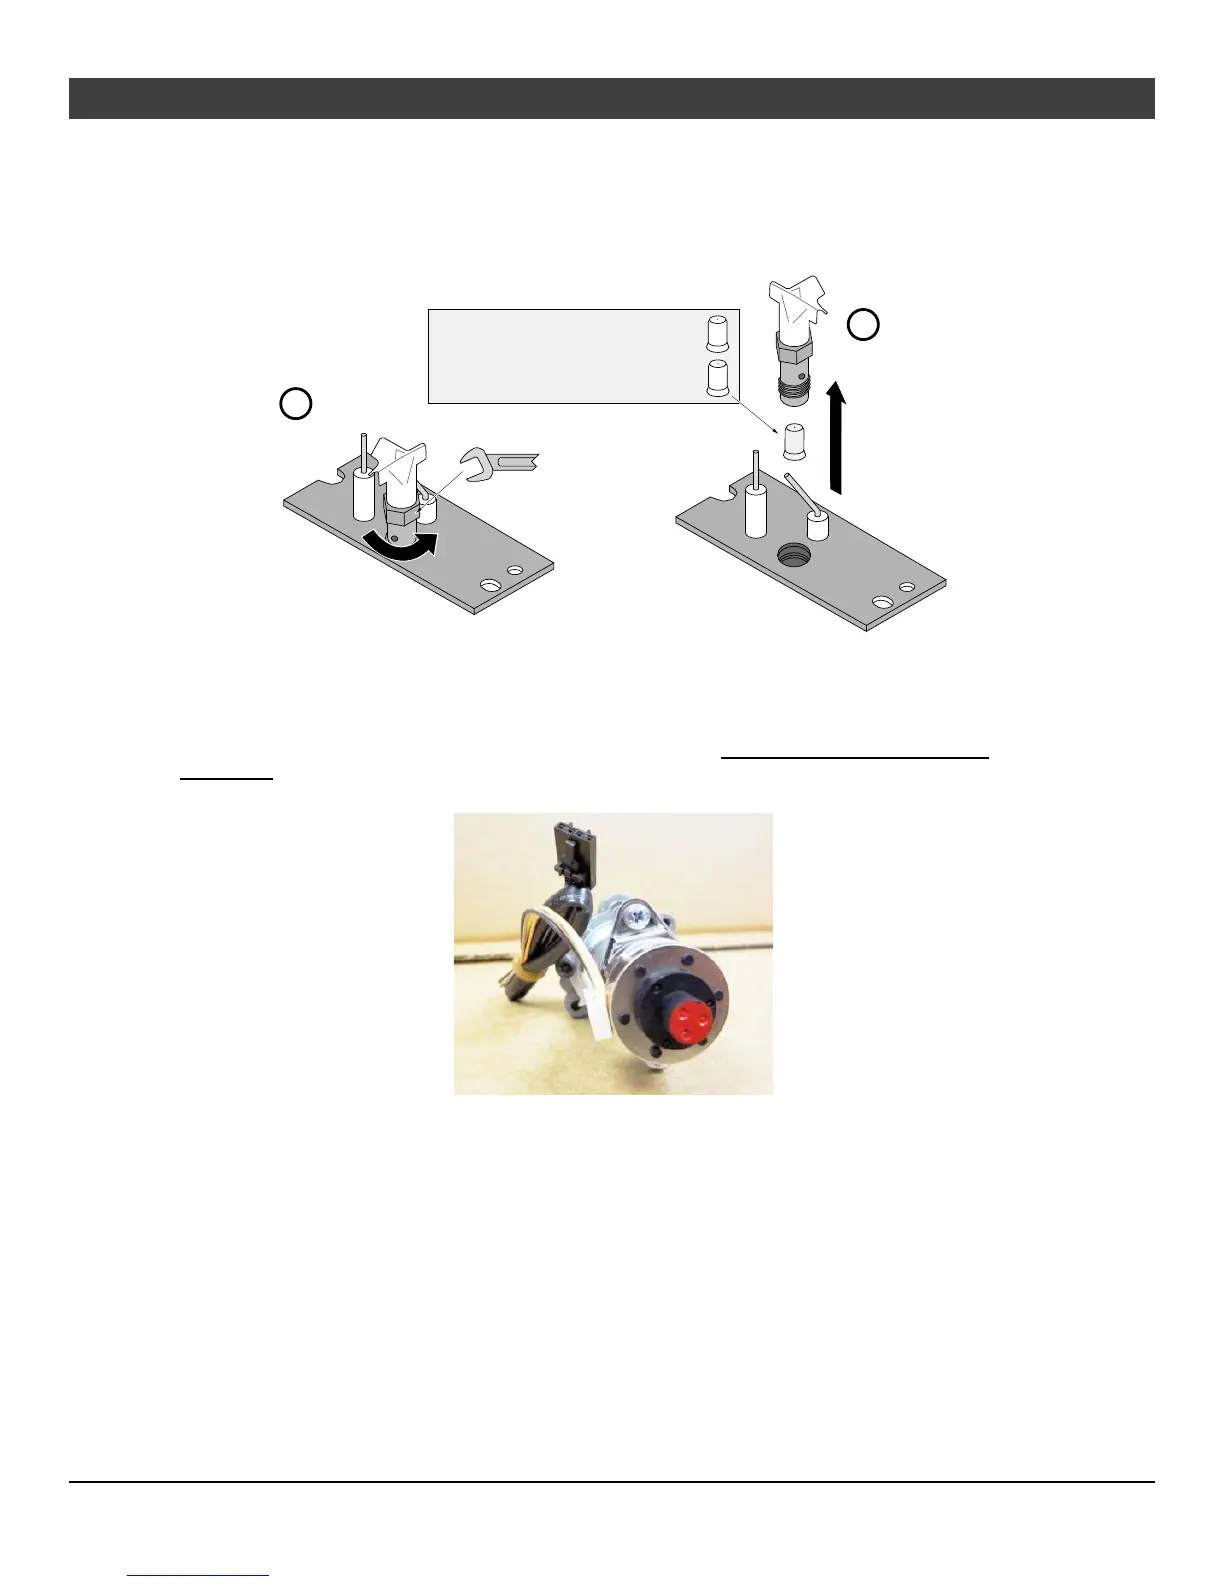
6. Install the LP pilot orifice following the directions below.
(a) Use a 7/16” open-end wrench to remove the pilot hood.
(b) Remove and discard the Natural Gas (NG) orifice. Place the LP orifice in the pilot assembly then replace
the pilot hood, tightening the pilot hood until it is snug (do not over-tighten).
7. Replace the firebox components. Restore the fireplace to the correct configuration. Install the firebacks before re-
installing the burner.
8. Access the stepper motor (shown below). The stepper motor (adjustable regulator) has an installation sheet
included with it – make sure to follow all of the directions. Disconnect the wiring from the stepper motor.
Remove the stock stepper motor and replace with the LP version. – MAKE SURE IT IS CORRECTLY
ORIENTED. Secure using the screws included with the motor – tighten to 25 Lb-inches. Leak test this area after
installation to verify proper installation. Re-attach the wiring.
9. Restore the appliance to the correct configuration. Make the gas line connection, bleed the gas line (if
applicable), start the heater and thoroughly leak-test all gas connections and the gas control valve.
a
b
7/16" Wrench
Natural Gas Orifice = .020N (3way)
.018N (2way)
LP (Propane) Orifce = .014LP
.020N
or
.018N
.014LP