38 TREK SERVICE INFORMATION August 2016
Pressing Crankset Bearings
The bearing fit is tighter in the Speed Concept than in early Madone models. If the bearings
do not slip in by hand, follow this procedure after you have installed the bearing shield
(page 28).
Notes:
• Be very careful when using the press. Too much force can crack the bottom bracket shell.
• Press in one bearing at a time.
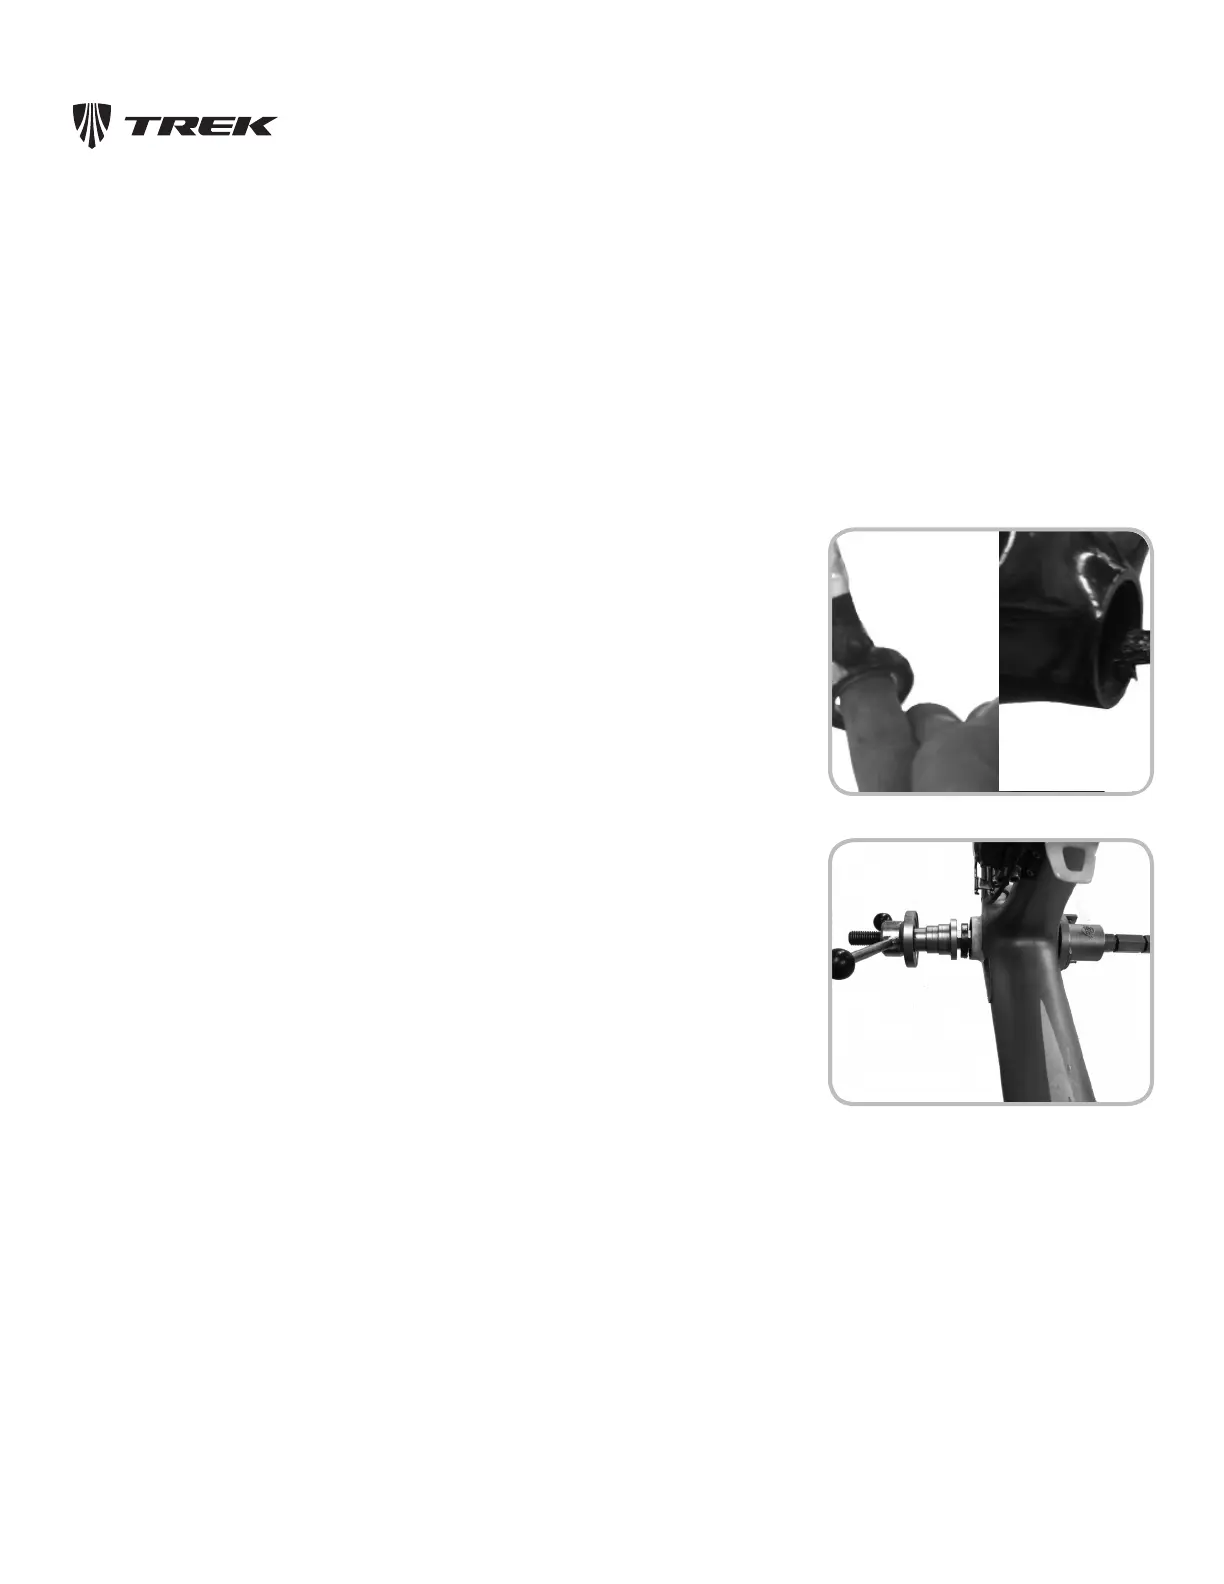
Figure 14.5. Using a headset press to install the bearings
Tools required
Installation
• Park Bearing Removal Tool BBT-90
• Brass punch
• Hammer
To Press A Bearing
1. Install the bearing shield.
2. Apply a liberal coat of grease to the contact surfaces of one bearing and the drive side
of the bottom bracket shell (Figure 14.4).
3. Press the bearing into the frame by hand as far as possible.
4. With the cup guide on the bearing side (Figure 14.5), slide the bearing press through
the bearing and frame.
5. Center the guide in the bearing.
6. Press the bearing into the bottom bracket shell until the bearing is flush with the shell.
To Remove A Bearing
If you cannot remove a bearing because it is stubborn, follow these directions.
1. Remove the crankset.
2. Slide the Park Bearing Removal Tool BBT-90 through one side of the bottom bracket
shell to the back side of the bearing.
3. Position the punch on the inside ring of the bearing.
4. Gently tap the punch with the hammer, then move 90 degrees around the bearing and
tap again.
5. Continue tapping and moving around the bearing. TAP GENTLY.
6. Go around the bearing and keep tapping.
DO NOT HIT HARD. Excessive force can damage the bottom bracket shell.
Figure 14.4. Greasing the bearing and the frame saddle