37
6.6.2 Removing the old fender and the components
To remove the old fender, follow these steps:
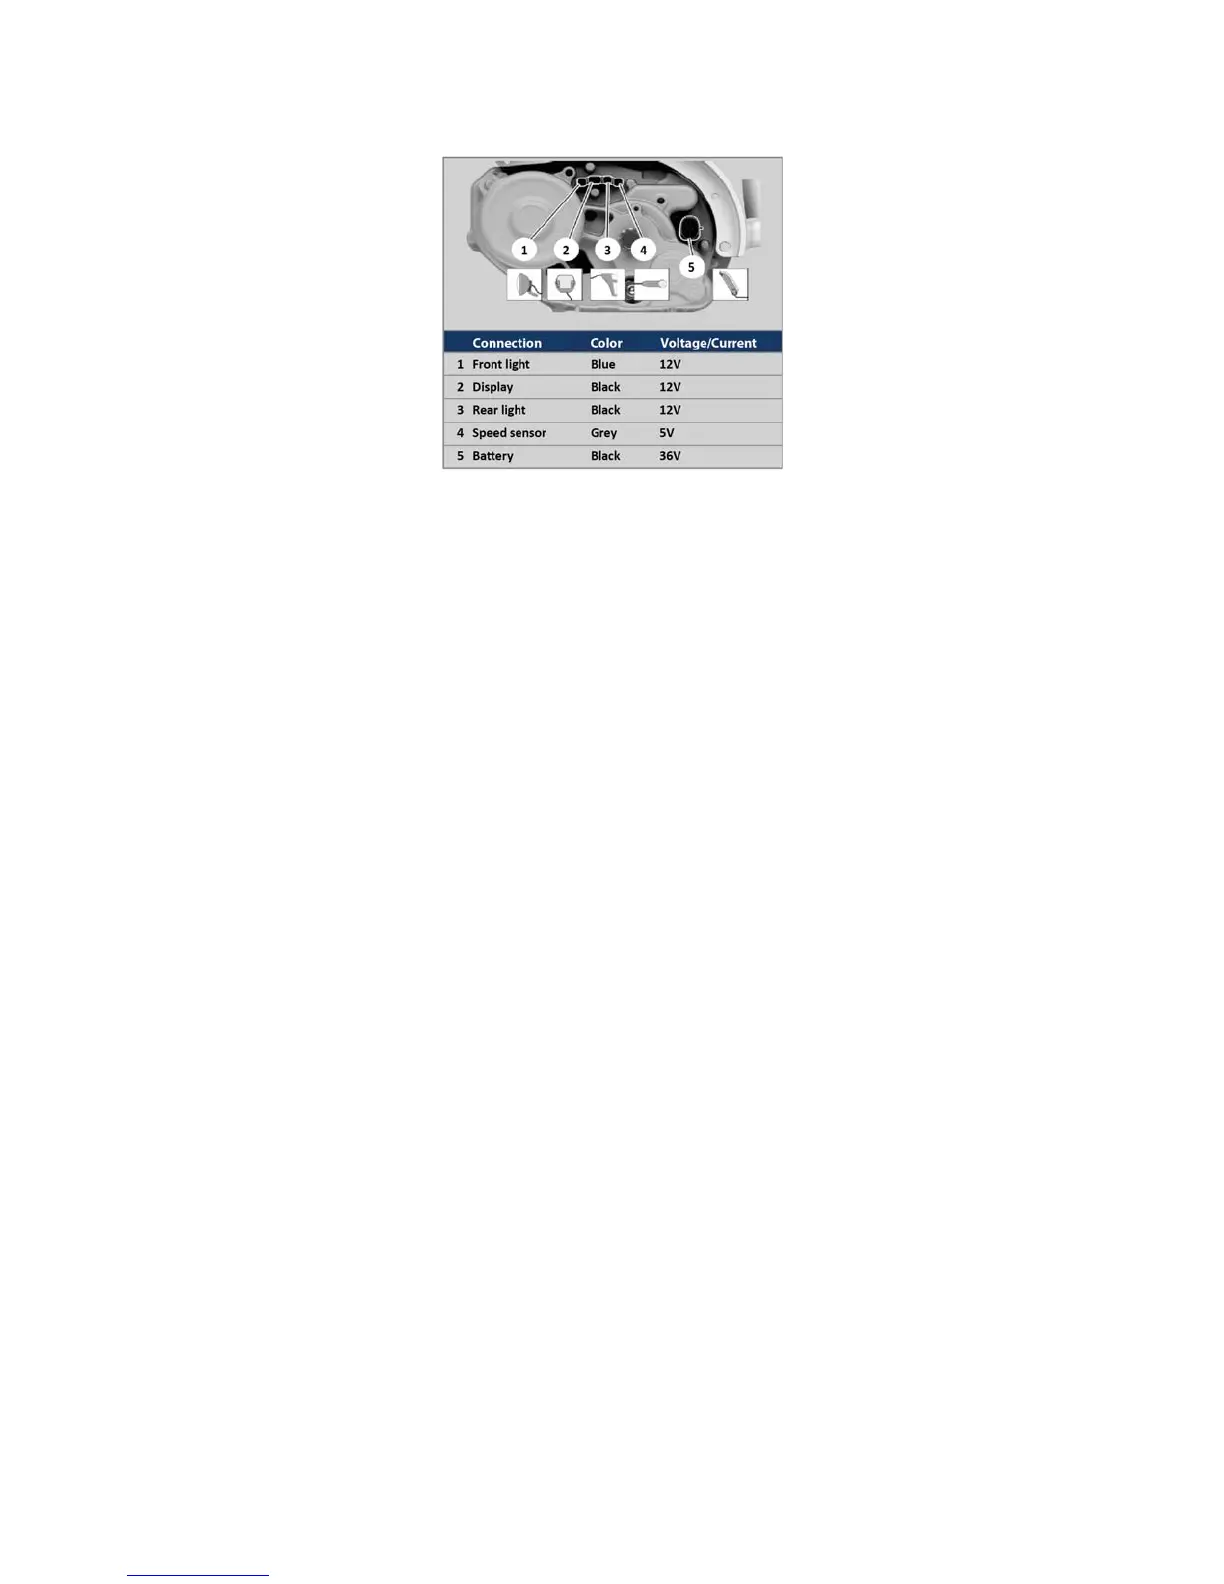
Disconnect the rear light connector at position 3
1. Remove the rear wheel, cranks and drive unit covers.
2. Remove cover of the electric connection at the drive unit.
3. Disconnect the connector of the rear light (Fig. 2, position 3), cut the cable wires at the Y-connectors, and free
the cable from drive unit and frame.
Tip. Make notes of the wiring colors connected together.
4. Remove all bolts that holds the fender to the frame and the rack.
5. Carefully remove the fender, to not damage the cable.
6. Secure the old fender in a soft jawed vice.
7. Remove the clips that hold the cable in place and carefully
free the cable from the fender.
8. Remove the rear light (or, if present, the rear light - brake
light – license plate light unit) from the fender.
9. If present, remove the rear reflector.
10. Remove the fender end piece.
Tips. Store all screws, bolts, washers and clips for re-use. Keep the old fender nearby for reference.





 To Next Page