38
6.6.3 Marking holes on the replacement fender
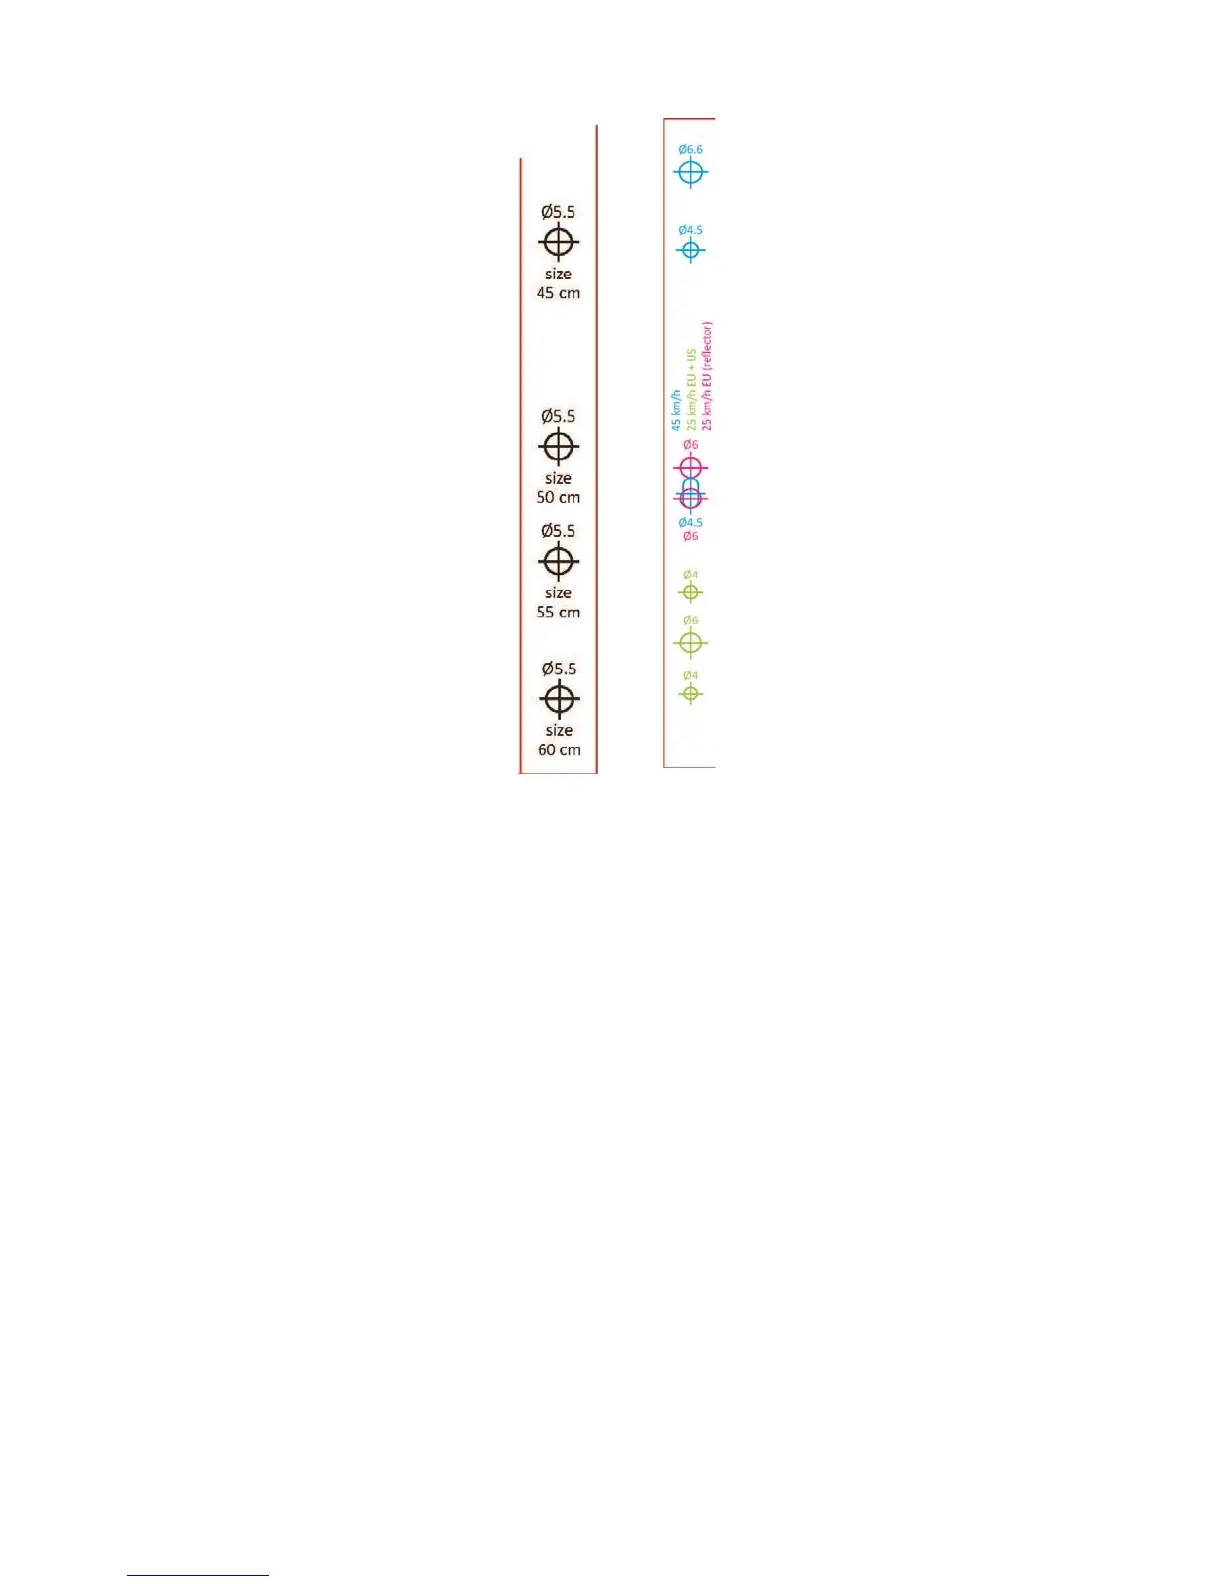
Decals on the fender to indicate the correct spot to drill the holes
The replacement rear fender has decals on its underside, showing all possible drilling locations. Reference the hole
locations in the original fender, or test fit the replacement fender on the bicycle, to determine which holes need to
be drilled.
Tip. Mark the hole locations on the decal with a marker.
It is necessary to drill three, or four, new holes for:
• The seat stay bridge (5.5mm),
• For the rear light (between 4mm and 6.5mm, refer to the decals mm),
• And on some models, a rear reflector (6mm).
6.6.4 Drilling holes in the replacement fender
To drill the marked holes, follow these steps:
1. Secure the replacement fender in a soft jawed vice.
2. Drill pilot holes in the marked location, using a drill bit one size
smaller than the diameter indicated on the fender decal. The
pilot holes will help guide the full sized drill bit to ensure the
final hole is centered.
3. Remove the fender from the vice and check the location of the
pilot holes on the bicycle.
4. Once satisfied, return the fender to the soft-jawed vice.
5. Complete the holes, using the full sized drill.
6. Use the round file to smooth and de-burr the new holes.
 Loading...