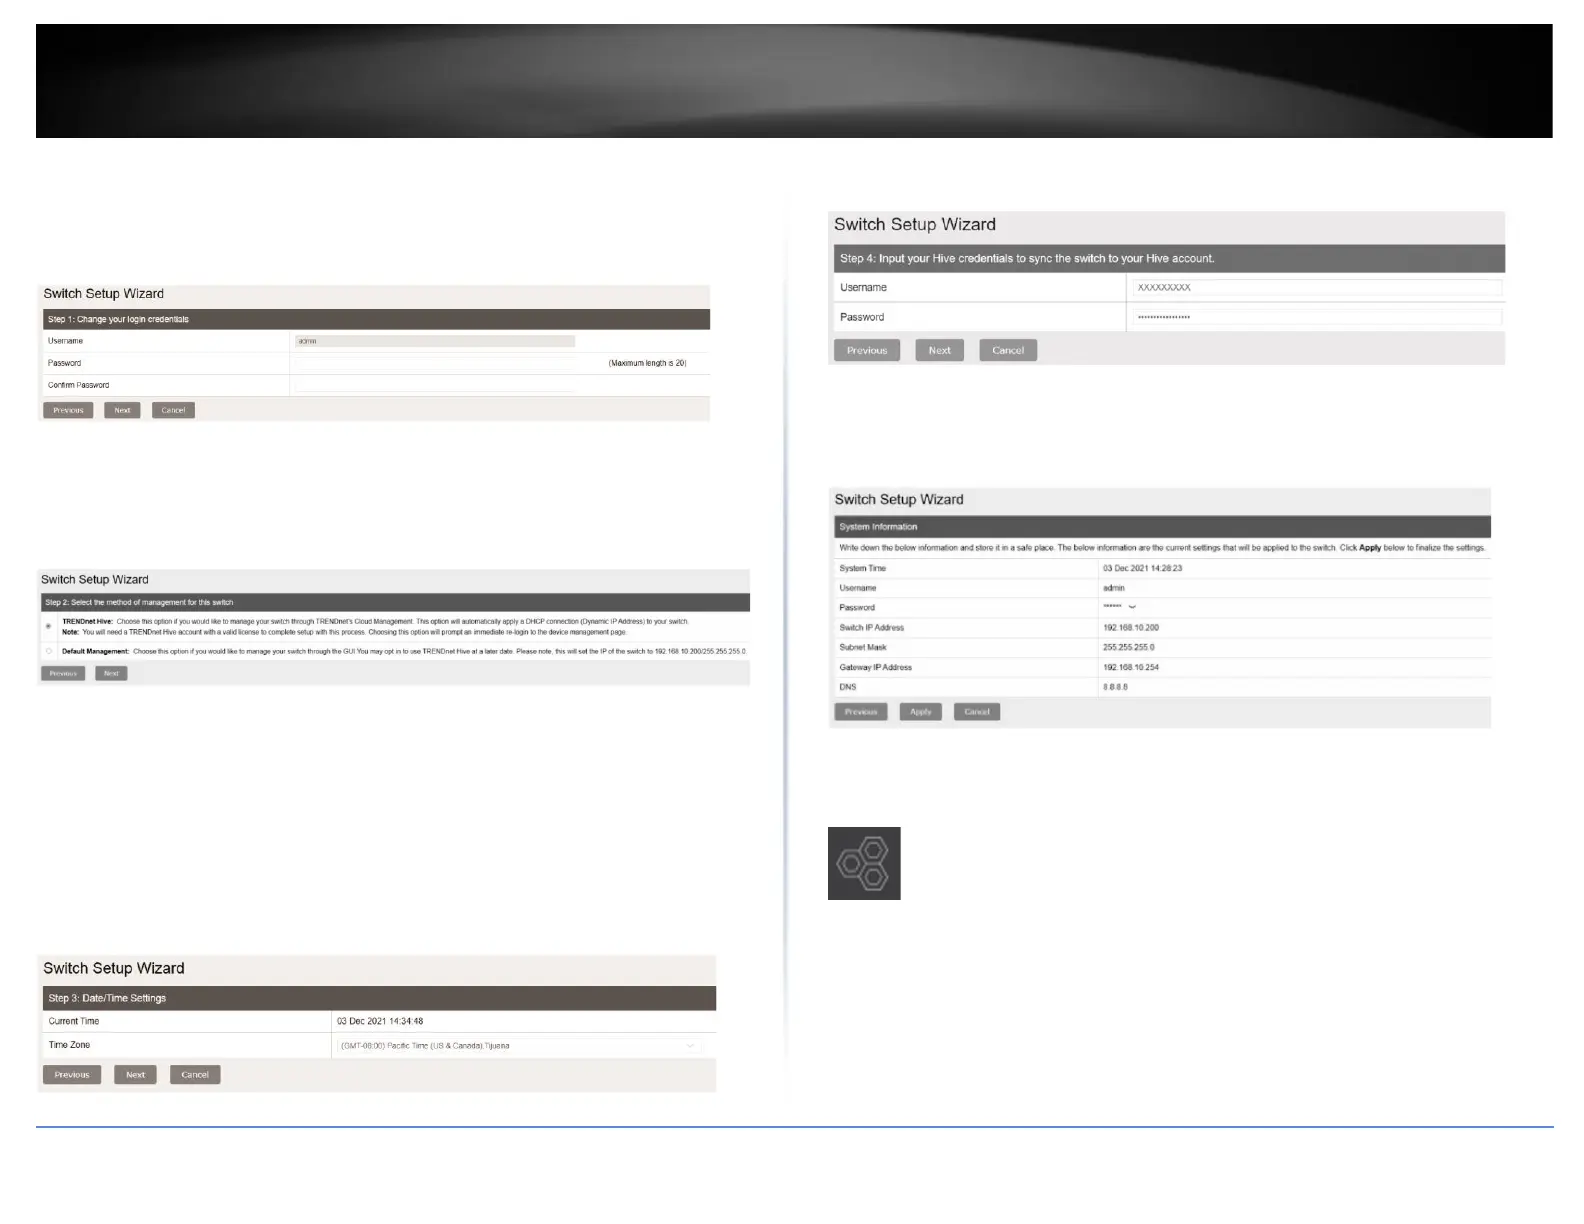
6. You can change the switch administrator password by typing in the new password in
the fields provided, then click Next.
Note: If entering a new password, please note that you will need to use the new
password when logging into the switch management page for local management access
moving forward.
7. Select the method of management and click Next:
-TRENDnet Hive: Manage your switch with TRENDnet's Cloud Management. This option
will automatically apply a DHCP connection to your switch.
-Default Management: Manage your switch through the GUI. You may opt-in to use
TRENDnet Hive at a later date.
8. Proceed to the following sections depending on the selection above.
TRENDnet Hive
Follow these steps if you have selected TRENDnet Hive in the setup wizard.
1. Change your computer's network adapter settings to obtain an IP address
automatically, as the TRENDnet Hive option automatically applies a DHCP connection to
your switch.
2. Select your Time Zone, then click Next.
3. Enter the user account credentials for your TRENDnet Hive Cloud Management
account to register the switch with your account, then click Next.
4. The summary page will display all of the configuration settings that were applied
through the setup wizard. Click Apply to complete the setup wizard.
Note: You may want to note the new password and IP address settings for local
management access to the switch.
5. To verify the switch is now successfully registered with your TRENDnet Hive Cloud
Management account, the Hive button in the top right will be green to indicate
successful registration.
Default Management
Follow these steps if you have selected Default Management in the setup wizard.
1. Configure the switch date and time settings, then click Next.