© 2018 Triacta Power Solutions LP All Rights Reserved
Meter Head Servicing or Replacement
Before removing the Meter Head, be sure to turn off all the power feed/s to the Triacta
GATEWAY Meter Base unit. Always use a properly rated voltage sensing device to confirm
power is off.
Push up firmly on the Meter Head to disconnect the Meter Head edge connectors from the
Voltage, Wiring and Communication Modules installed in the Meter Base unit.
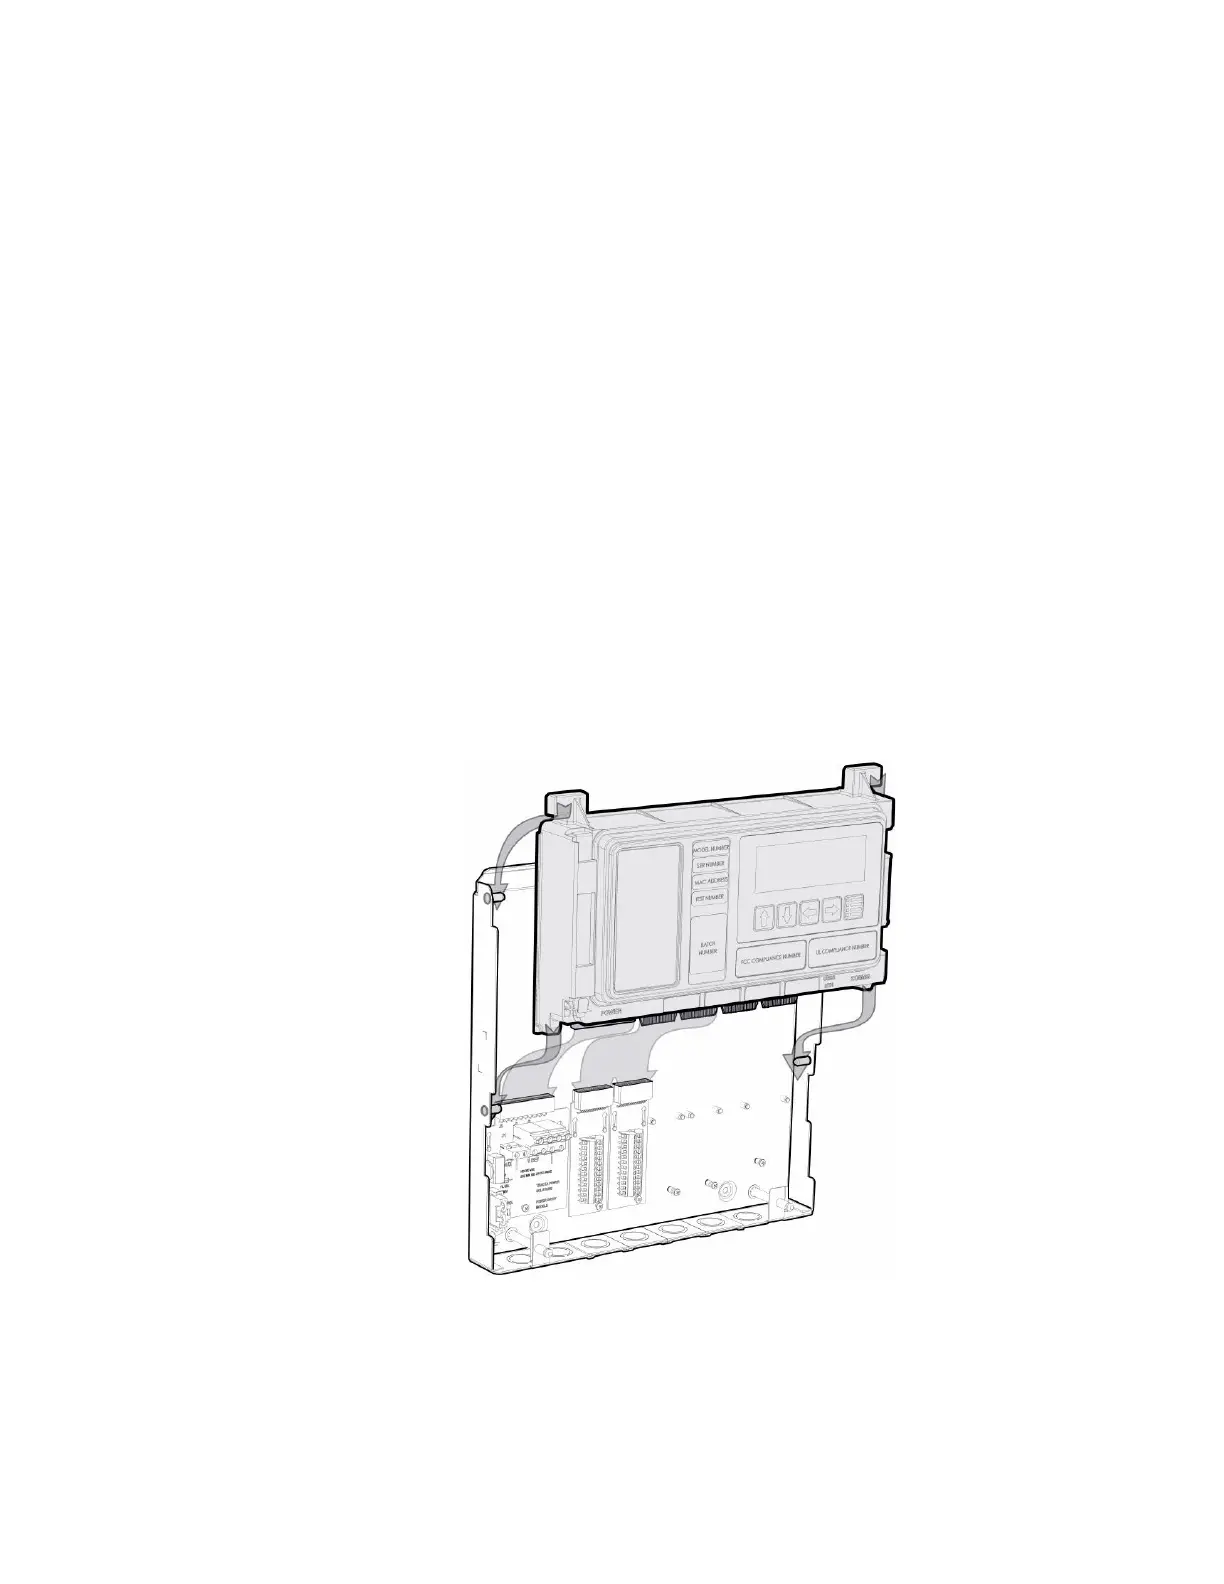
Slide the Meter Head up so that the alignment tabs on the Meter Head go behind the alignment
pins on the Meter Base unit as shown in the diagram below.
To replace/reinstall the Meter Head, slide the Meter Head down from above so that each of the
alignment tabs on the Meter Head unit go behind the alignment pins on the Meter Base as
shown in the diagram below.
Push down firmly on the Meter Head unit to fully insert the Meter Head unit edge connectors
into the Voltage, Wiring and Communication Modules installed in the Meter Base unit.
In most cases the Triacta GATEWAY will be shipped with the Meter Head unit pre-assembled
into a Meter Base unit. Alternately, the Meter Base unit can be pre-installed early in the
construction phase (ie as the electrical panels are being built) and the Meter Head unit can be
inserted later when the installation is ready to be commissioned.
Figure 21: Inserting the Meter Head Unit