Do you have a question about the Trio MC664 and is the answer not in the manual?
Users must ensure no possibility of injury or damage during installation and use of control systems.
Details on processors, axes, memory, and other specifications for MC664 and MC664-X models.
Recommends using the latest version of Motion Perfect 4 software.
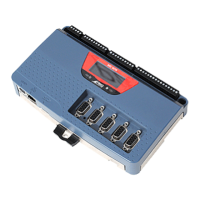
Description of the 30-way high density input connector and its pin assignments for power and I/O.
Details on RJ45 Ethernet and EtherCAT connectors for programming and network communication.
Pinout and function details for the 8-way Mini-DIN RS232 serial port.
Pinout and function details for the 9-way D-type sync encoder connections.
Information shown on the LCD display during power-up and when WDOG is active.
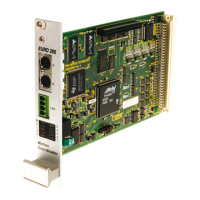
Step-by-step guide for fitting expansion modules, including cover removal and securing.
Table detailing unit, axis, configuration, and system error codes with their meanings.
Maximum number of modules and constraints on combining half and full height modules.
Explanation of how slot numbers are allocated by the system software.
Details on registration inputs (24V) and common OV return for the Panasonic interface module.
Information on transmit and receive RJ45 connectors for Panasonic 'Realtime Express'.
Description of LED indicators for module status, errors, and status signals.
Details on registration inputs (24V) and common OV return for the SERCOS interface module.
Information on sercos fibre-optic transmit and receive connectors for the SERCOS interface module.
Description of LED indicators for module status, errors, and SERCOS phase.
Details on registration inputs (24V), OV return, and power inputs for the SLM interface.
Pinout for the 15-way D-type SLM connector, detailing axis and I/O connections.
Description of LED indicators for module status and errors for the SLM interface module.
Details on voltage outputs, bidirectional registration, and registration inputs for the flexible axis interface.
Description of LED indicators for module status and errors for the flexible axis interface.
Pinout for incremental, absolute, and pulse & direction encoder signals.
Mapping of encoder connector pins to axes for 8-axis (P874) and 4-axis (P879) versions.
Guide for pushing and securing the Anybus® module into the Trio Expansion Interface.
Details on registration inputs (24V) and common OV return for the EtherCAT interface module.
Information on the RJ45 Ethernet master connector for EtherCAT communication.
Description of LED indicators for module status, errors, and EtherCAT activity.
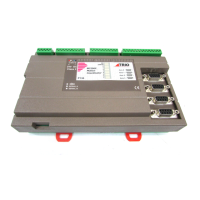
Instructions for mounting the controller onto a back plane using mounting clips and screws.
Ensuring ventilation slots are kept clear for adequate airflow through the module.
| Power Input | 24VDC |
|---|---|
| Communication | Ethernet, USB |
| I/O | Digital and Analog I/O |
| Storage | 4 GB Flash |
| Ports | Ethernet, USB |
| Operating Temperature | 0°C to 50°C |