Bar mixers
8
Offer the shower valve to the fittings and ensuring
the sealing washers are place, screw the unions
onto the fittings.
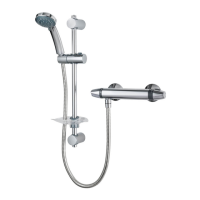
Straight fittings
The straight connectors can be used to connect to
1/2” BSP female elbow fittings in solid wall
installations. The terminating outlet elbows must
be aligned horizontally and centred to 150mm.
The hot and cold supply pipes must be anchored
rigidly in order to support the valve and prevent
movement after installation.
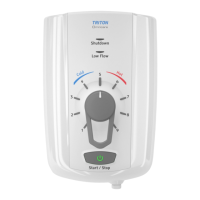
If installing in hollow walls or laminate cubicles,
the fittings are supplied to compress onto the wall
to support the shower valve (fig.10).
The maximum thickness of wall is approx. 20mm.
Sufficient room must be left on the fitting to
accommodate the compression nut and olive. At
the front end, allowance must be made to accept
the shower union and collar.
Flush out the pipework in accordance with
Water Regulations and Byelaws.
Connect 15 mm pipes using standard
compression nuts and olives (fig.11).
Screw the supplied collars onto the fittings until
tight to the wall.
Offer the shower valve to the fittings and ensuring
the sealing washers are place, screw the unions
onto the fittings. If installing with a combi
multipoint system, ensure the flow limiters are
fitted.
LEAK TESTING
Fit the hose to the outlet and direct it to waste.
Open the supplies and test for leaks in the valve
connections. Remedy any leaks if necessary.
COMMISSIONING
Ensure that both hot and cold water supplies are
fully open and at (or near to) their design
temperature and pressures and are within the
requirements as stated.
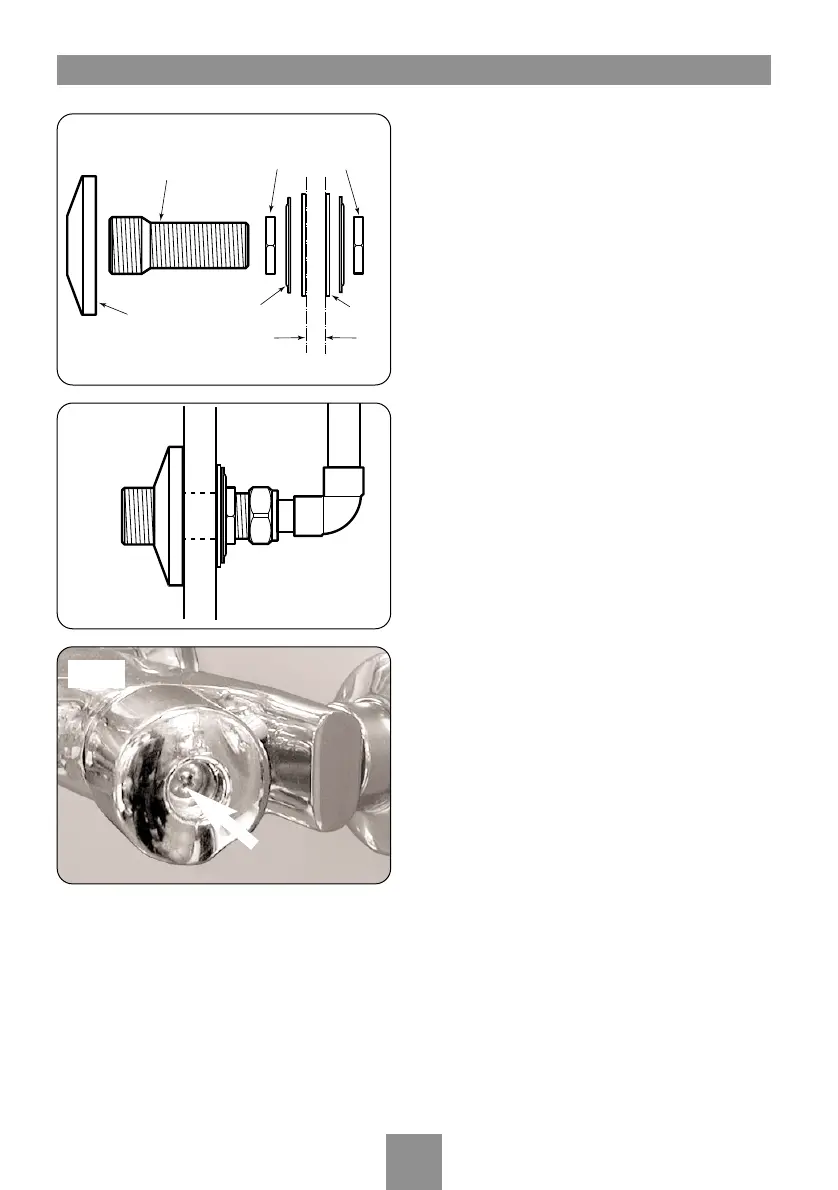
Ensure the temperature knob (right side) is
rotated fully anti-clockwise (press override button
to achieve maximum temperature setting).
Ensure the sprayhead is directed to waste.
Start the water flow by turning the flow control
(left side) anti-clockwise.
Fig.12
 Loading...