~ 13 ~
3.4 CHECKING THE CHASSIS DEPTH
All models of the Powrtouch Freedom are designed to fit on standard chassis depths of either
150mm or 200mm approximately.
3.5 SPECIAL MOUNTING PLATES
On some recently manufactured caravans (in particular Hymer) special mounting plates may
be required. These plates can be supplied (for a small additional cost) and are fitted by nuts
and bolts using pre-drilled holes in the chassis. Once these plates are fitted then the
mechanical assembly of the unit will proceed as detailed below.
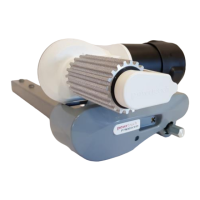
3.6 MECHANICAL ASSEMBLY
For safety reasons it is recommended that the fitting of the Powrtouch Freedom should
be undertaken on a flat hard standing. Before raising the caravan, ensure the handbrake is
on and then it can be raised as required (using trolley jack and/or axle stands) and secured in
position using the caravan steadying legs with supporting blocks and wheel wedges as
necessary; it is then helpful to lay down a ground sheet. Remove all items from the packaging
onto the protective sheet. Ensure both rollers are in the DISENGAGED position, as the unit will
not fit correctly otherwise. Loosely assemble the left-hand motor unit, right hand motor unit and
alignment tube and place under the caravan/trailer.
Wherever possible the Single Axle Powrtouch Freedom should be fitted in front of the
caravan/trailer road wheels, if this is not possible then it is acceptable to fit the unit behind the
road wheels.
Using appropriate support blocks raise the loosely assembled unit into an approximate
position, fit the clamps and U-Bolts (see Fig 3) to the chassis (do not tighten at this point).
Adjust to the correct place using the 19mm spacer provided between the tyre and the drive
roller (on each side of the trailer). Please note the spacer blocks should be a sliding fit between
the tyre and the coarse drive roller.
Also adjust the position of the drive rollers in relation to the tyres by sliding the motor units on
the alignment tube until the maximum amount of roller is in contact with the tyre tread without
any part of the unit fouling the tyre or chassis. It is advisable to leave a minimum 10mm gap
between the Powrtouch Freedom unit and the inside wall of the tyre, this is to allow for the
expansion of the tyre when the rollers are engaged. Before tightening the u bolts to the
recommended 35 ft lbs tighten the alignment tube pinch bolts and lock nuts making sure the
alignment tube is approximately centralised; it is then advisable to check the roller / tyre gaps
again. The assembly should then be secured by tightening the U-bolts to the recommended
torque of 35 ft lbs using a torque wrench.
Check both the above alignments at least once during the process and on completion.
Once the motor assemblies are completed the stop blocks should now be fitted on the chassis
in a position directly behind the Powrtouch clamping plates to ensure that the motor
assemblies do not slide along the chassis away from the tyres when the drive rollers are
engaged to the tyres (see Fig. 3). Once correctly positioned they can be tightened using the
locking bolt and nut with a torque wrench spanner set at 35 ft lbs.