15
CONNECTIONSCONNECTIONS
CONNECTIONSCONNECTIONS
CONNECTIONS
CONNECTING TO CONNECTING TO
CONNECTING TO CONNECTING TO
CONNECTING TO
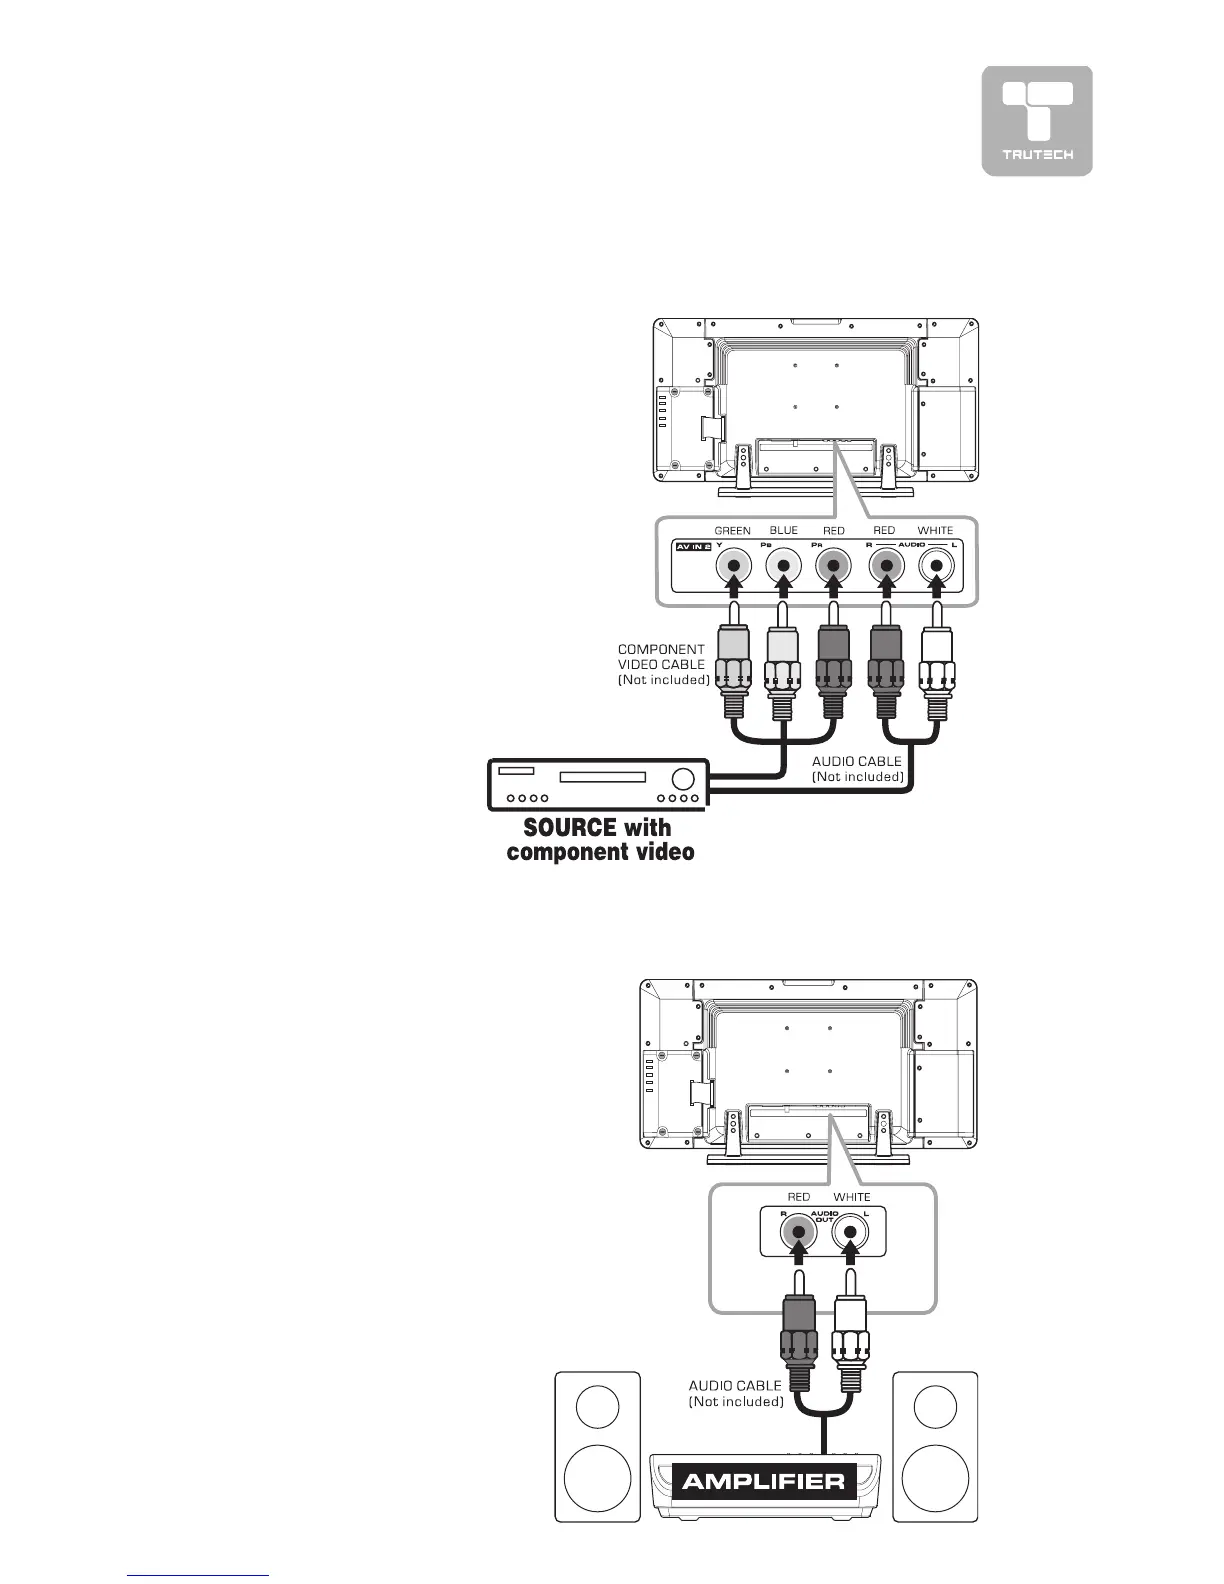
SOURCES WITH COMPONENT VIDEO OUTPUTSOURCES WITH COMPONENT VIDEO OUTPUT
SOURCES WITH COMPONENT VIDEO OUTPUTSOURCES WITH COMPONENT VIDEO OUTPUT
SOURCES WITH COMPONENT VIDEO OUTPUT
(DVD - only 480i, 480p, 720p & 1080i are supported)(DVD - only 480i, 480p, 720p & 1080i are supported)
(DVD - only 480i, 480p, 720p & 1080i are supported)(DVD - only 480i, 480p, 720p & 1080i are supported)
(DVD - only 480i, 480p, 720p & 1080i are supported)
Devices with component video output must
be connected to the AV2 input:
Connect the three video outputs (Y, Pb,
Pr) from the source to the corresponding
video inputs on this unit (Component video
cable not included).
Connect the right (red) and left (white)
audio output from the source to the right
(red) and left (white) input on this unit
(Audio cable not included).
Make sure you connect both audio and
video from the same source to AV2.
Note: Note:
Note: Note:
Note: Please refer to the user manual for
your component video source for more in-
formation and connection details.
CONNECTING AN AUDIO AMPLIFIERCONNECTING AN AUDIO AMPLIFIER
CONNECTING AN AUDIO AMPLIFIERCONNECTING AN AUDIO AMPLIFIER
CONNECTING AN AUDIO AMPLIFIER
This connection allows you to use an audio
amplifier and external speakers.
Connect the right (red) and left (white)
audio OUTPUT from this unit to the right
(red) and left (white) audio INPUT on your
amplifier. Refer to your amplifier’s user
manual for more information.
Note :Note :
Note :Note :
Note :
To control the audio, both the TV and the
amplifier must be turned on, and the volume
of the amplifier must be set above 0, or
you will not hear any sound.
If you want to hear the volume of the
amplifier only. Press the volume –
button of TV to decrease the volume
or press the MUTE button of remote
control to turn off the sound.
 Loading...