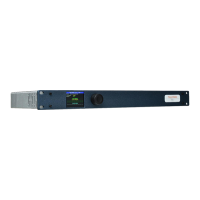
The TallyMan TM1 Mk3+ is a control system designed for redundancy, ensuring continuous operation even during unexpected issues or maintenance. It operates on an A-B failover basis, automatically deactivating the Primary controller and activating the Backup controller upon a failover event. This system protects against power failures, network interruptions, or system failures, significantly improving operational resilience. The system supports both automatic and manual failover modes, allowing operators to perform maintenance with minimal disruption.
Terminology:
- Primary: The unit expected to be in use during normal operation.
- Backup: The unit ready to take over from the Primary in a failover event.
- Active: The TM1 (Primary or Backup) with functional control over the redundancy system.
- Standby: The TM1 working correctly and ready to take over operations when required.
- Activating: A TM1 in the process of becoming Active.
- Deactivating: A TM1 in the process of deactivating to enter Standby mode.
- Unavailable: A TM1 not available to be either Active or in Standby mode.
- Failover Mode: Changes between Auto and Manual failover operations.
- Automatic Failover: The system monitors itself for failover events and implements the failover action.
- Manual Failover: The user can manually change the Active unit; the system will not failover automatically in this mode.
- Auto Armed: Failover mode is Auto, and the system is ready for a failover event (only if Primary is Active).
- Auto Triggered: Failover mode is Auto, and the system has triggered a Failover action (Backup TM1 is Active).
- Auto Unavailable: Failover mode is Auto, but the system cannot act on a failover event due to physical connection, network issues, or system errors.
System Overview:
The Primary system controller performs operational functionality. Once configured as Primary, it remains so until the configuration changes. The Backup system controller, also configured, operates in Standby mode, continuously synchronizing with the Primary and monitoring its health. In a failover event, the Backup takes control by deactivating the Primary and becoming Active. Synchronization is from Primary to Backup. If the Backup becomes Active, the Primary will not remain synchronized. Restoring the Primary to Active is a manual operation, after which the Backup returns to Standby and resynchronizes.
The Active status indicates the controller currently in control. Only one unit can be Active at any time.
Writing Configurations:
Configurations are performed offline using TallyMan software. Files are written to the Primary controller via its NIC1 IP address. The Primary loads the configuration, reconfigures itself, and then automatically writes the configuration to the Backup unit, which undergoes the same process.
Connecting to the System:
Each system controller has two Ethernet NICs for two separate networks. Configuration and connection to the system use static IP addresses assigned to these NICs, specifically NIC1. A virtual IP (VIP) address is also assigned to each NIC for communication with external equipment outside the redundancy 'bubble'.
Ethernet:
Each TM1-Mk3+ unit supports two separate networks. For redundancy, both units must use the same subnets for each NIC. For example, if Primary NIC1 is on 192.168.10.XXX, Backup NIC1 must also be on 192.168.10.XXX. Each NIC port hosts a Virtual IP address (on the same subnet as the permanent IP address) defined in the TallyMan configuration software. These VIPs are dynamically applied to the active unit. In a failover, the VIP is removed from the previously active unit and applied to the newly active unit, ensuring a seamless transition and continuous communication for external equipment. A failsafe prevents both TM1-Mk3+ controllers from using the same VIP simultaneously. If the deactivating unit cannot disable VIPs, the Backup unit can shut down the Primary unit.
Backup Link:
Primary and Backup controllers communicate via two links: the Direct Link cable and the NIC1 Ethernet port (IP Link). Both links are essential for monitoring and correct redundant system operation. Their status is displayed on the TM1-Mk3+ front panel in redundancy mode.
GPIO and Serial Connections:
GPIO and Serial connections can be set up using a VIP connection (preferred) or a Changeover device.
- VIP Connection: Serial and GPIO devices are moved outside the redundancy 'bubble' and interface via VIPs. A GPIO expansion device (e.g., TSL ESP-1R+) connects to the system via the VIP address, communicating without needing to know which TM1 is Active. Ethernet-to-Serial converters can be set up similarly.
- Changeover Device: A changeover device (e.g., TSL SW2x1) routes GPIO and Serial connections from both Primary and Backup TM1 units. The output connects to the equipment. The changeover unit is controlled by a TMRP GPO, reflecting the current system status. Multiple TMRP units can be paralleled for redundancy.
Hardware Requirements:
To build a redundant system, you need:
- 1 x Redundancy license
- 2 x TallyMan TM1-MK3+ controllers
- 1 x Direct Link cable
- 1 x TMRP unit
- Associated networking, power supplies, and cables.
TallyMan Redundancy Package:
Includes 2x TM1-Mk3+ system controllers and 1x TallyMan Redundancy Kit.
TallyMan Redundancy Kit:
For existing single TM1-MK3+ systems, includes:
- 1 x Redundancy licence
- 1 x Direct Link Cable for auto negotiation and synchronization
- 1 x TMRP 4-button LCD control panel for monitoring and managing failover, with external triggers for alarming and controlling switchboxes
- 1x TMRP 1RU mounting panel
- 1x TMRP power supply
TM1-Mk3+ units are designated as Primary or Backup. The Primary is for normal operation, while the Backup is in Standby, monitoring the Primary. In a failover, the Backup becomes Active, and the Primary deactivates. During normal operation, both units synchronize state changes. If the Backup is Active, the Primary is not synchronized. When the Primary is restored to Active, the Backup resynchronizes.
Hardware Installation (TM1-MK3+):
- Connect the Direct Link cable between the WatchMan ports on both units.
- Connect Ethernet cables for each network connection.
IP Addressing (TM1-MK3+):
Use the front panel encoder and display:
- Press the encoder to enter the Setup Menu.
- Set up IP addressing for NIC 1:
- Scroll to "IP 1" and press to display "IP Address 1 Menu".
- Scroll to "Address", press to highlight the first octet.
- Scroll to set the value, press to highlight the next octet. Repeat for all octets.
- Repeat to set Netmask and Gateway.
- Scroll to "Save" and press.
- If using a second network interface, repeat step 2 for "IP 2".
- In the Setup Menu, scroll to "Back" and press to return to the main display.
TallyMan Redundancy Panel (TMRP):
A compact switch button unit for status display and control of the redundant system.
- Mounting: Supplied with a 1RU mounting bracket and two blanking plates, mountable in three positions.
- Power: DC power input (12Vdc PSU supplied) and PoE (Power over Ethernet). Either or both can be used for resilient power.
- Connections: Power (12Vdc or PoE) and Ethernet are required. GPO is available for external changeover units or status monitoring.
- DC Power Connector: 12Vdc
- Factory Restore Button: Restores factory settings (resets IP address and password).
- Ethernet (PoE) Connector: 100Base-T Full Duplex, PoE Class 3, 12 Watt.
- GPO Connector (Open Collector Outputs): GPO 1 (Primary Active), GPO 2 (Backup Active), GPO 3 (System is Armed).
- 5V Output: +5Vdc (800mA Max).
TMRP Setup:
Upon power-up, the TMRP displays current IP settings and model number, then the status of the TallyMan redundancy system. In its default unconfigured state, buttons show "No Primry" and "No Backup", indicating no connection to controllers. To configure, assign an IP address within the same subnet as the Primary and Backup's NIC1 port, and include it in the system configuration. Setup is done via a web page.
TMRP Web Page Access:
- Enter the TMRP's IP address in a web browser.
- Log in: Username "tallyman", password "control".
- Change password (optional): Enter current, new, and confirm new password, then save.
- Change IP settings (optional): Enter new IP address, subnet mask, gateway, then save. TMRP reboots.
- Change TMRP label (optional): Enter new label, then save.
Loading a New Configuration (TMRP):
- On the TMRP web page, go to "Configuration" and click "Load Configuration".
- Browse and select the configuration file, then click "Open".
- Click "Upload".
- Click "Reboot" to apply the configuration.
Upgrading TMRP Firmware:
- Prepare the unit: On the TMRP web page, go to "Upgrade" and click "Unit Upgrade", then "Upgrade".
- Upgrade on PC: Open the TMRP_Upgrexe application. Check/enter the TMRP's IP address, click "Connect", then "Program". After completion, click "Ok" to reboot.
- On the TMRP web page, go to "Upgrade" and click "Web Upgrade".
- Locate and select the web upgrade file, then click "Open".
- Click "Upload".
Logging Out of TMRP Web Page:
Click "Logout" on the web page.
Software Installation (TallyMan):
- Open TallyMan software: Double-click the icon.
- Select "Configuration", then "OK".
Creating a New Configuration:
- Create new configuration/set system controller:
- File > New.
- Platform = TM1-Mk3+.
- Apply.
- Set Primary IP addresses:
- In "System Properties", click "Edit IP table".
- For NIC1, enter Primary NIC1 IP Address, then "Update selection".
- For NIC2, enter Primary NIC2 IP Address, then "Update selection".
- "Finished".
- Add Backup unit:
- In "System Properties", click "Add New Component".
- Type: Backup System.
- Name: Backup.
- OK.
- In "Backup Controller IP address table", for NIC1, enter Backup NIC1 IP Address, then "Update selection".
- For NIC2, enter Backup NIC2 IP Address, then "Update selection".
- "Finished".
- Set VIP addresses:
- In "System Properties", click "Edit Virtual IP table".
- For NIC1, enter NIC1 VIP address, then "Update selection".
- For NIC2, enter NIC2 VIP address, then "Update selection".
- "Finished".
- Set TMRP addresses:
- In "System Properties", click "Edit TMRP IP address table".
- Enter TMRP IP address, then "Add to list".
- "Finished".
- Write the configuration:
- Click "Write Configuration".
- "Yes" to confirm.
- "Download and Restart".
- The configuration is automatically written to the Backup by the Primary unit once operational.
- Connect to the system:
- Click "Connect to System".
- "Yes" to save current offline file (optional).
- Enter file name and "Save" (optional).
- "Connect".
- Check/modify device IP assignment:
- Select a device in the tree.
- Set Communications.
- Select NIC1 or NIC2 VIP.
- OK.
- Repeat for all devices.
Modifying an Existing Configuration:
- Open an existing config: File > Open, select file, Open.
- Add a Backup component:
- In "System Properties", click "Add New Component".
- Type: Backup System.
- Name: Backup.
- OK.
- Set the Backup unit's IP addresses:
- In "Backup Controller IP address table", for NIC1, enter Backup NIC1 IP Address, then "Update selection".
- For NIC2, enter Backup NIC2 IP Address, then "Update selection".
- "Finished".
- Set the Backup unit's VIP addresses:
- In "Virtual IP address table", for NIC1, enter NIC1 VIP address, then "Update selection".
- For NIC2, enter NIC2 VIP address, then "Update selection".
- "Finished".
- Set the TMRP addresses:
- In "TMRP IP address table", enter TMRP IP address, then "Add to list".
- "Finished".
- Write the configuration:
- Click "Write Configuration".
- "Yes" to confirm.
- "Download and Restart".
- Connect to the System:
- Click "Connect to System".
- "Yes" to save current offline file (optional).
- Enter file name and "Save" (optional).
- "Connect".
- Check/modify device IP assignment:
- Select a device in the tree.
- Set Communications.
- Select NIC1 or NIC2 VIP.
- OK.
- Repeat for all devices.
Operation - TM1-Mk3+ Front Panel:
The front panel display shows the status and control of the redundancy system.
- Standalone Mode: Displays "Redundancy: Not Setup", Mode: Standalone, Unit: Running, Power: OK, Local: Inputs/Outputs/Relays status, and Redundancy System Status.
- Redundancy Mode: Displays "Redundancy: Enabled", Mode: Primary/Backup, Unit: Running/Activating/Deactivating, Power: OK, Local: Inputs/Outputs/Relays status, Redundancy System Status, Redundancy Failover Mode, and Backup Link Status.
Status Descriptions:
A detailed table describes possible values and meanings for Mode, Unit, Power, Redundancy, Local Inputs/Outputs/Relays, Status, Failover, and Backup Link.
Provides additional feedback and control options.
- Press encoder to enter Setup Menu.
- Scroll to "Redundancy" and press.
The menu shows: Unit's current mode, Unit's current status, Backup Link, Partner Unit's status, Redundancy status, Failover (Option), TMRP Connections (Option), Activate Unit (Option), and Back.
TMRP Connections:
To view configured TMRPs and their status, enter the "TMRP Connections" menu. It displays IP addresses and status of TMRPs (max three units).
Normal Operation:
Once configured, TM1-Mk3+ front panels and TMRP display:
- Redundancy: Enabled
- Left unit: Primary
- Right unit: Backup
- Primary: Active
- Backup: Standby
- Failover Mode: Auto (Armed)
- Direct Link cable: OK
- IP Link: OK
This is the normal state: Primary Active, Backup ready, Failover mode Auto Armed, and both Backup Links Ok.
TMRP Operation:
TMRP buttons provide status information (Active Unit, Normal State, Option Available, Warning) and controls. The "Enable" button must be pressed and held to show control options, which depend on the redundancy system's state.
- Changing Failover Mode (Auto to Manual / Manual to Auto): Press and hold "Enable". Buttons with control options turn amber and blink. Press the "F.Over Mode Manual" (or "F.Over Mode Auto") button. Release both buttons. The selected option flashes quickly for 2 seconds to confirm the change.
Failover Events:
A failover moves Active status from Primary to Backup. Both units monitor each other's health. A unit is healthy if:
- Powered and fully booted.
- Stable network connections on the same LAN for each NIC (second NIC ignored if only one configured).
- Both Backup Links (Direct Link, IP Link) are connected.
- Valid configuration with redundant setup.
- In "Running" state (internal processes running).
Failure in any of these points triggers a failover.
- Scenarios: Network failure, software failure, power failure, switch failure, processor choke, network separation, hardware failure, communications delay.
- Resulting Scenarios: Normal, Error, Remote Shutdown.
Normal Failover:
Failover completes with all communications and actions according to procedure. Primary becomes Standby, Backup becomes Active.
Error Failover:
Failover completes, but Primary cannot communicate with the internal application process. Primary shows "Config Error", Backup becomes Active.
Remote Shutdown Failover:
Failover completes, but communications and actions did not respond correctly. Primary is shut down by Backup to ensure VIPs are relinquished and communications closed before Backup becomes Active. Primary shows "REMOTELY SHUTDOWN", Backup becomes Active.
Error and Remote Shutdown Resolution:
To restart a system controller from TMRP:
- TMRP displays error state (e.g., "Primry Error").
- Press and hold "Enable". Buttons turn amber and blink.
- Press "Primry To Restrt".
- Release both buttons. "Primry Bootng" flashes, then "Primry Stndby" is displayed.
To restart a system controller from TM1-Mk3+ front panel (error state):
- Press encoder to display Setup Menu.
- Unit Management > Restart Unit > Restart Unit.
- Confirm restart. Unit reboots, then returns to Standby.
To restart a system controller from TM1-Mk3+ front panel (remotely shutdown):
- Press encoder to display Setup Menu.
- Unit Management > Restart Unit > Restart Unit.
- Confirm restart. Unit reboots, then returns to Standby.
Replacing a System Controller:
- Primary System Controller:
- Change Failover mode to Manual.
- Manually change Active unit to Backup.
- Disconnect and remove old controller.
- Install replacement controller.
- Power on new controller.
- Set new controller's IP addresses to match removed unit.
- From TallyMan software, load and write the configuration. This makes the new unit Primary and Active.
- Backup System Controller:
- Change Failover mode to Manual.
- Manually change Active unit to Primary (if Backup was Active).
- Disconnect and remove old controller.
- Install replacement controller.
- Power on new controller.
- Set new controller's IP addresses to match removed unit. Primary automatically writes configuration to new Backup.
- TMRP:
- Disconnect and remove old TMRP.
- Install replacement TMRP, ensuring GPIO connections are correct.
- Power on new TMRP, note IP address during boot.
- Set new TMRP's IP addresses to match removed unit. New TMRP joins system.
Deleting the Configuration (TM1-Mk3+):
- On display main page, press encoder to display Setup Menu.
- Unit Management > Delete Configuration > Delete Configuration.
- "Command Sent" message, unit reverts to standalone setup.
Restarting a Unit (TM1-Mk3+):
- On display main page, press encoder to display Setup Menu.
- Unit Management > Restart Unit > Restart Unit.
- Confirm restart. Unit reboots.