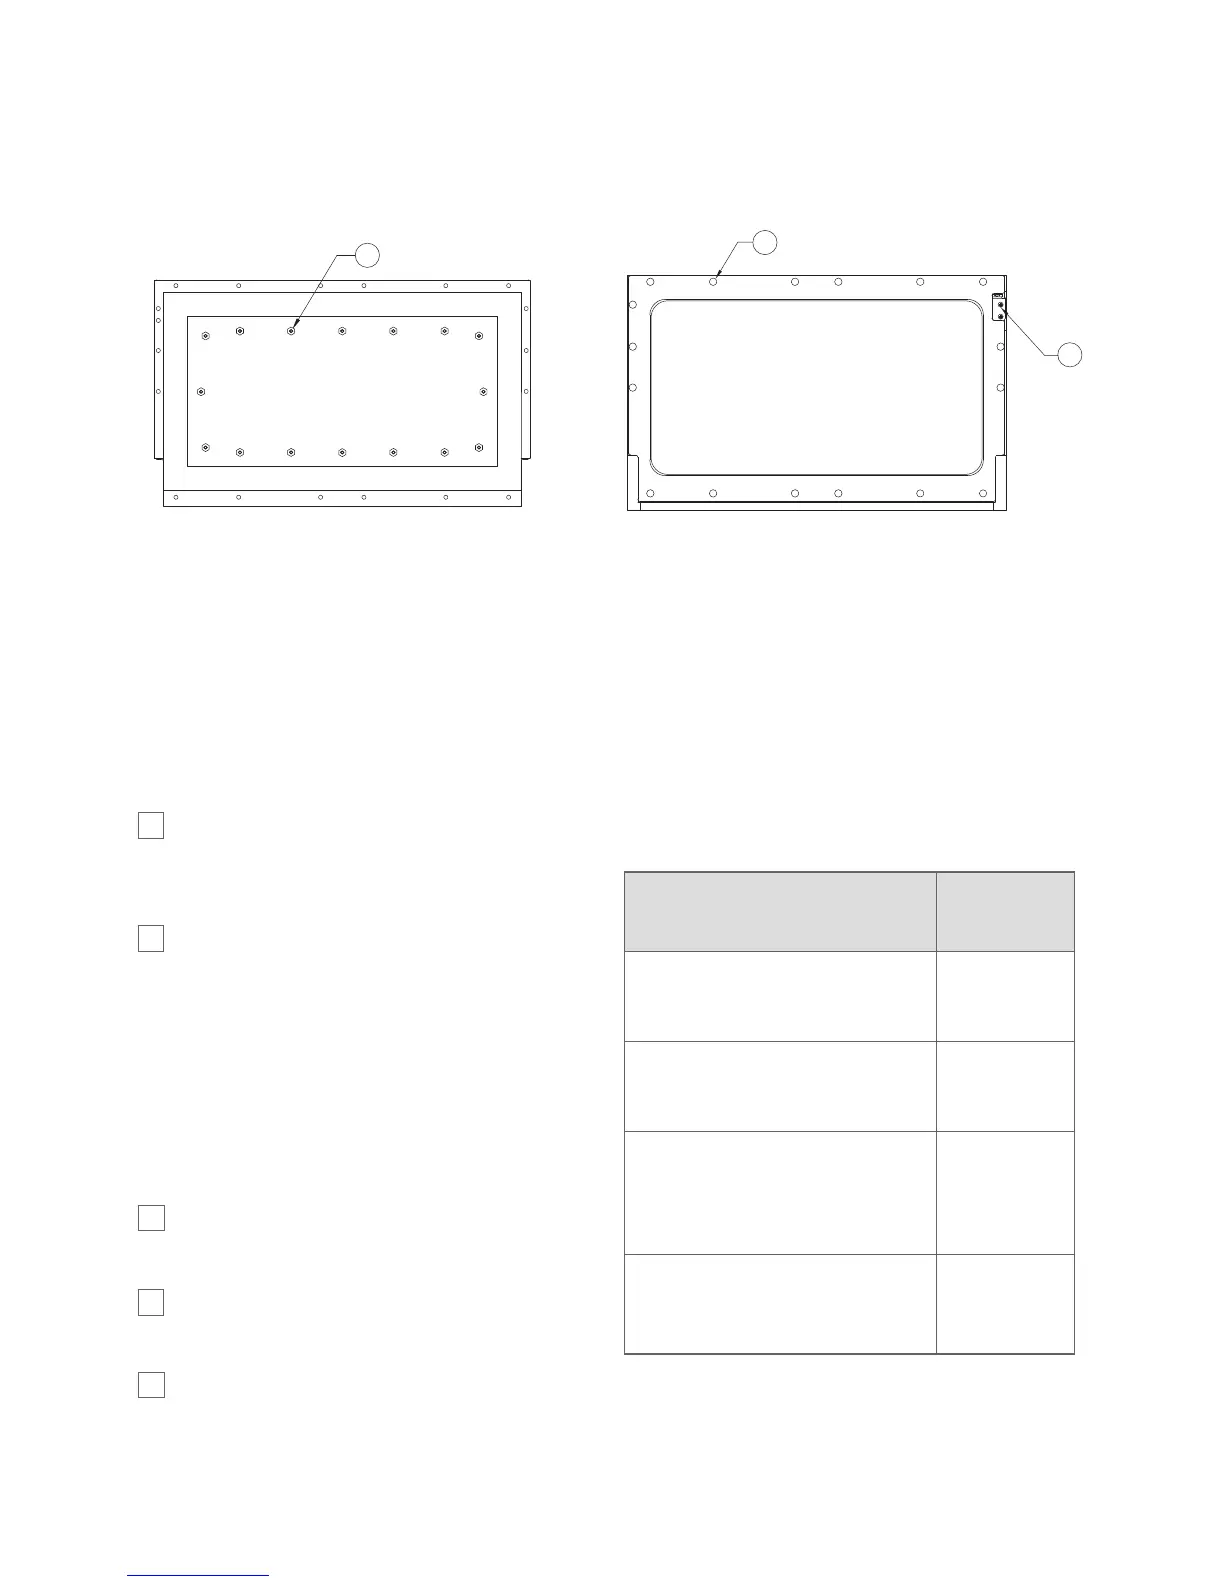
91
SHUNT CAVITY/PLATE
Tightening Sequence
8
4159
11
10 6237
12
14
15
13
16
: Cook Door Assembly: Tightening Specs
THE COOK DOOR
SHUNT
ASSY/DOOR COVER
Tightening Sequence
5
93
92
14
8
1
15
9
10
16
623717
11
12
13
4
Critical Adjustment Notes (Figure 29)
1. Item 76 should be oriented with the Gasket Seam
at them bottom of the door assembly. Gasket
should be straight with no twists or pinching.
2. Attach insulation to the inside of the door cover
using aluminum tape (Item 94).
o
x
block openings at bottom.
3. Item 89, (insulation) not shown for clarity.
4.
D
oor should be flat without twisting or
warpage after tightening all hardware.
5.
Refer to the chart to the right for torque specs
and tightening sequence.
6. Attach Item 95 with adhesive backing using
the two (2) locating holes on the front cover.
7. Item 80 and 77 must mount secur
ely
. If Item 80
can move after installation, reject.
PART
PART NUMBER
TORQUE
VALUE
85.
Bolt, 1/4”-20 x 1.00
P/N 102945
80 I
n-Lbs
91. Nut, Keps #8-32
P/N 102962
21 In-Lbs
92. Screw, 8-32 x 3/8”
T
r
o
x S
ecurity
P/N 102748
21 In-Lbs
93. Screw, 8 x 1/2” PTH
P/N 101688
21 In-Lbs
SCREW TORQUE CHART
Refer to Figure 30 above.
39

 Loading...