27
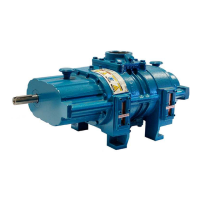
8. DISASSEMBLY AND REASSEMBLY
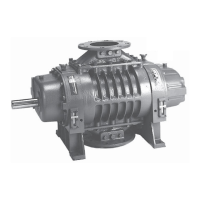
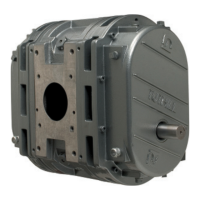
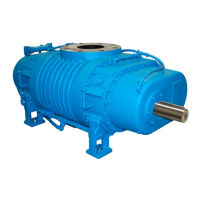
8.1 DISASSEMBLY OF BLOWER
1. Drain lubrication from either end and disconnect all external oil lines. Do not attempt to remove oil
distribution line bushing in the non-drive end plate until the end cover has been removed and the
internal ttings are disconnected. The oil lter and heat exchanger may be removed or left fastened
to the cover. Mark piping and other parts so that they can go back in their original position when
reassembling.
8.1.1 FREE END DISASSEMBLY
2. Support free end cover (7) using a lifting strap. Remove cap screws (26) and install two of them as
jacking screws in the tapped holes next to the dowel pins. It is recommended that two studs 8” (203
mm) long be used to assist in supporting the cover until it has cleared the dowel pins. It is not necessary
to remove oil pump (144) and the adapter plate (313) from the cover unless these items are being
replaced.
3. Remove large O-ring (302), four slinger cap screws (309) (5/16-12 point socket required), and oil
slinger (20). Tap drive shaft (310) lightly with a mallet to remove from rotor shaft. Remove cap screws
(30) and the oil retaining rings (15).
8.1.2 GEAR END DISASSEMBLY
4. Remove drive shaft key (23). Remove all burrs and other defacements from the drive shaft.
All series except 66/69. Remove cap screws (30) and place two screws in jackscrew holes provided
to remove seal adapter plate (46). Tap out the seal and discard O-ring (314).
Series 66/69: Remove cap screws (30 & 93). Remove seal housing (91) and remove stator portion
of the mechanical seal (76B). Using a spanner wrench, remove the adapter sleeve (87) by turning
counter clockwise. Remove mating ring (76A) and O-rings (88 & 140).
5. Support drive end cover (6) as done on the non drive end. Remove cap screws (26). The drive end
cover also has jacking screw holes, but it must slide off the spherical roller bearing on the drive shaft.
To keep the bearing outer race from cocking, it is suggested that the drive shaft bearing pressing tool
shown on page 35 be used.
6. Remove cap screws (66) and drive shaft (45). The bearing (50) should be pulled now unless it is to be
pressed apart after the drive shaft has been removed.
7. Stand the blower up on the non drive end on 6” × 6” (152 × 152 mm) blocks remove cap screws (326)
from the driven gear and align the match marks on the timing gear teeth (8). Using a suitable puller or
extended pry bar, remove the gear shell from their hubs. The shell and hub are matched, do not inter-
change. Remark if the original markings are no longer visible.
8. Unlock spanner nut lockwashers (36) and remove spanner nut (35) and lockwashers. Remove gear
hubs with puller. Remove gear keys (24).
9. Remove oil sight gauge (70). Remove cap screws (307) and mounting feet (304), Series 66 & 69 have
feet (304) and (408). All feet are mounted on 1 1/8” (28.7 mm) hollow locating dowels (306) from which
they should easily disengage by tapping lightly with a mallet. Discard O-rings (305).
10. Remove cap screws (30) bearing retainer rings (14) and end plate cap screws.
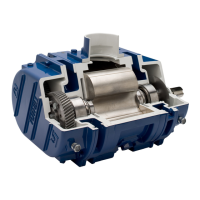
8.1.3 END PLATE AND ROTOR DISASSEMBLY
11. The end plate, with the bearings, must be pulled from the rotor shafts. Make up two Bearing Pressing
Fixture plates shown on page 36 along with eight pieces of 1/2 × 13 all thread, at washers, and hex
nuts. The use of a hydraulic ram is also recommended but some modications may be necessary
depending on the type of equipment available. Install each plate to the bearing retainer ring mounting
holes and apply pressure equally to the ends of the rotor shaft by tightening the nuts on the threaded
rods. Install spacers under plate after rotor shafts become ush with top of bearing. Use a hoist to pick
up the end plate once the bearings have cleared the shaft.
 Loading...