ENG10
Instructions for Use
Quick Start
1. Press POWER on lower, right-hand corner of control panel.
2. Open blue door enclosing pump set loading area.
3. To load pump set (refer to Figure 4):
• Grasp nger tab on valve and insert into left pocket (1).
• Grasp black ring retainer and gently stretch tubing around rotor (2).
• Pull up on retainer and insert into right pocket (3).
• Avoid over stretching the silicone tube.
• Press down on nger tab to ensure that valve is fully seated. Finger tab should align with locating rib.
• Close blue door. (Note: display status line should read SET LOADED).
4. Suspend the pump set so that the bottom of the formula container is 18” above the pump.
5. To automatically prime the pump, press 4PRIME PUMP and 4AUTO PRIME. For Feed & Flush sets, auto priming will prime both lines.
6. To directly control pump priming, press 4PRIME PUMP and then press and hold the
4HOLD TO PRIME button(s). If a Feed & Flush Set is used, remember to rst press 4HOLD TO PRIME FLUSH until the ushing uid has reached the valve, and then press
4HOLD TO PRIME FEED until the feeding uid has reached past the valve and down to the distal end connector.
7. Use buttons4on left side of LCD to set the feeding parameters. Set ushing parameters if a Feed & Flush Set is loaded. The continuous or intermittent feed mode selection
is made under the MORE options menu.
8. Press 4RUN when ready to start. The screen will display RUNNING.
9. To stop, press 4HOLD or press and hold the POWER button.
General Startup
Placement/Mounting
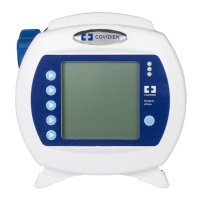
There are two recommended placement methods for the KANGAROO ePump enteral feeding pump.
• Attached to a vertical IV pole via the Pole Clamp peripheral device, included with the pump.
• Placed feet down on any horizontal surface.
A/C Power Operation Plug the KANGAROO ePump enteral feeding pump into an A/C power outlet for normal operation. When the pump is not
plugged in, or if A/C power is interrupted, a built-in rechargeable battery will run the pump.
Battery Power Operation If A/C power is not available to the pump, or if A/C power is interrupted, the pump will automatically operate on backup
battery power. The built-in battery recharges any time the pump is plugged into an outlet. A fully-charged, new battery
will supply 15 hours of backup power at 125 mL/hr before requiring recharging. Contact Customer Service, Section XIII, to
replace the Battery Pack if battery life degrades.
Power On/O To power up the pump, press the POWER button on the lower right of the front panel. To power down the pump, press and
hold the POWER button until the pump display turns o.
Figure 4. Installation of Pump Set
1
3
2
Black Ring
Retainer
(MISTIC)
Finger
Tab
Valve
Rotor

 Loading...