EN UltiMaker S7 Installation and user manual 15
Print cores
TheUltiMakerS7usestwoprintcoresintheprinthead,whichareinterchangeable.Therearedierent
types of print cores:
• Type AA: for printing build materials and UltiMaker Breakaway material
• Type BB: for printing water-soluble support material
• Type CC: for printing composite materials
• Type DD:forprintingceramicsupportmaterial(incombinationwiththeMetalExpansionKit)
The print cores contain information on a small chip, so that the printer always knows which print cores are installed
and which materials can be used with this print core.
Each UltiMaker S7 comes with two print cores AA 0.4 (one is already installed in print head slot 1) and one print
core BB 0.4. This means that it is possible to print with two build materials or with a build and support material.
During the welcome setup, the second print core must be installed. Go to Print core 2, select Start, and follow the
steps on the display.
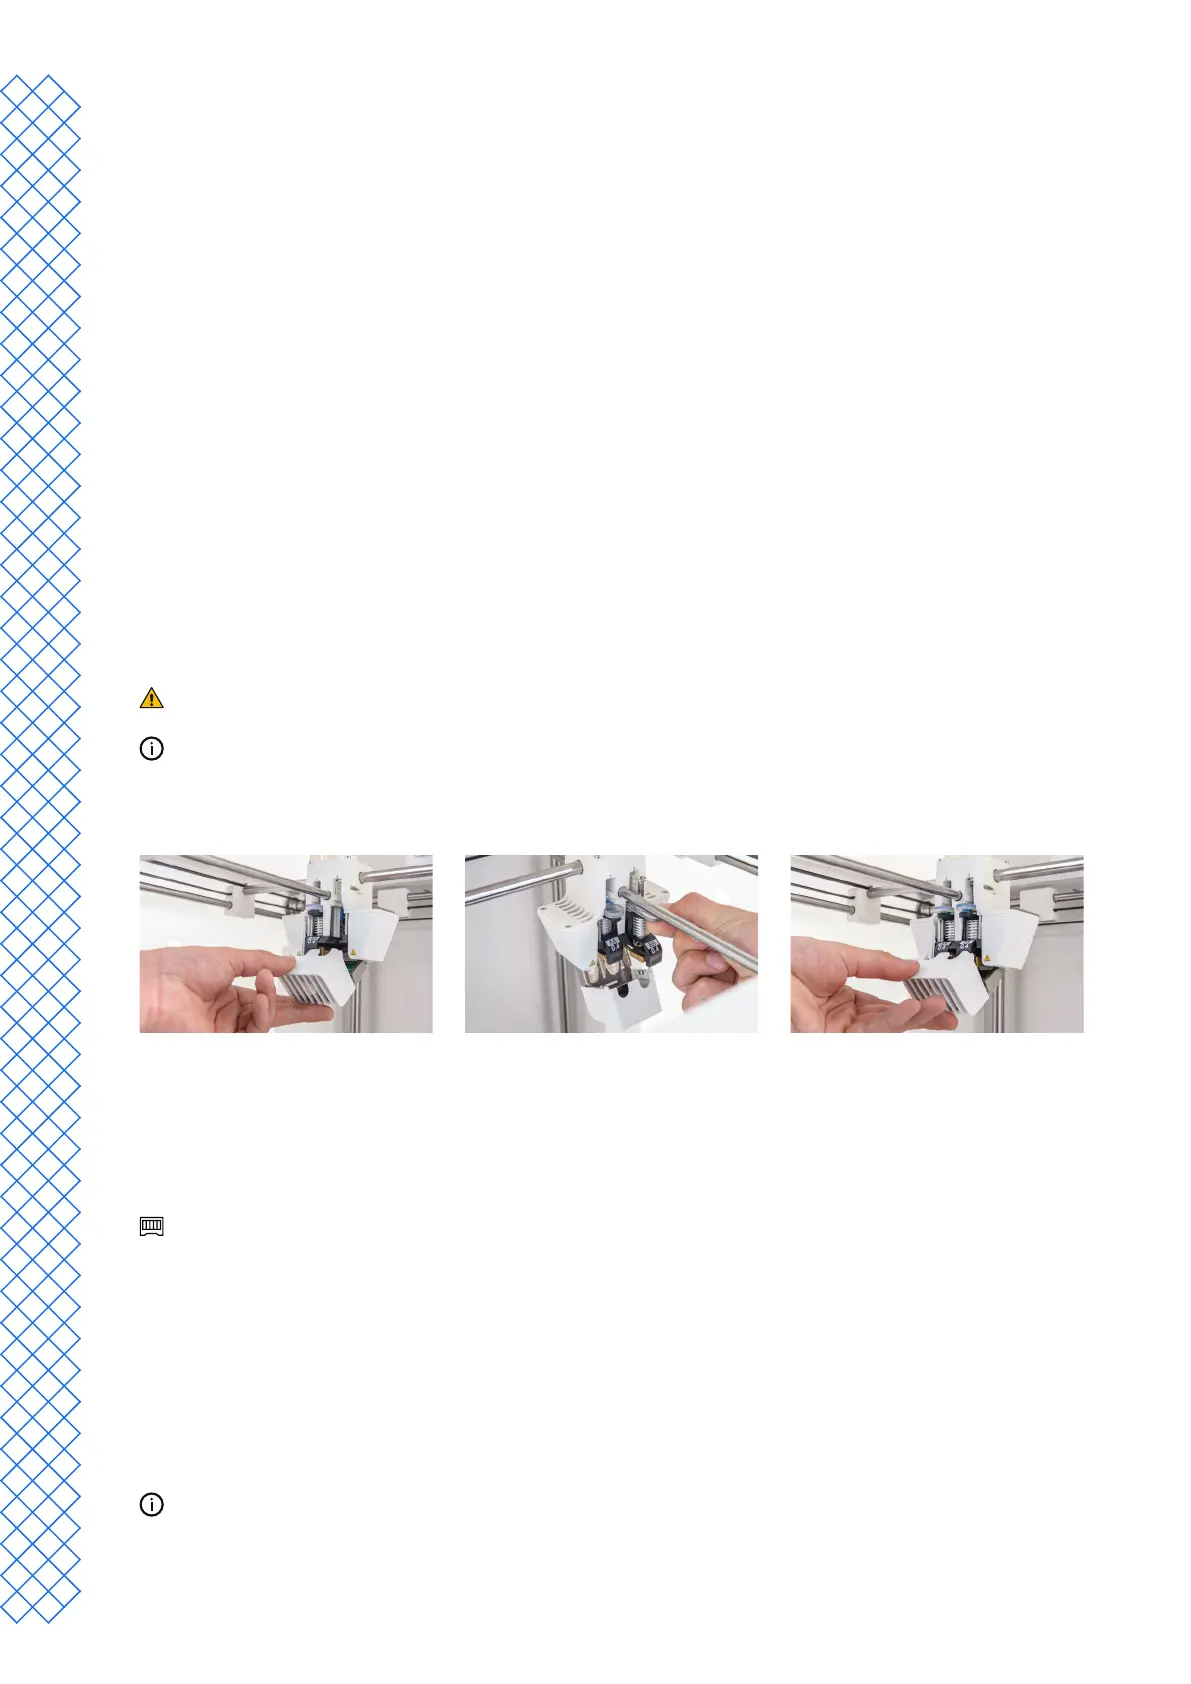
1. Open the glass door.
2. Open the print head fan bracket and press Conrm.
3. Install the second print core (BB 0.4) in print head slot 2 by squeezing the levers of the print core and sliding it
into the print head until you hear a click.
Donottouchthecontactpointsonthebackoftheprintcorewithyourngers.
Make sure you keep the print core completely vertical while installing it so it will smoothly slide
into the print head.
4. Carefully close the print head fan bracket and select Conrm to proceed with the welcome setup.
Load materials
BeforeyoucanstartprintingontheUltiMakerS7,youneedtoloadmaterialsintotheprinter.Fortherstuse,itis
recommendedtousethespoolsofToughPLAandPVAthatcomewiththeprinter.
FortheMaterialStation,thematerialloadinginstructionsaredierent.SkiptothesubsectionMaterial Station.
Load material 2
Material2willbeloadedrstbecauseitmustbeplacedclosesttothebackoftheprinter.SelectMaterial 2 from the
list shown on the touchscreen, select Start, then take the following steps to load the material:
1. Unpackthematerialandcutotheend,ensuringashort,sharptip.
2. Placethespoolwithmaterial2(PVA)ontothespoolholderandselectConrm. Make sure the end of the
material points in a clockwise direction, so that the material can enter feeder 2 from the bottom.
3. Wait until the printer detects the material and select Conrm.
When using a third-party material, you can select the material type manually.