12
Applying a measuring point
Creating a measuring point
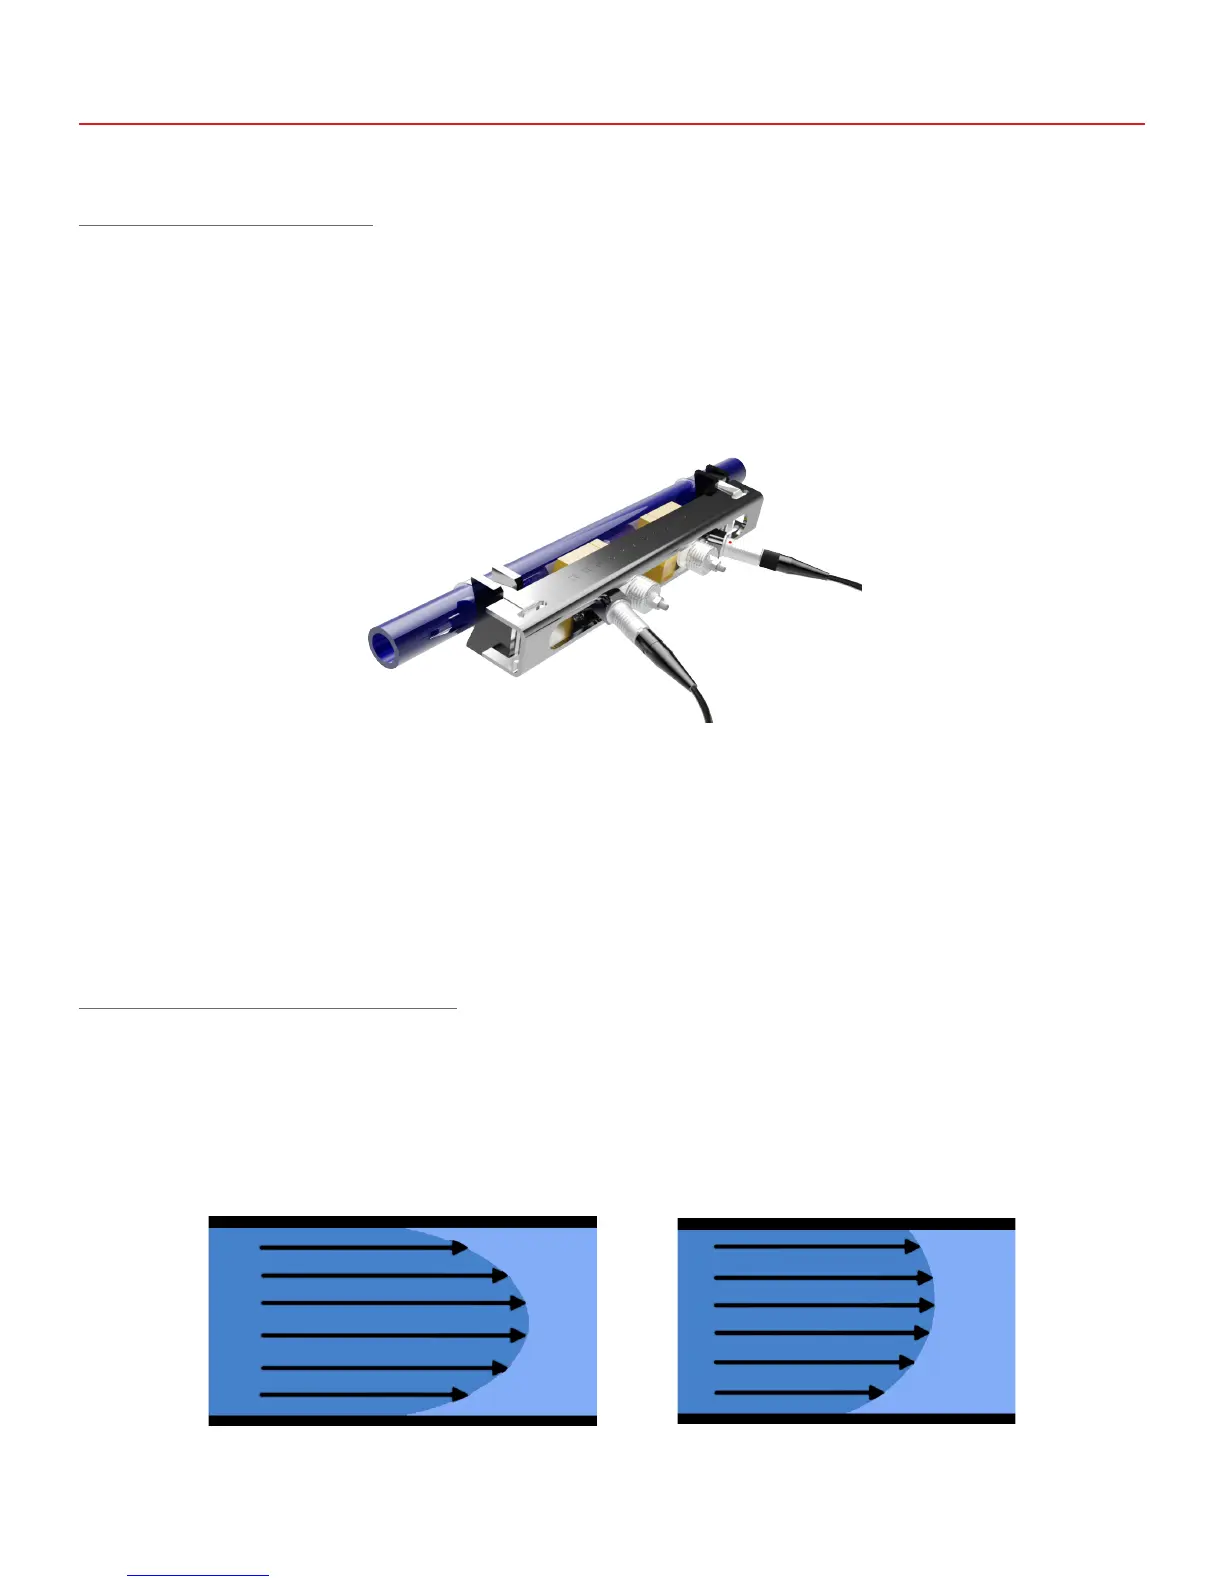
In addition to the flow meter, there are certain items required, when creating a measuring point
• A pair of probes
• A positioning terminal board
• A Y-cable supplied with the device
• All the accessories supplied in the case (Coupling gel...)
Figure 9- Terminal board with probes and Y-cable
Choosing a location for the probes
The following paragraphs set out the main precautions to be taken when choosing a location for the probes.
To achieve the most accurate measurement possible, it is necessary to have what is called ‘a developed flow profile’. The aim
is to obtain a hydraulic profile which is as predictable and symmetrical as possible.
Figure 10a- Symmetrical hydraulic profile Figure 10b- Asymmetrical hydraulic profile
 Loading...