Tools Required
- Straight Screwdriver
1. Turn appliance power OFF.
2. Connect the wire harness to the controller.
3. Attach the 2 provided tinnerman nuts to the controller. Be sure to line up the holes.
4. Hold the controller against the front panel.
5. Secure the controller to the appliance using the 2 provided screws.
Product Programming 1 7 2 4
System Programming 3 2 2 8
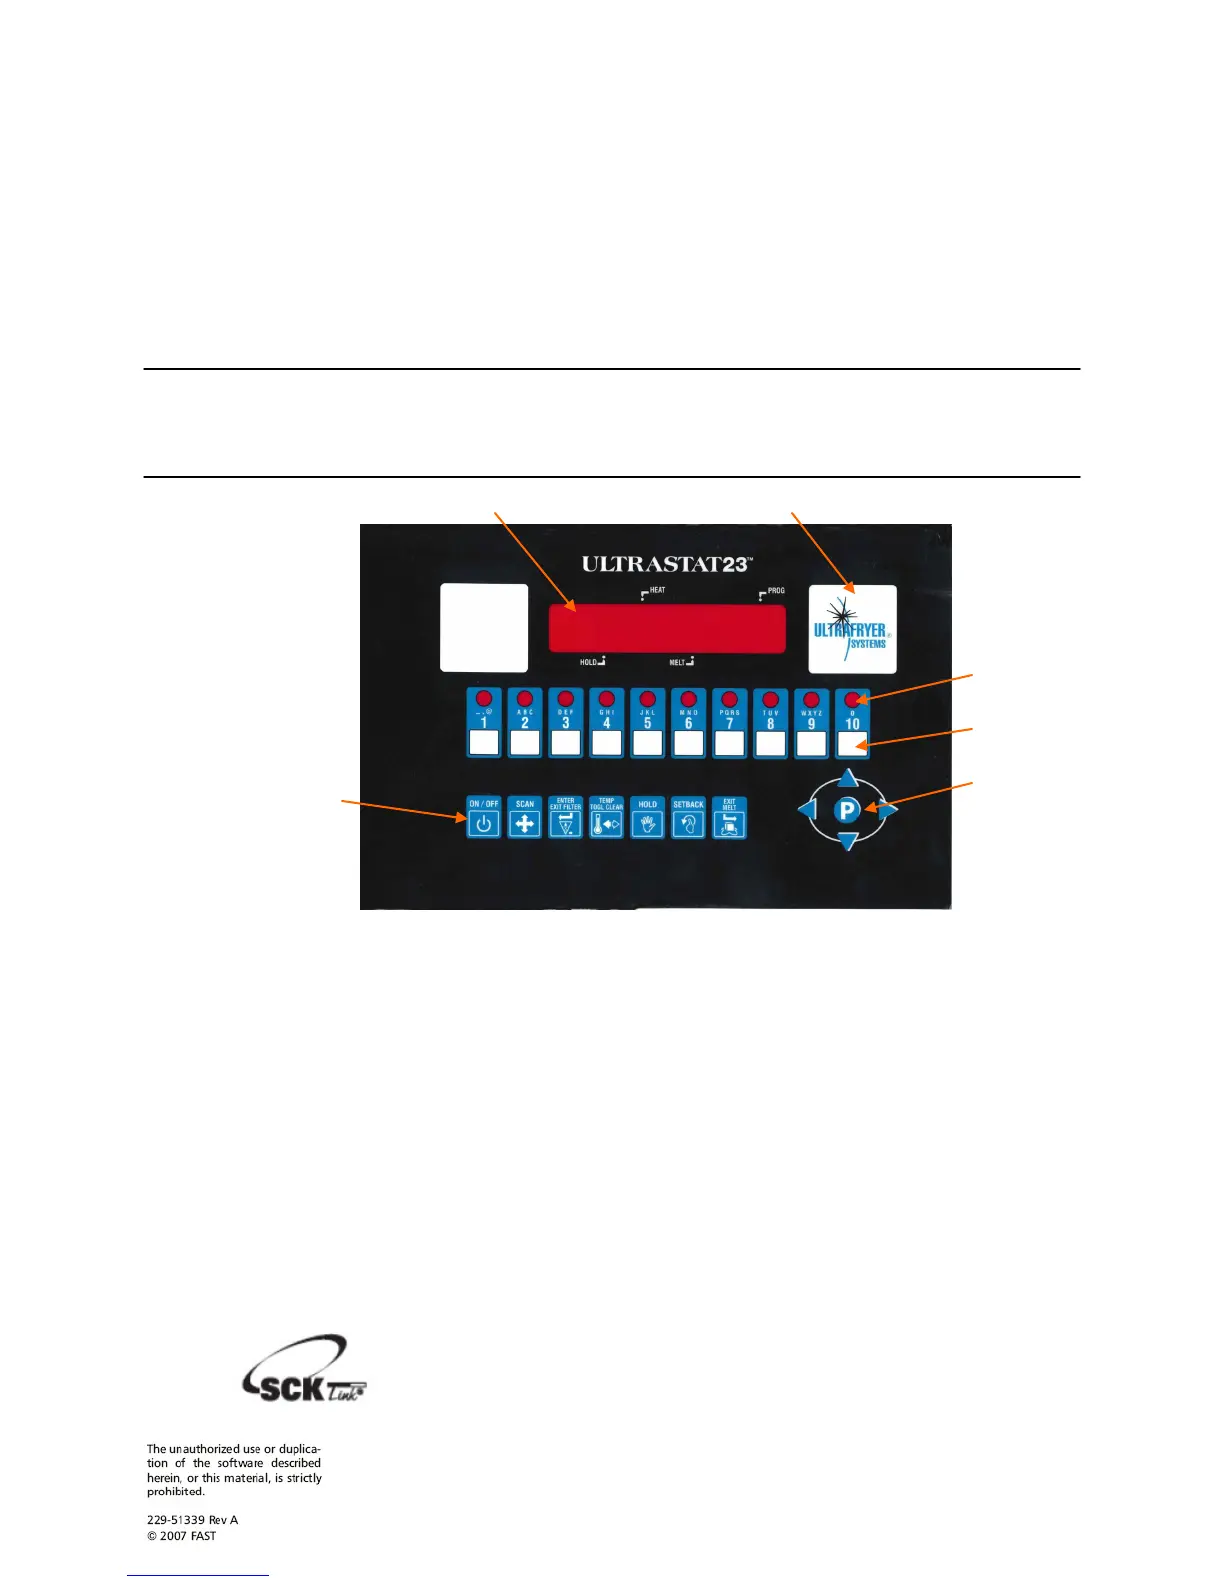
1 LARGE LED DISPLAY: 8-character, 14-segment. Displays programming and cook cycle
information.
2 SERVICE WINDOW: Locate the controller’s serial number and tech support phone number
easily.
3 INDICATOR LIGHTS: lit when there’s an active cook cycle and in programming mode.
4 PRODUCT KEYS: Press to start a cook cycle. Also used in programming. REPLACEABLE
MENU STRIP: Make menu changes quickly and easily.
5 PROGRAMMING CENTER: Easy cell phone-like programming. Access programming mode
and change cooking parameters.
6 FEATURE KEYS: Used to access programming functions and controller features; keys will vary
by model.
NOTE: SCK LINK: Signifies that your control is communications-capable.
Installation
Programming
Codes
30A216 REV A Oct 2009 3
Controller
Features
 Loading...