YK15-0009-DI-002-04
26
4.2 Operation Start
Before starting the Pump, check the following again.
(1) Piping and wire connection are completed.
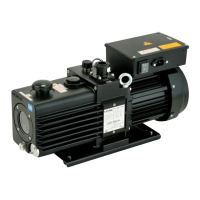
(2) Checking the oil level
Ensure that the oil level is between the two level lines on the oil level gauge shown in Fig, 14.
(3) Checking the rotating direction
Close the main valve on the Inlet side, open the leak valve, and run the Pump for two to three
seconds to check the rotating direction of the motor.
If the motor is rotating in the correct direction (Clockwise as viewed from the motor side),
pressure will drop. If it is reversed, interchange two of the three wires shown in Fig, 17.
(4) After checking (1), (2) and (3) above, close the leak valve and run the Pump. Here, ensure that
the vacuum gauge between the main valve and the Pump indicates a pressure close to the
ultimate pressure.
WARNING
①
You have a risk of getting burnt. Do not touch the Motor and Pump
unit as they become high temperature during operation.
Apply an appropriate protection to avoid touching
necessary.
② Refrain from touching any part other than valve when op
Gas ballast.
③ Ensure to close the Gas ballast to start the operation.
The oil might jet out during operation around high pressure range.
④
Oil mist would appear through the Exhaust side if operated around
high pressure range.
Attach the oil mist trap (o
ption) and perform the duct piping, and pass
the oil through the removal devices.
CAUTION
Follow the process described below if the rotation at start was not
smooth;
①Check first the oil level and fill it appropriately.
②The oil might enter inside the Pump cylinder if you left the Pump
stopped longtime (three days or more) even you kept the atmospheric
pressure inside the Pump
when stopped it last time. The Overload
protective device might work if you attempted to restart the Pump
under such a condition.
This time, do the inching start of the Pump
(repeat turning ON/OFF in a
short time) several times.