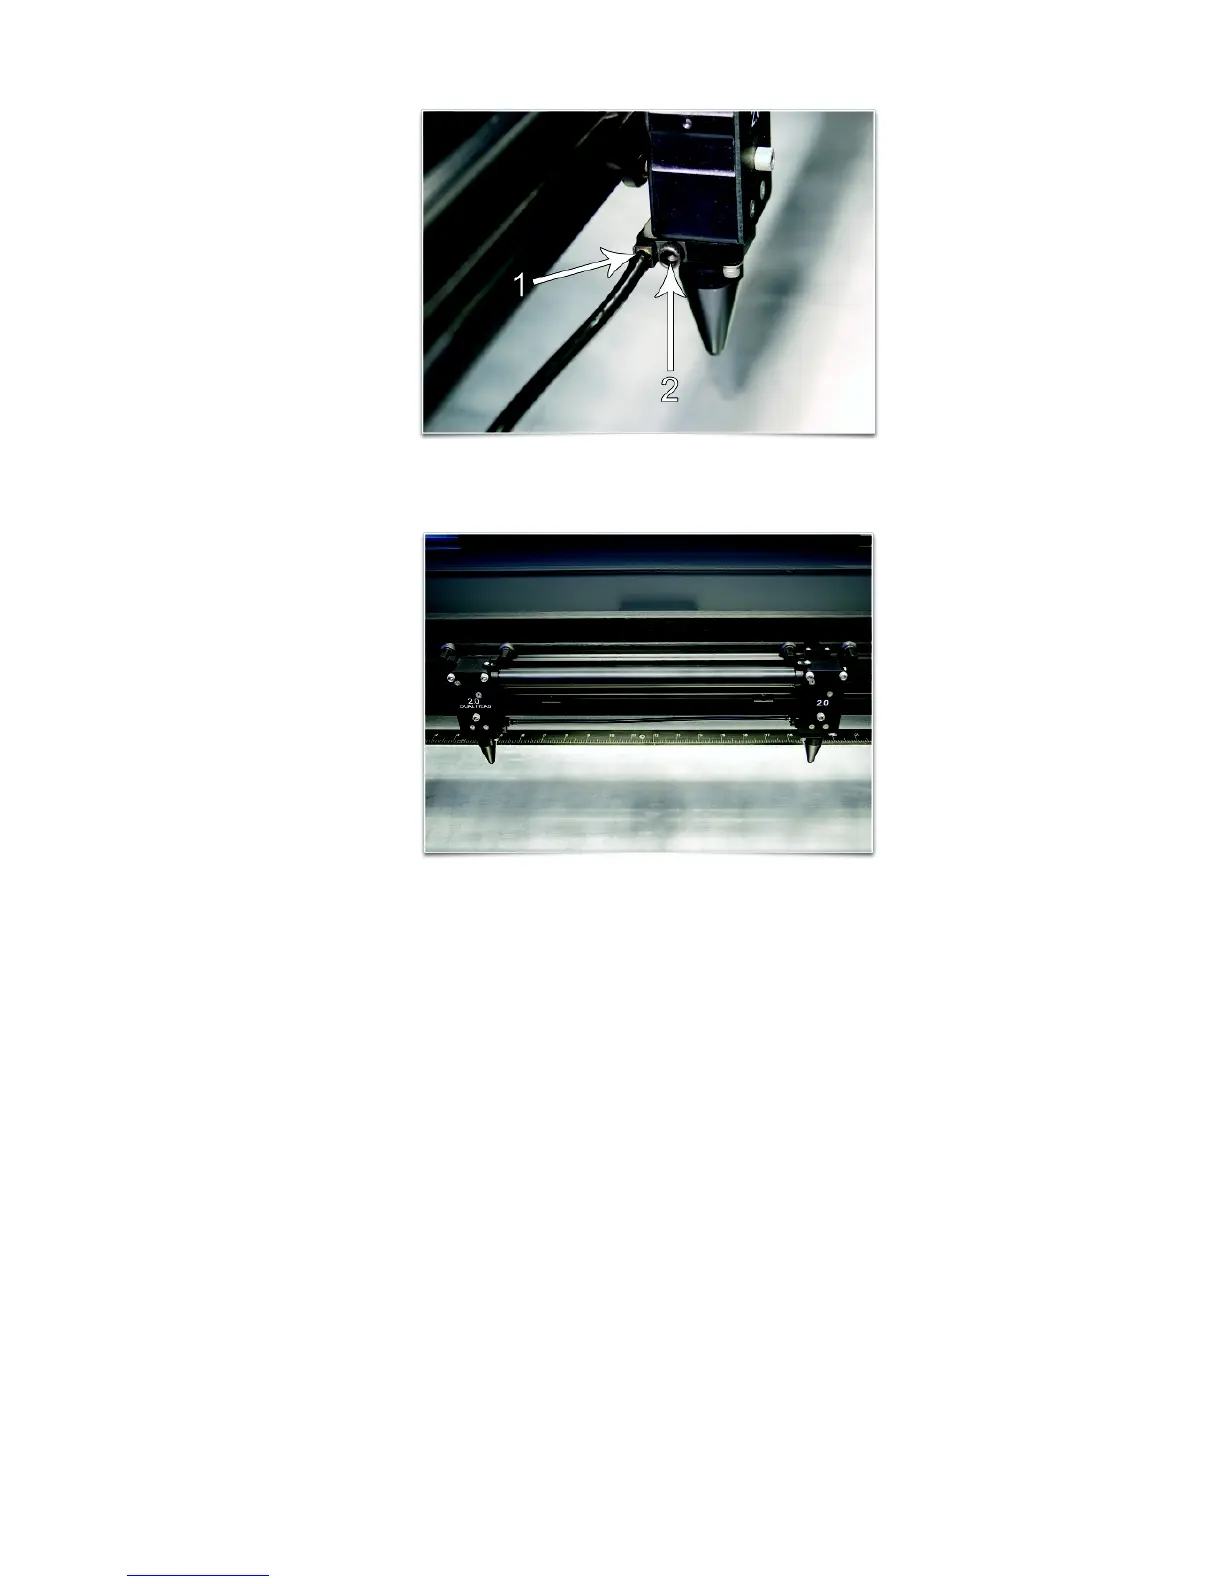
c. Attach the other end of the Air hose to the Dual Head carriage in the same way.
d. Install cones in both carriages as shown.
Operation
1. Start your graphics program and create new artwork or open existing artwork. Remember that the Dual
Head Option splits the engraving/cutting area in two halves in the X direction. Make sure your artwork fits
in half the engraving area.
2. Select “Print,” choose your printer (if the laser system is not set as your default) and select Printer
Properties to bring up the Printer Driver settings.
3. Select the Engraving Field sub-tab within the Manual Control Tab and then click the “Dual Head” option
box. A pop-up message will appear asking you to verify your page size in your graphics software because
the driver’s page “Width” will now be half of what it was. Make a note of the new dual head page size.
4. Adjust the page size and orientation in your graphics program to match the new dual head page size and
orientation in the driver.
Note: Some graphics programs do not allow your “Width” to be smaller than your “Height” when in the
Landscape mode and will force the page orientation in your graphics program to “Portrait” mode. If this is
the case and you cannot get the laser to engrave in the proper location using the full dimensions of the
dual head page size, you might need to reduce your “Height” to something slightly smaller than your
“Width” in both the Printer Driver and the graphics software program.
5. Position your graphic as required on the new page size.
94