CAUTION
Joints should be assembled in a vertical position to ensure proper mating between
the joints.
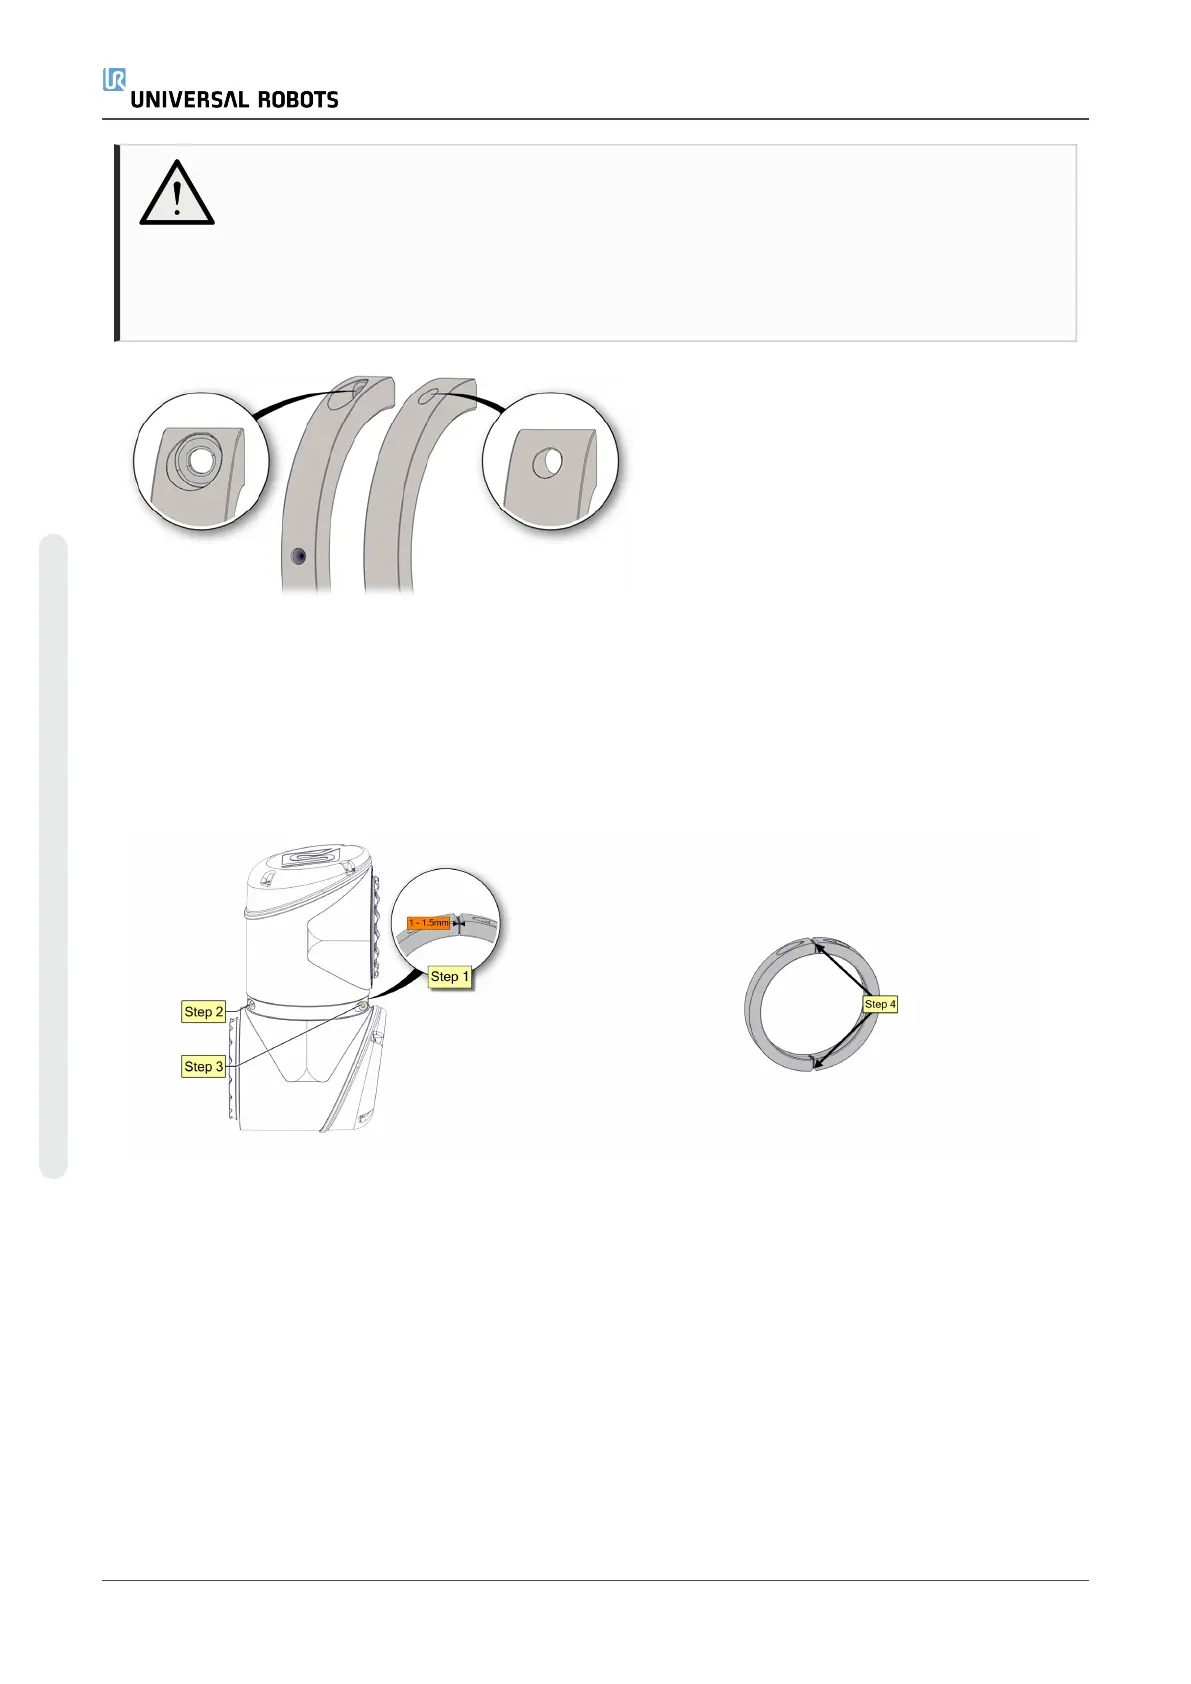
Ensure the screws are inserted in the correct clamp.
Only apply to early version of brackets where one side has a circular marker.
When tightening the clamps, it must be done in steps. Do not exceed recommended torque:
•
Step 1: Tighten one side so there is a gap of 1.0mm to 1.5mm.
•
Step 2: Tighten the other side completely with 5.0Nm. +/- 0.50 Nm.
•
Step 3: Tighten the first side with 5.0Nm. +/- 0.50 Nm.
•
Step 4: Ensure same gap at both ends.
4.2.9. Tool Flange
The tool flange is a Screw Connection and is disassembled like a joint with this connection.
See section Screw Connection
Power and communication plug is in the same plug.
See section Screw Connection
Power and communication plug is in the same plug.
e-Series 38 Service Manual
Copyright © 2009–2024 by UniversalRobotsA/S. All rights reserved.