UpRight Connectors Section 1 - General Information
Page 1-6 Service Manual
1-6 U
P
R
IGHT
C
ONNECTORS
UpRight connectors are designed so that connector parts, contacts or electrical cables may be replaced
without replacing the entire connector.
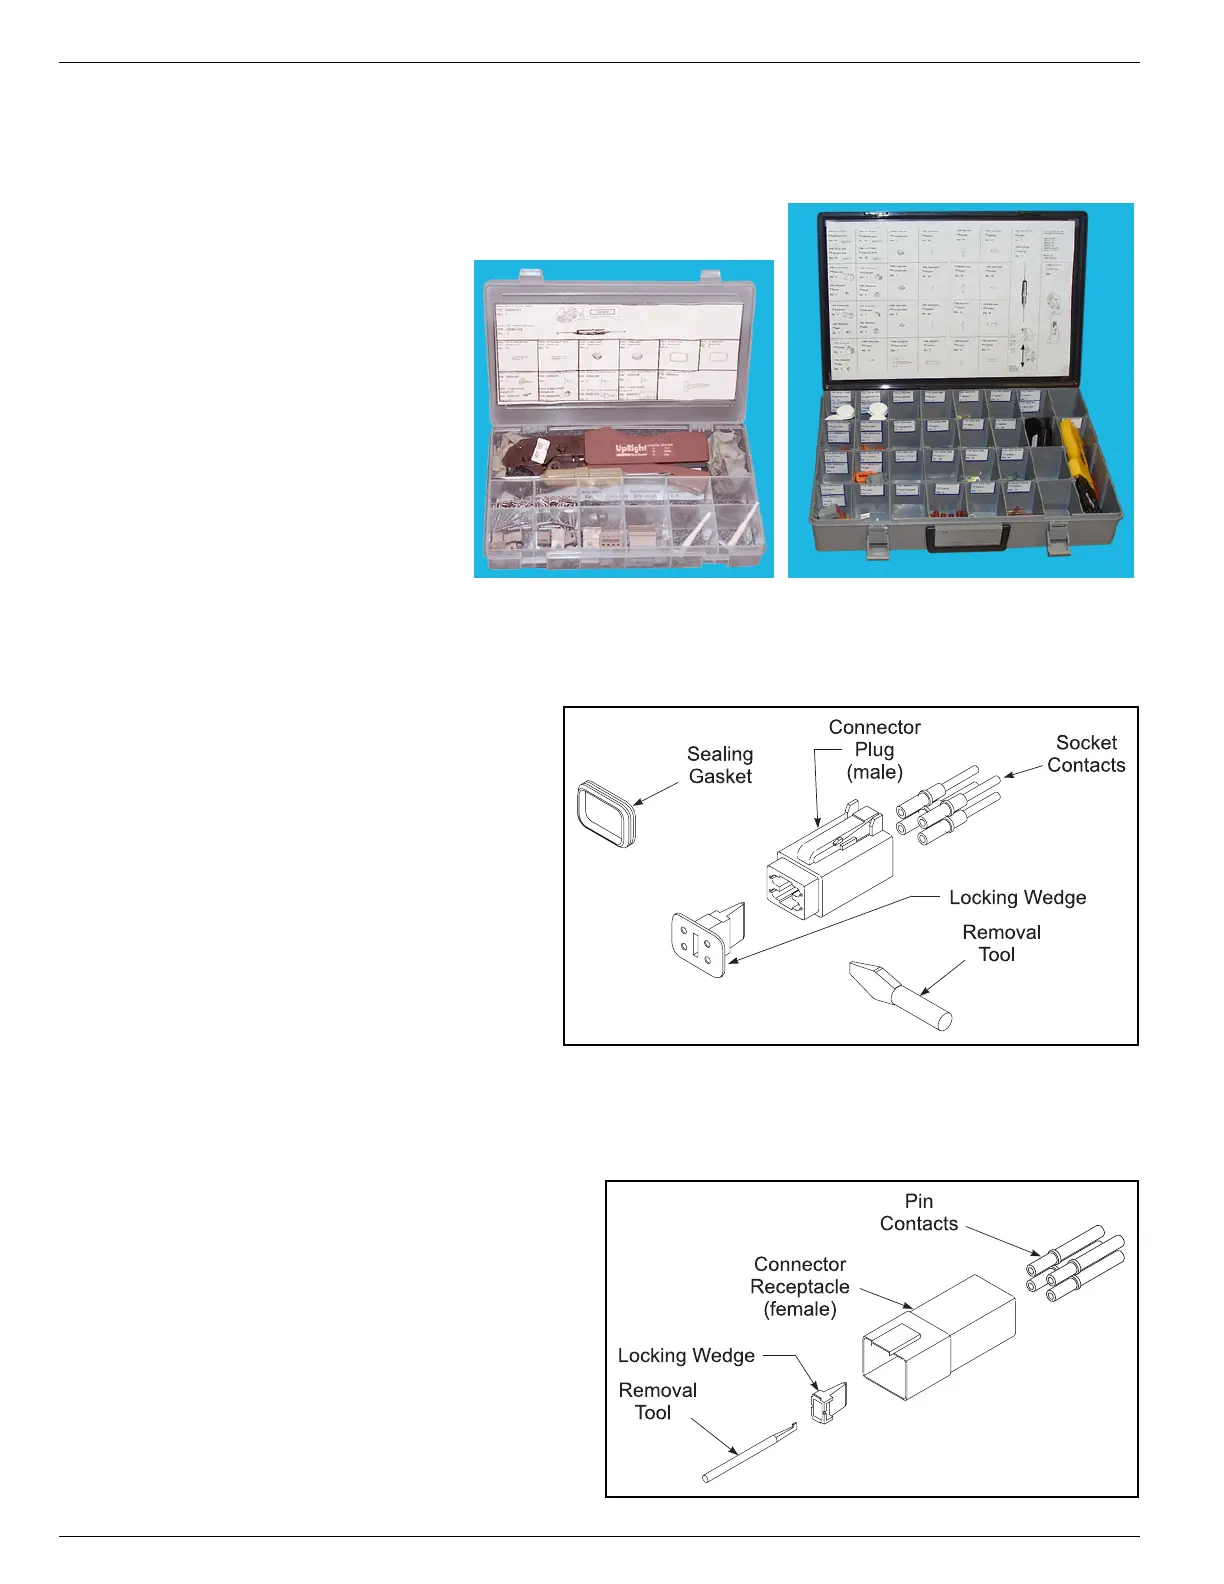
Figure 1-1:
UpRight Connector Kits
M
ALE
C
ONNECTOR
(P
LUG
)
Figure 1-2:
UpRight Male Connector
1. Disconnect the male connector
(plug) from the female connector
(receptacle).
2. Using the flat end of the Removal
Tool (or flat blade screwdriver), pry
the Locking Wedge from the Male
Connector. Care should be taken
that the Sealing Gasket is not dam-
aged during this procedure.
3. Check all parts for damage. Replace
all parts which are damaged or
worn.
4. Replace or re-crimp the wires and
contacts. Refer to “Crimping” proce-
dure.
F
EMALE
C
ONNECTOR
(R
ECEPTACLE
)
Figure 1-3:
UpRight Female Connector
1. Disconnect the male connector (plug)
from the female connector (receptacle).
2. Using the notched end of the Removal
Tool (or a wire hook), pull the Locking
Wedge from the Female Connector.
3. Check all parts for damage. Replace all
parts which are damaged or worn.
4. Replace or re-crimp the wires and con-
tacts. Refer to “Crimping” procedure.