53
Appendix
A
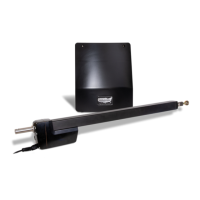
USAutomatic Battery Controller
Battery controller is designed to charge 12 vdc batteries of various types using either solar panel
or DC transformer part # 520009. It also capable of charging 24 vdc battery if using a 24-volt solar
panel. The package includes Power source input adapter plug.
Recommend battery types: SLA (Sealed Lead Acid), FLD (Flooded Lead Acid), GEL and AGM are
all ideal choices. We do not recommend using Lithium-ion batteries with this controller.
Controller Features
12 / 24 vdc battery detection Battery voltage reading active PWM charging mode
Battery reverse connection protection Battery reverse discharge protection USB power outlet
LCD display Temperature compensation Plug N Go connections
Controller Specications
10-amp solar charger 6.2 in x 2.75 in x 1 in Weight 4.2 oz
DC adapter 20vdc @ 1.2 amps max Float charging 13.8 / 27.6 vdc Max solar panel 130 watts
Self-consumption < 9ma USB max current 1.5 amps Under voltage cutoff 10.5 vdc
Installation
The controller is fully automatic for easy and quick
installation.
1. Connect battery to the controller.
2. Controller LCD screen will display current
battery voltage.
3. Connect Power source input adapter plug
to controller power source input
4. Connect Power Source to controller
(solar panel or DC transformer)
Operation
- Charging Indication Symbol when steady indicates that
the power source is charging the battery.
- No symbol indicates power source is not supplying
enough energy to charge.
- No symbol indicates power source polarity is reversed,
verify power source polarity.
*If the symbol is ashing, the battery is fully charged and has entered oat charging state.
Diagnostics
1. Controller LCD screen is blank:
A. Battery voltage below cutoff voltage. Load test battery replace or charge as necessary.
B. Reverse battery connection indication. Verify battery polarity connection to controller.
2. Battery symbol is ashing – indicates the battery voltage exceeds the rated input voltage of the
charger. Disconnect the external battery charger from battery or choose appropriate battery.
Warning
Risk of explosion! Never install the controller in a sealed enclosure with ooded batteries.
Power Source Inputs:
1. DC power plug 2.5mm
2. Direct wire leads
14-18 gauge
Battery Connections:
1. Anderson Power Plug
2. Direct wire leads
14-18 gauge
Battery Voltage
Reading
Charging
Indication
Symbol
Battery symbol / 5 bar
battery capacity indicator