WWW.UTOPIAGROUP.COM
page 33
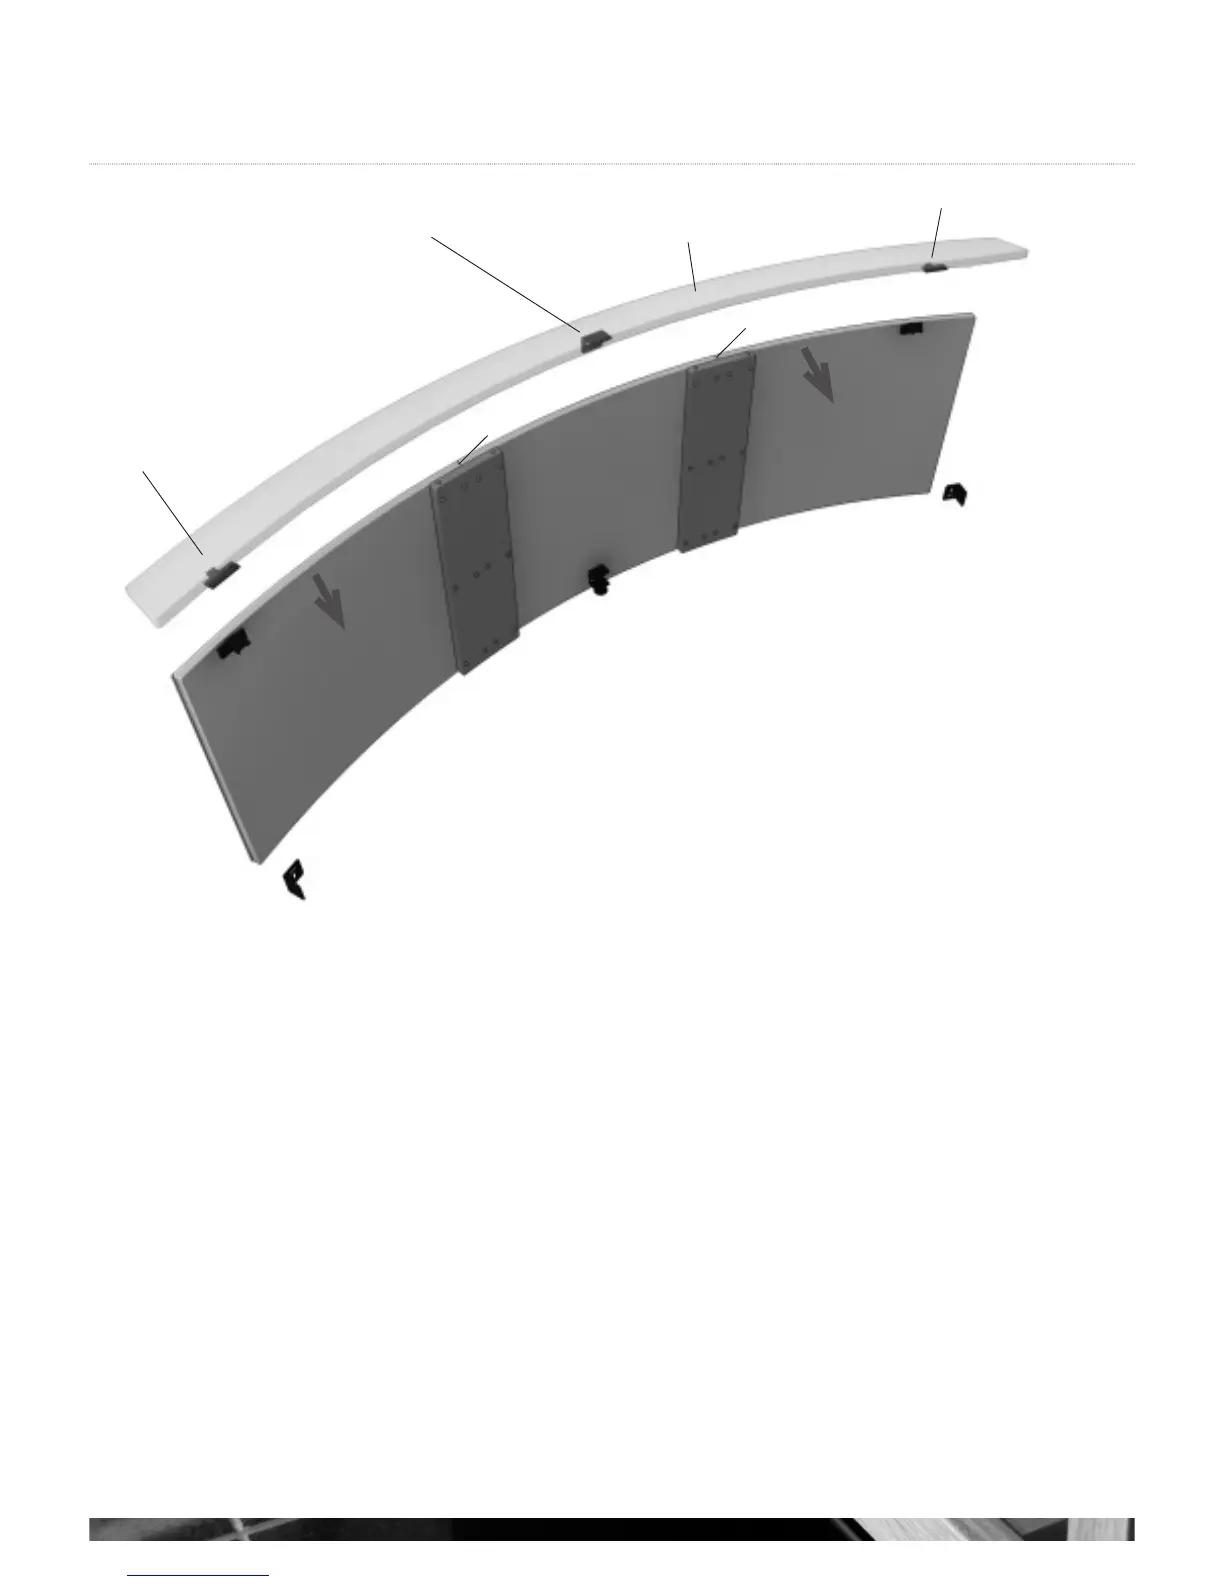
g 1
A
A
B
E
C
C
2mm gap
2mm gap
Symmetry Bath Panel
SYMMETRY BATHS
Please note - remove all protective film from panels before fixing them together.
Ensure the under side of this bath rim is fitted at a height which will give the required
clearance for the panels and/or a bath end storage unit when fitting.
BATH SIDE PANELS WITH A TOP RAIL.
The top rail should be fitted around the under side of the bath rim with the desired
amount of rail showing and fixed to the timber under the bath rim.
FITTING BATH SIDE PANEL BETWEEN 2 WALLS
When fitting a side panel set between two walls fasten them together with the blocks and
screws provided ensuring there is a 2mm space between each panel (see g 1 A)
Fit the adjustable foot at the base of the centre panel (see g 1 B), to support the panels.
Fit the keku clips as shown in (see g 1 C), ensuring that they line up correctly on the top
rail and panels. Once in place, fix an L bracket to the under side of the top rail as a stop
support to the bath centre panel (see g 1 E).
Fit the two L brackets to the wall approximately 100mm from the floor level where the
back of the side panel final position will be (see g 1 F). Slide the assembled panels onto
the keku clips until they positively engage.
If you wish to remove this panel for maintenance purposes we recommend that you use a
suction pad similar to a glazers pad placed in the approximate location of the keku clips and
ease off from one end.
Keku clip
Keku clip
Bracket fixed to
top rail only
Top Rail
F
F
INSTALLATION INSTRUCTIONS