17.6 To remove the injector.
Remove the complete burner module as in section 17.4
Support the injector elbow and unscrew the pipe nut from its base.
The burner bracket is secured to the front cover by four screws. Remove these
screws.
The burner and its bracket can now be lifted clear of the module.
Unscrew the injector from the burner.
Replace in the reverse order.
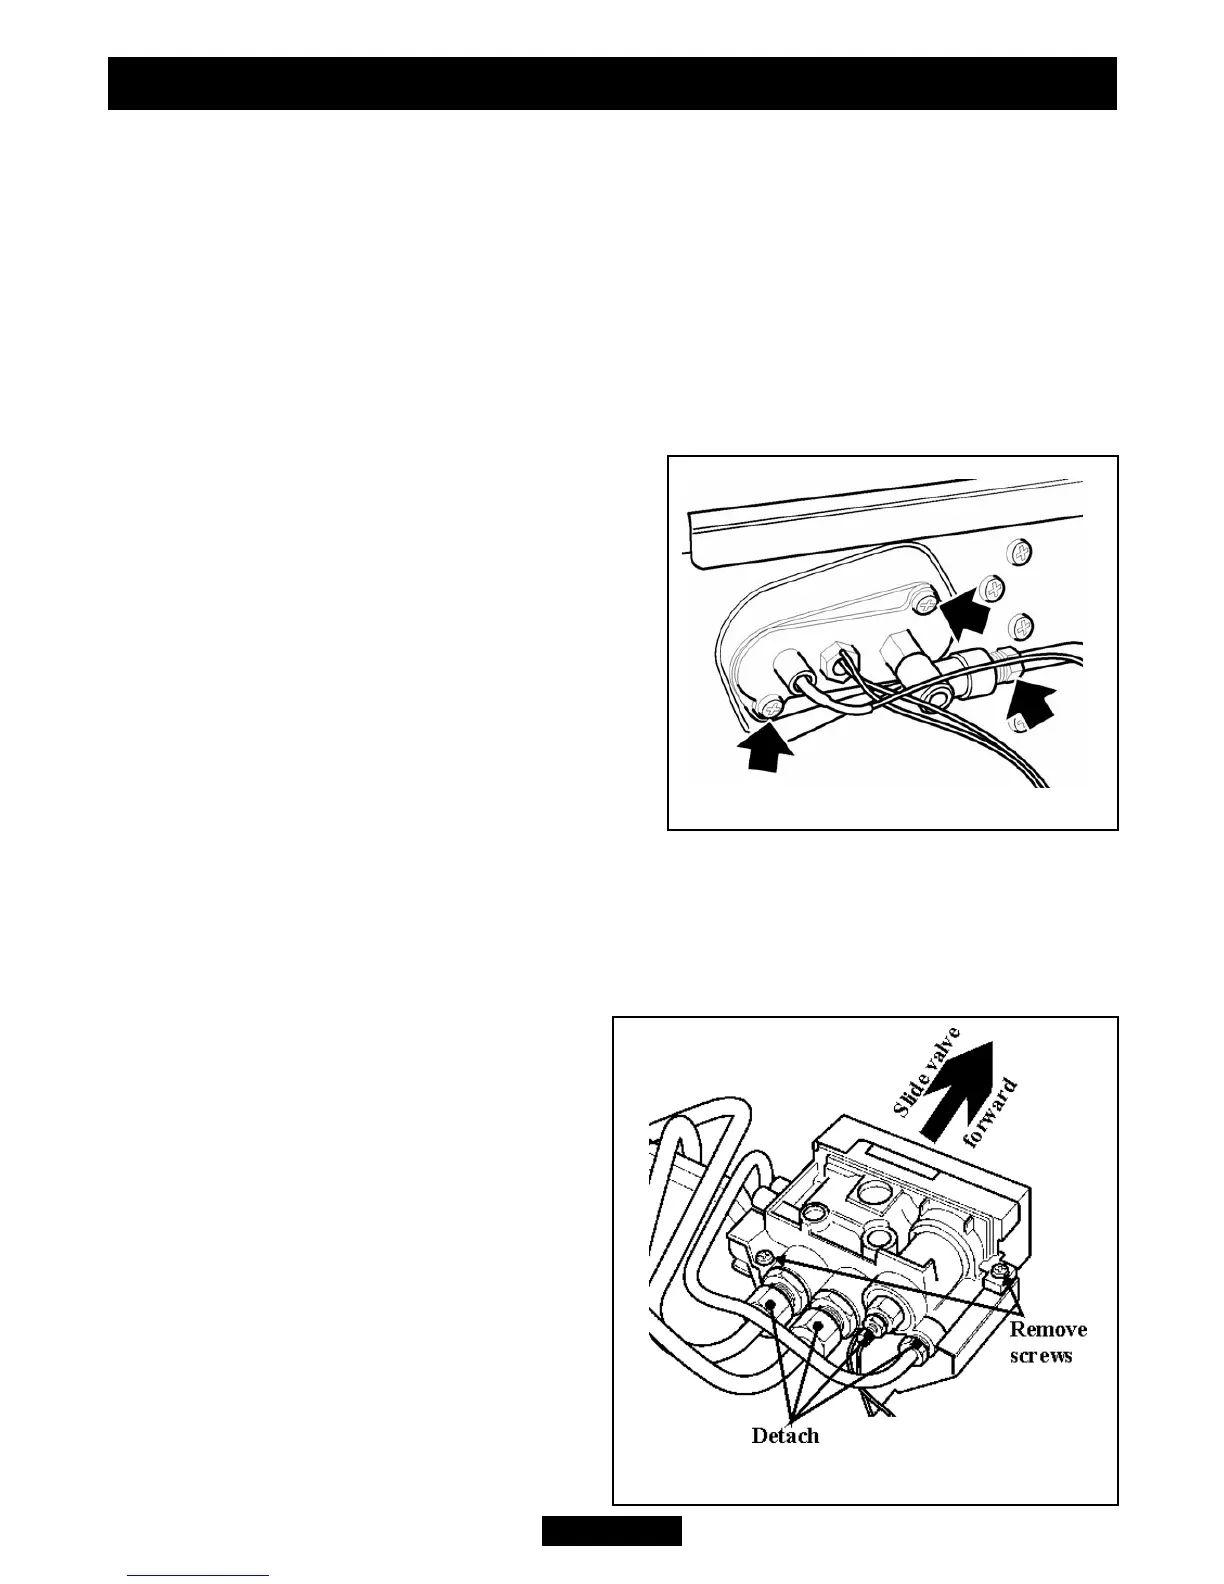
17.7 To remove the pilot unit.
(See figure 38).
Note: The Pilot unit must be replaced as a
whole assembly. Its individual components are
not separately replaceable.
Remove the complete burner module as in
section 17.4
Remove the electrode lead at the pilot. Do
this by holding the lead as close to the
electrode as possible. This will limit the
possibility of damaging the lead connection.
Unscrew the nut connecting the pilot to the
pilot pipe.
Unscrew the thermocouple at the rear of the gas valve.
Unscrew the two screws securing the pilot to the module front.
If the pilot gasket is damaged in any way it must be replaced.
Replace in reverse order.
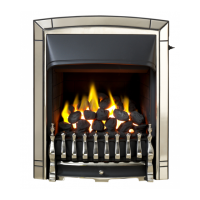
17.8 To remove the gas valve.
Remove the complete burner module
as in section 17.4
Remove the electrode lead at the pilot.
Do this by holding the lead as close to the
electrode as possible. This will limit the
possibility of damaging the lead
connection.
Unscrew the thermocouple at the rear
of the gas valve.
Undo the inlet, outlet and pilot nuts on
the gas valve.
Remove the two mounting screws on
the underside of the gas valve
Remove the valve by sliding it forward.
Replace in reverse order.
INSTALLER GUIDE
Figure 38. Pilot fixings.
Page 39
© Baxi Heating U.K. Limited 2010.
Figure 39. Control valve removal.