2222
Appliance Preparation
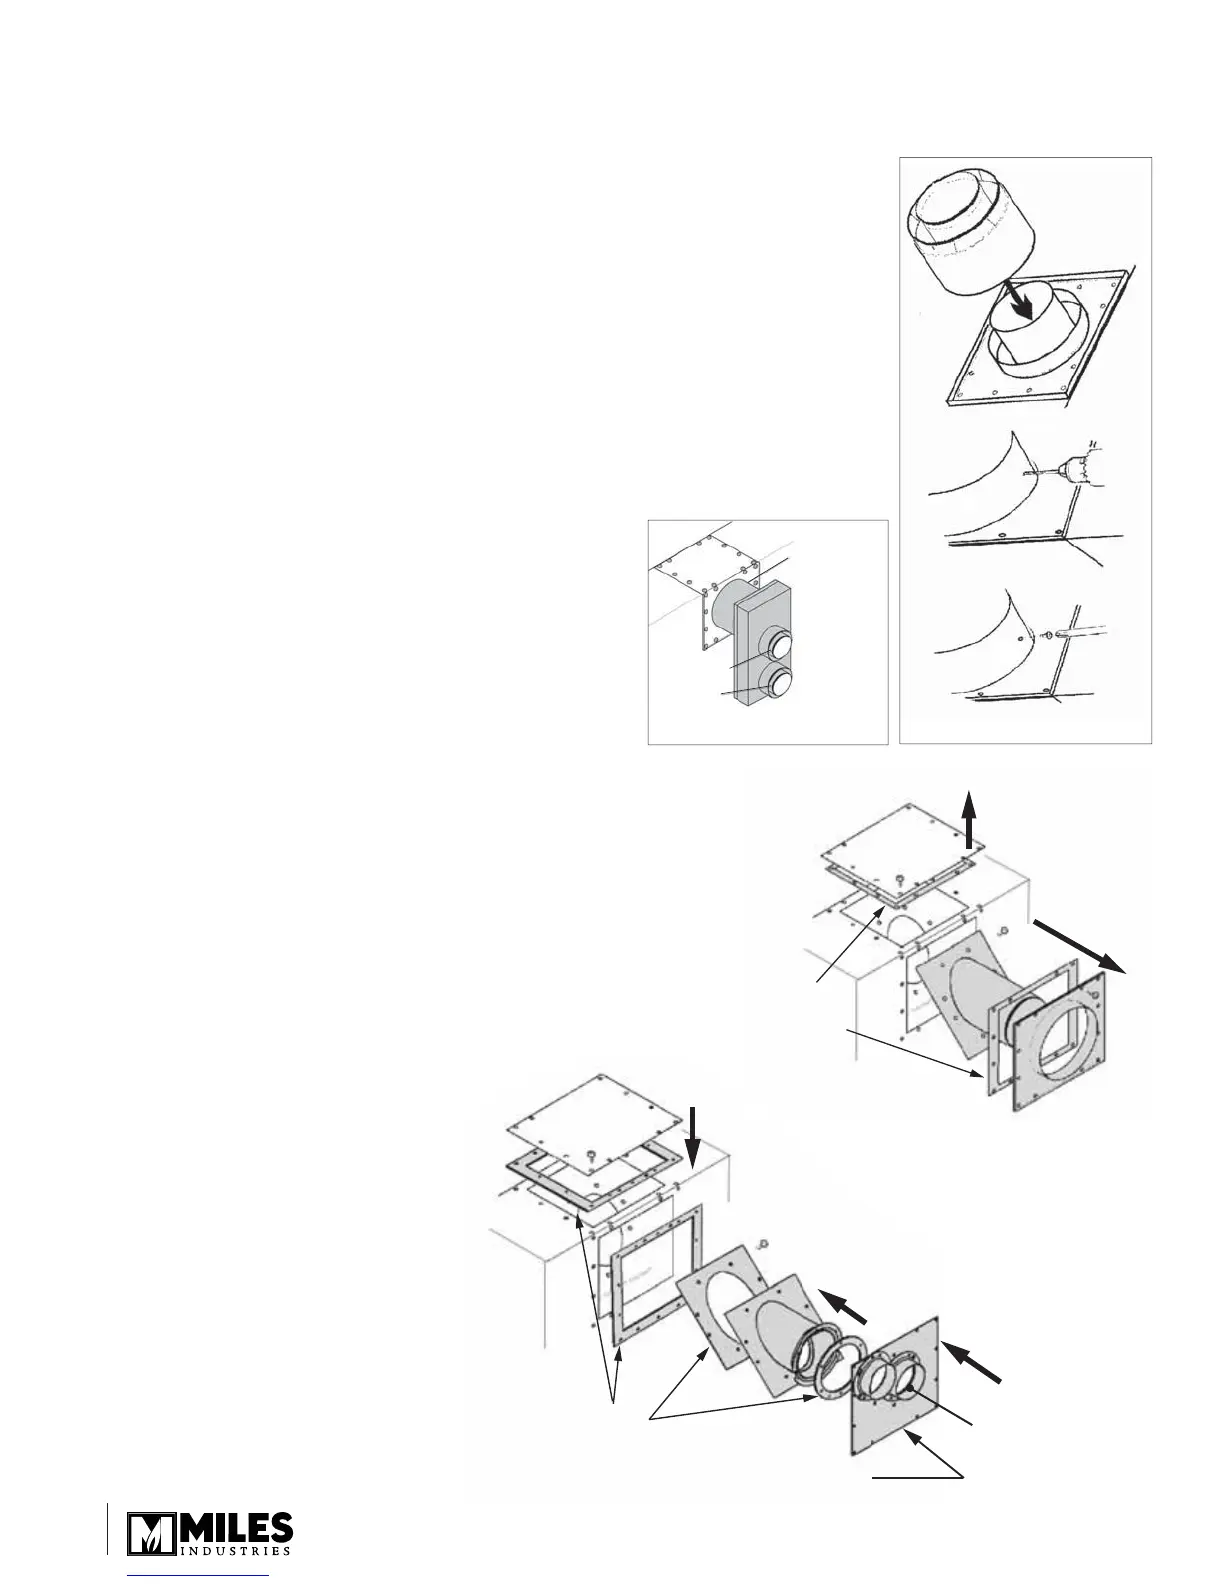
#817VAK Pipe Adapter Fitting
If installing fl at on wall with Valor terminal unit #551DVK, ignore this stage.
See fi gure 23.
Fit the adapter #817VAK over the appliance vent collars pushing on fi rmly.
For rear vent outlet connection, align the adapter so that the seam on horizontal
pipes is not at the bottom—check by temporarily fi tting a pipe.
Drill through the adapter outer tube and appliance outer collar for #6 screws. Make
sure that the drill does not penetrate the inner tubes.
Secure the adapter to the outer collar with two #6 thread-cutting screws supplied.
Co-Linear Conversion
For installation into solid-fuel burning fi replaces and chimneys ONLY.
Generic Adapter Box
Fit the adapter #817VAK over the appliance vent collars
pushing on fi rmly. See fi gure 23.
Fit and fully twist-lock the co-axial-to-co-linear adapter to the
#817VAK adapter.
Keeping the connector and adapter fully twist-locked, rotate
them so that the air inlet collar on the connector is at the
bottom. See fi gure 23a.
Drill through the adapter outer tube and appliance outer collar
for #6 screws. Make sure the drill does not penetrate the
inner tubes.
Secure the adapter to the outer collar with two #6 thread cutting
screws supplied. See fi gure 23.
Valor #556CLA Co-Linear Adapter
(Note: Instructions may vary as #556CLA may be installed on top or
back of heater depending on heater model.)
See Figure 23b.
Remove blank plate and gasket to gain access to exhaust spigot.
Retain plate and good gaskets for re-use later.
Remove existing outer intake plate. Retain good gasket only for
re-use.
Remove existing exhaust spigot—gasket below should remain
on heater.
Install new co-linear exhaust spigot
re-using existing screws. Ensure all
screws are reinstalled tightly.
Install new co-linear outer plate
(note: up/down front/back orientation
on drawing) re-using existing good
gaskets and screws. Use 6 additional
screws supplied to seal outer plate to
gasketed fl ange of exhaust spigot.
Refi t the blank plate.
1.
2.
3.
4.
1.
2.
3.
4.
5.
1.
2.
3.
4.
5.
6.
817VAK
3” Exhaust
3” Inlet
Figure 23
Figure 23a
Re-use gaskets
if in good
condition.
If not, clean
and use
supplied gaskets.
This is the bottom edge when installing as rear outlet
This is the front edge when installing as top outlet
1
Exhaust
2
3
4
5
6