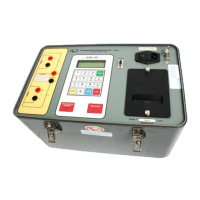
WRM-10P/WRM-40 OPERATING INSTRUCTIONS
a. Press # 3 (RESTORE RECORD). The
display below appears:
b. Press # 3 (ERASE RECORD) and to go
to next display.
c. To erase a single a record, press key # 1
and follow the instruction on display shown
below.
To erase all records press key # 2 and
continue on step f.
d. Enter the number of the record that is to
be erased and press the ENTER key. The
confirmation display appears as shown
below:
e. When the erased record number is
confirmed, press the ENTER key to return to
the Start-Up menu ending the sequence for
erasing a single record.
f. When key # 2 (ERASE ALL RECORDS)
is pressed in the Erase Record display (back
in step c), the following prompt displays:
i. Press the ENTER key to erase all test
records. If ERASE ALL RECORDS was
mistakenly selected, press “STOP” to abort
the erase process and return to the Start-Up
menu. When the ENTER key is pressed, the
following confirmation message is
displayed. Press ENTER key to return to the
Start-Up Menu:
This ends the Erase Record(s) sequence.
6.4.6 Enabling Computer Interface
The Computer Interface Mode allows the
user to retrieve test records stored in
theWRM-10P/40 FLASH memory via the
RS-232C port.
An IBM PC program is provided with each
WRM-10P/40 allowing the user with a PC
to retrieve these test records.
a. These procedural steps begin by pressing
key #2 (SETUP) on the Start-Up Menu. The
display below is now shown on the WRM-
10P/40 LCD:
2. DIRECTORY
3. ERASE RECORD
1. ERASE SINGLE REC.
2. ERASE ALL RECORDS
NUMBER: XX
ERASED
ARE YOU SURE?
“ENTER” TO CONTINUE
2. REVIEW RECORD
3. RESTORE RECORD
4. NEXT PAGE

 Loading...