HP25E / HP30E3. Installation and commissioning
3-8 © VEMAG 2018
• Move the arm of the lifting/tipping device into the bottom end position
using the DOWN key. Push a trolley into the trolley hoist to check the
correct height of the trolley hoist and repeat setting if necessary.
• If the trolley hoist is set to the right height, lock the setting ring again
with the guard ring. Attach the switch again.
• Lightly grease the contact surfaces of the seals of the drive hood and
put the hood back on. Then tighten up the mounting bolts again.
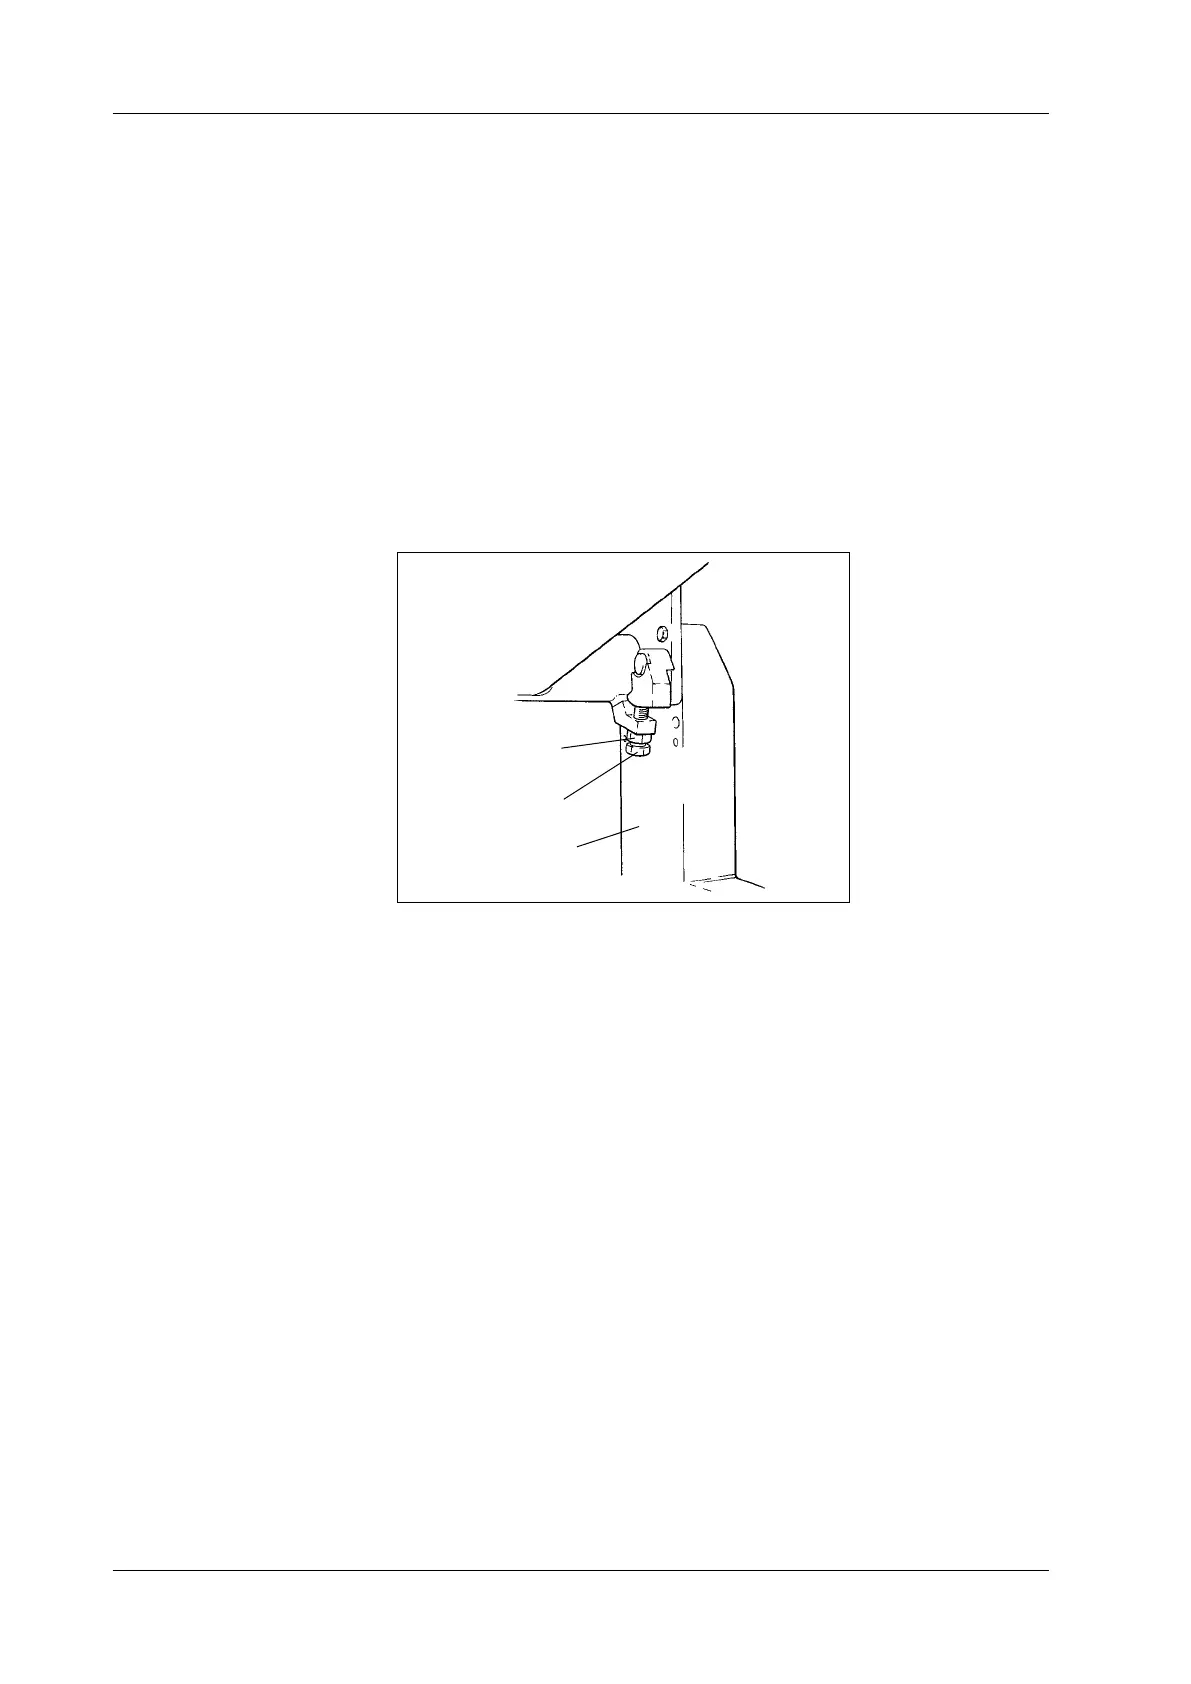
• The trolley hoist (1) must be aligned absolutely parallel to the oor to
ensure that the trolley moves in and is locked in position securely. To
do so, undo the guard nut (2) with the universal spanner and adjust
stop screw (3).
• Screw in screw: locking lever of trolley hoist moves down
• Screw out screw: locking lever of trolley hoist moves up
1 Trolley hoist
2 Guard nut
3 Stop screw
Fig. 3-10
Levelling the trolley hoist
1
3
2