41
VI. EMAILING FROM LABQUEST
®
2
If LabQuest is connected to a network with Internet access, you can email your data file, graph,
text file, or screenshot.
To set this up, follow these instructions:
1. Connect LabQuest to a network with Internet access. For detailed instructions, see Connect
LabQuest to a Wi-Fi Network
TIP! A LabQuest Network (Ad-Hoc Network) does not have Internet access. You will need to
join an existing network with Internet.
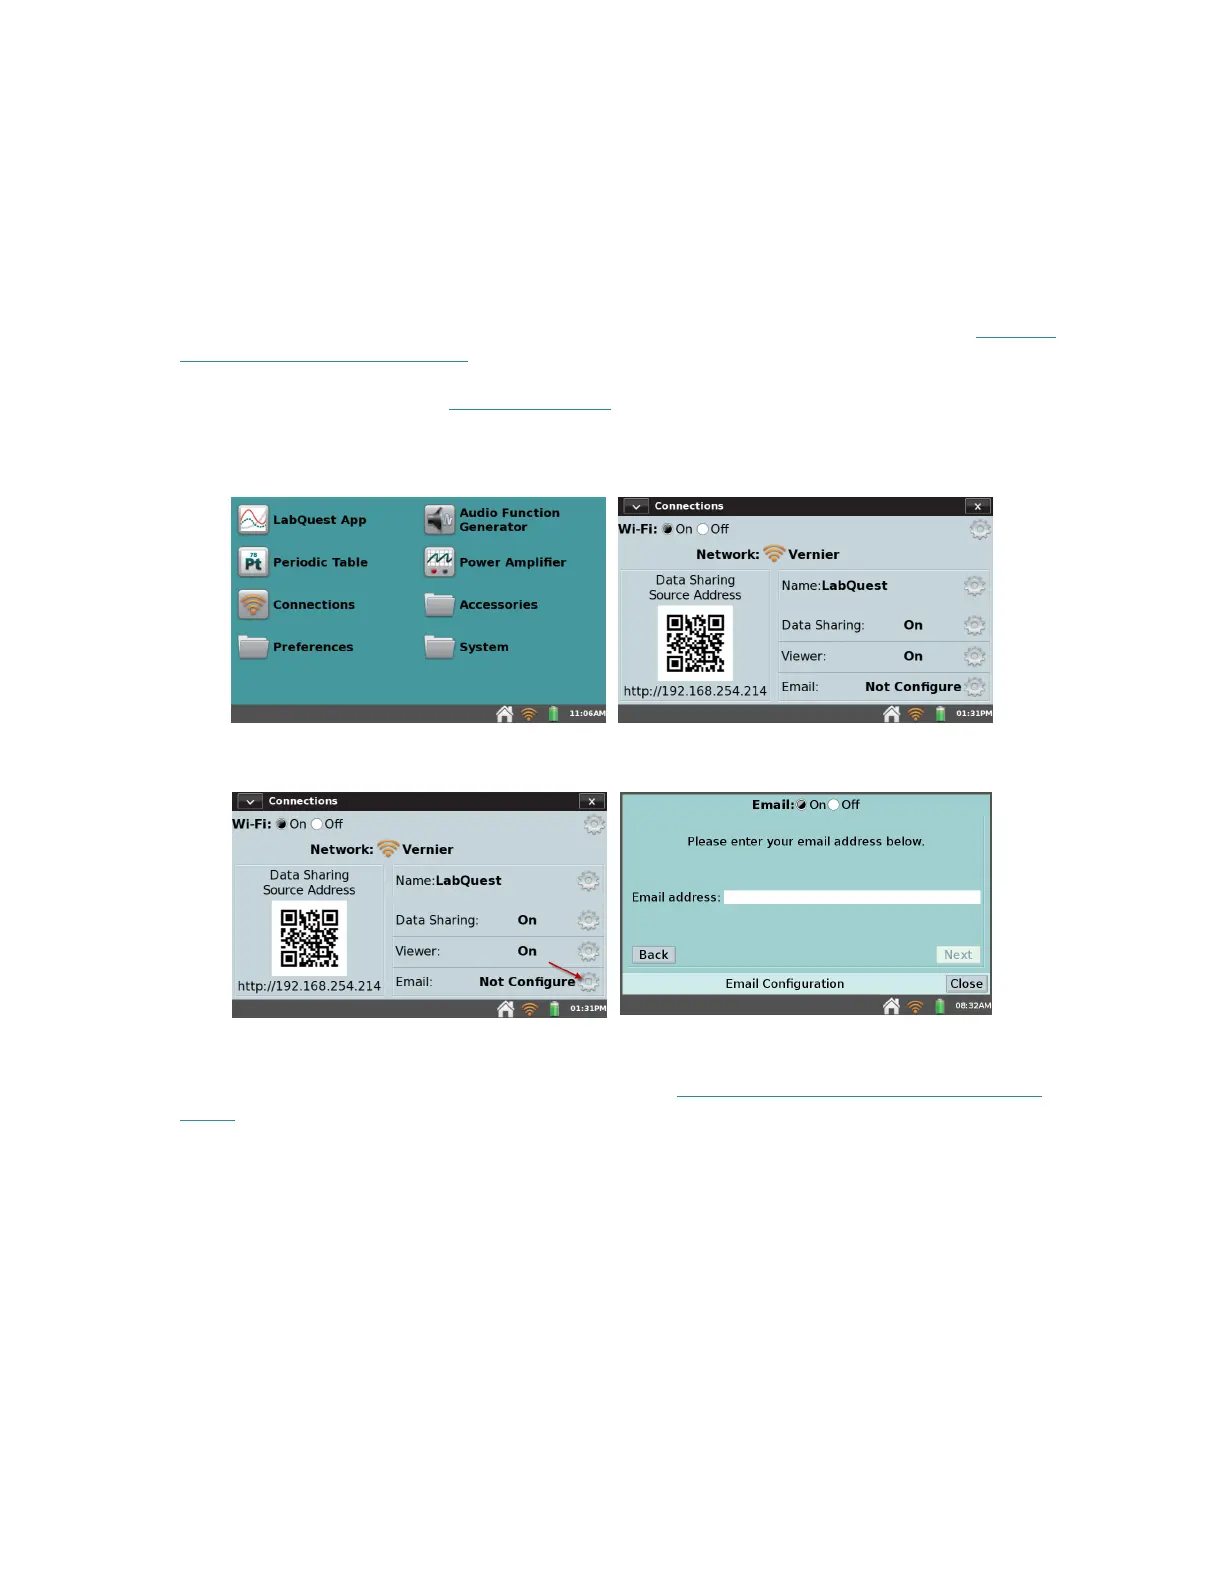
2. Launch the Connections app from the Home screen.
3. Tap the Email settings gear to open the Email Configuration dialog box.
TIP! If you are not able to access the Email Configuration dialog box, you may need to
update the Connections app lockdown settings. See Restricting Access to the Connections
Setup for more information.
4. Verify email is enabled (On).
5. Enter the email address you want to use with LabQuest.
TIP! This is used to access the outbound email server associated with this email account
required for sending emails. You cannot receive incoming emails on LabQuest 2.
6. Follow the on-screen prompts to register LabQuest with your email provider (e.g., Gmail).