Getting Started with LabQuest
®
2
2
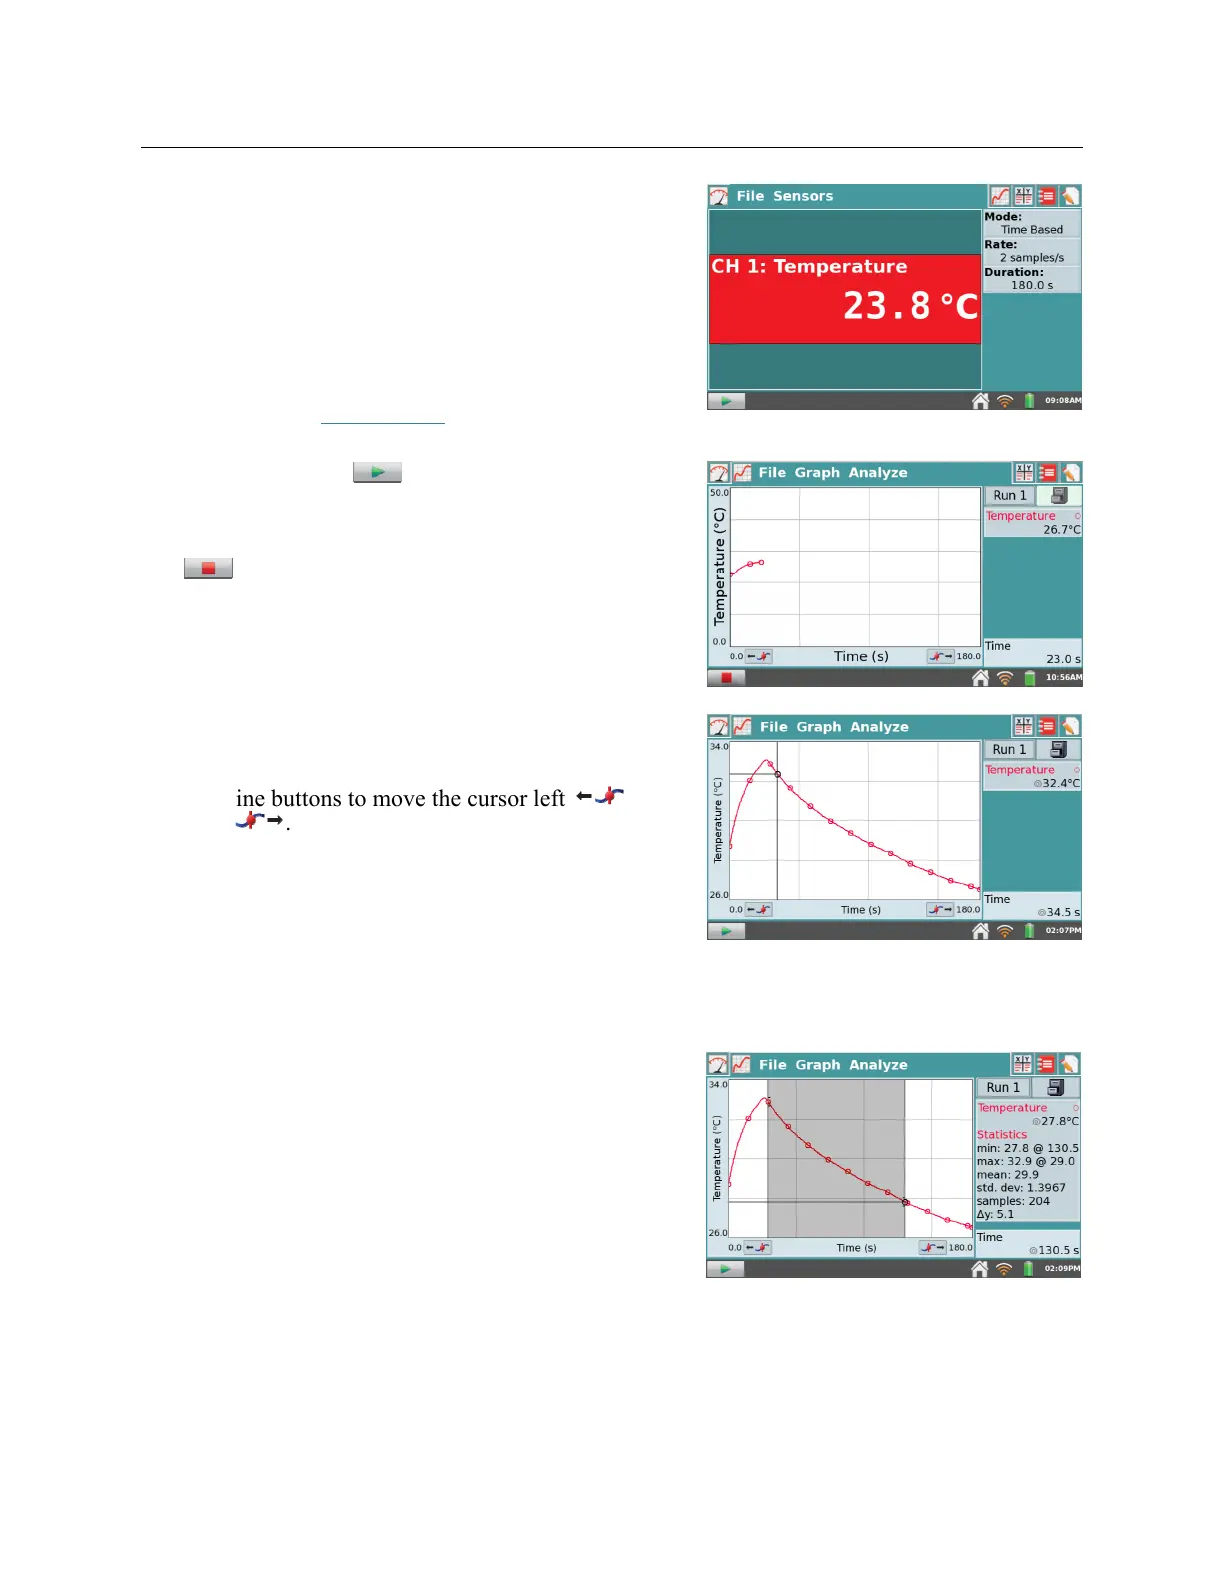
2. Connect an analog sensor to the CH 1 port on
LabQuest or connect a digital sensor to the DIG 1
port. LabQuest App will auto-ID the connected
sensor and automatically set the default collection
rate for the sensor.
TIP! If your sensor is an older-style (DIN) sensor
requiring an adapter, the sensor will not auto-ID.
Instead, you will need to set up the sensor
manually. See Sensor Setup.
3. Next, tap Collect . Data collection begins and
LabQuest graphs the data in real time.
You can stop collection early by tapping Stop
.
Once data collection is complete, the graph
autoscales to the data.
4. Tap the graph to examine a point of interest. The
coordinates of the point are shown in the panel to
the right of the graph. Tap another point or tap the
Examine buttons to move the cursor left and
right .
5. To select a region of data for analysis, tap-and-drag across the graph to highlight the desired
region. TIP! To analyze all data, you do not need to select a region.
Statistics
To view statistics for the selected data on the Graph
screen, choose Statistics from the Analyze menu.
Select the check box to select a data column. The
statistics information is then displayed in the panel
to the right of the graph.
To remove the displayed statistics, tap Analyze on
the Graph screen, choose Statistics, and then select
the checked box to clear the selection.