Chapter 3 Web Interface of RDU501
RDU501 Intelligent Monitoring Unit User Manual
6)
Click the Save button and a message will pop up “Save successfully, please click the [Save Configuration] button
to make the configuration take effect” and add a device information to the device list.
7)
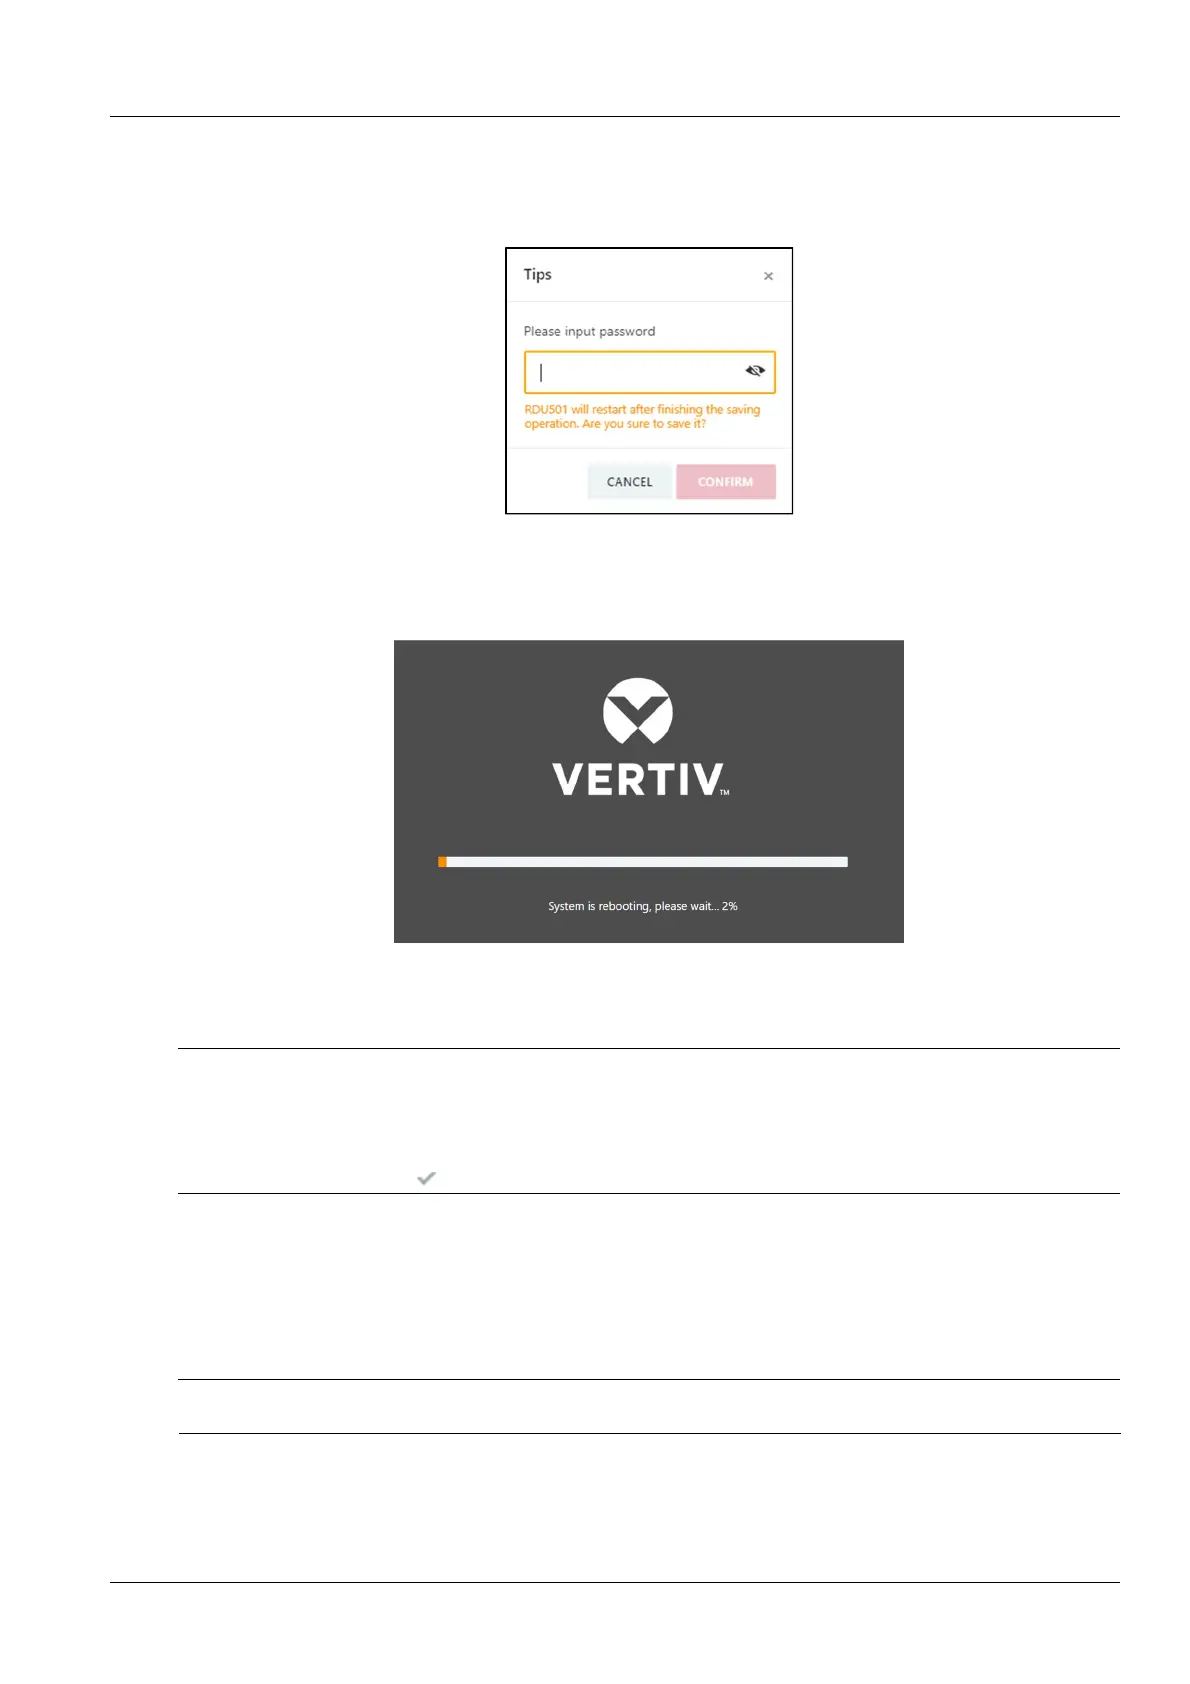
Click the Save Configuration button to bring up the second confirmation password dialog box as shown in
Figure 3-109.
Figure 3-109 Confirming password dialog box
If you click the Cancel button, the unsaved configuration will be discarded. If you enter the current user's login
password, click the OK button. After the password verification is passed, the system will jump to the system restart
interface, as shown in Figure 3-110.
Figure 3-110 System restart page
8)
Re-login to the RDU501 system and the newly added device will be displayed in the list on the device
management page.
Note
1.
By default, the system can add 32 intelligent devices, including RDU501 itself, ENV-TH, ENV-4DI, 8DIAI card, 8DOAO
card and cabinet-level access control devices. If you need to expand your connecting capabilities, please contact the Vertiv
Customer Service Center for purchase.
2.
If the device is configured on the EXP8COM expansion card, after remove the card and then re-inserting, you need to
manually click the Enable icon to enable the device again, as shown in Figure 3-107.
Delete the device:
1)
Select the device to be deleted in the device list;
2)
Click the Delete button to delete the device;
3)
Click the Save Configuration button to make the device-deleting operation take effect, the same as adding a new
device.
Note
Only administrators or engineer users can delete devices.
Modify the device:
1)
Select the device to be modified in the device list;
2)
Modify device information;